Hello Luscious Hexagon Cushion

Well Hello Luscious!

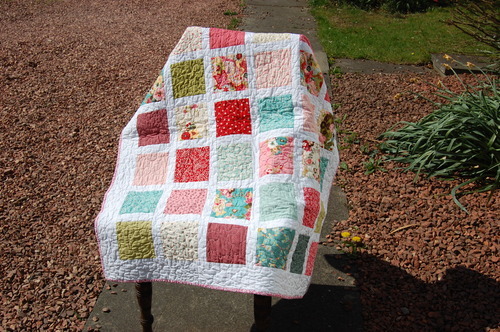
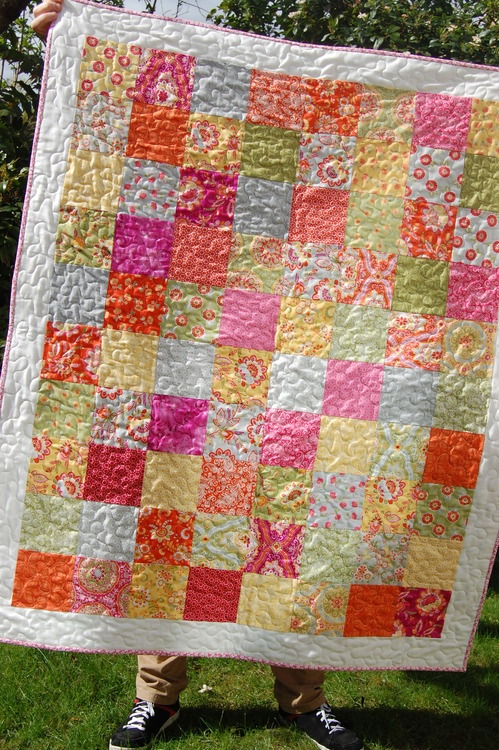
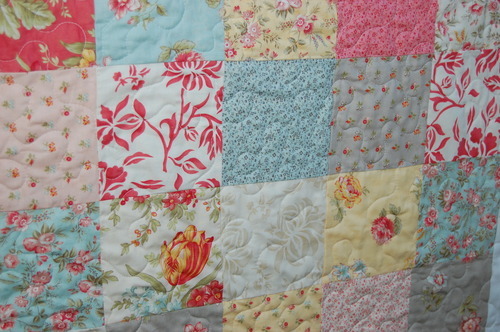
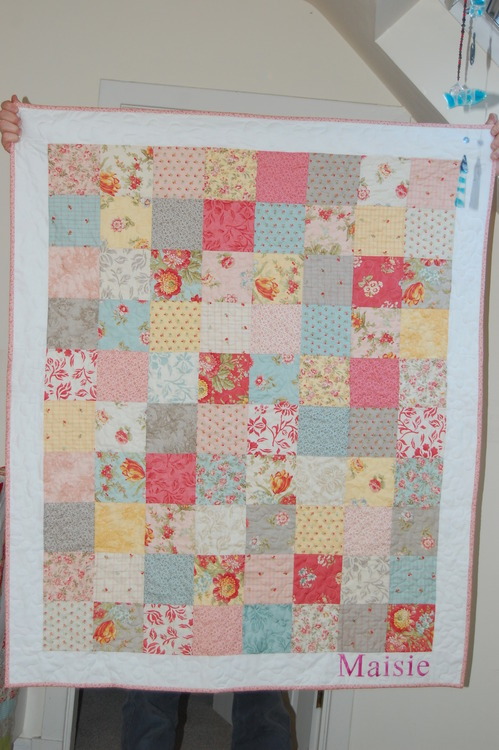
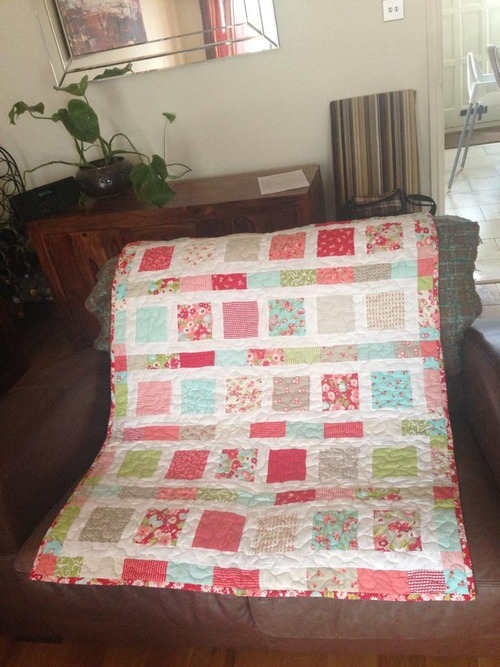
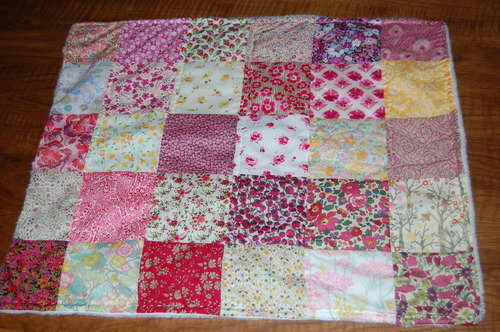
Before you get a bit creeped out that I hardly know you and yet am blatantly hitting on you, pyjama-d, hair in scrunchied bedhead-pineapple and all, Hello Luscious is the name of this beautiful collection of fabrics from Basic Grey for Moda fabrics. I love it – as you can see by my “buddy icon” quilt picture.

image

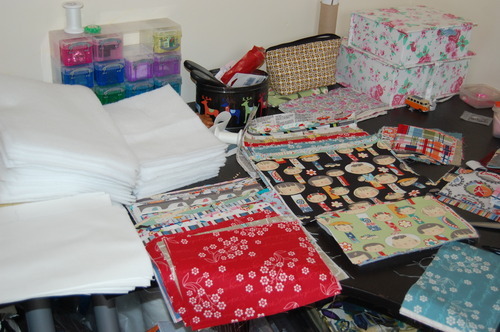
So… yeah. I realise I am making, and nowhere near finished, a 1400 1” hexagon quilt, and that really all hexagony activity should be being poured into said quilt if I’m ever going to have it finished this decade…. but do you know how frustrating it is to have these cute little fabric hexagons all over the house and not have them in something holdable to admire? Frustrating enough for me to chop into one of my precious Hello Luscious charm packs and take as a holiday project a couple of months ago.

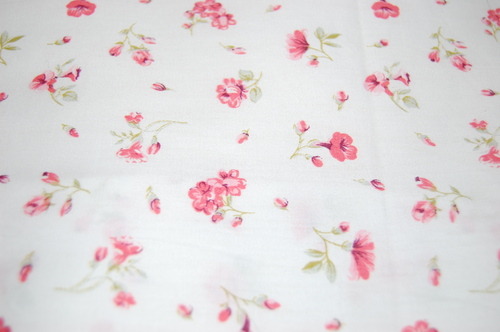
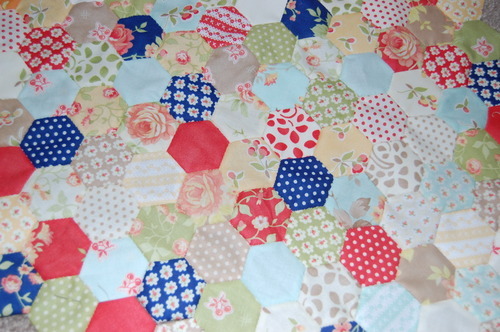
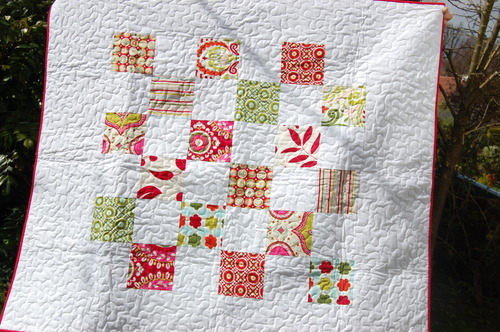
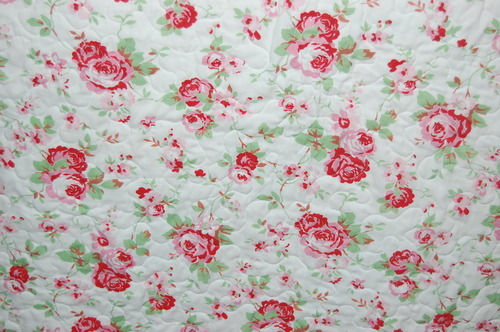
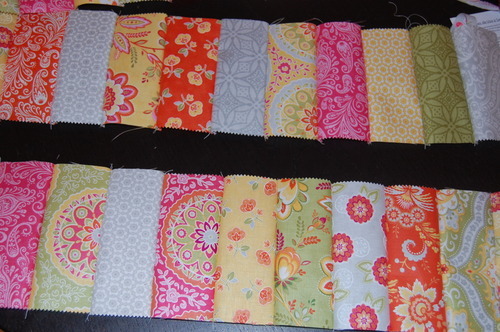
This is hello Luscious: image

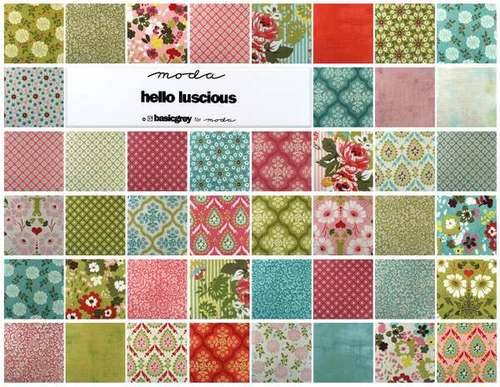
Isn’t it lovely? Lovely enough fabric goodness for you to ignore the fact it has been a WHOLE MONTH since I said hi? I was trying to gloss over it, but hey, let’s now just skip past it like nothing happened.

I must be getting much faster at making hexagons, because in a few evenings watching films with the hubster in a holiday cottage, I had about 80 little hexagons, with which I was uncommonly delighted… and no idea what to do with them.

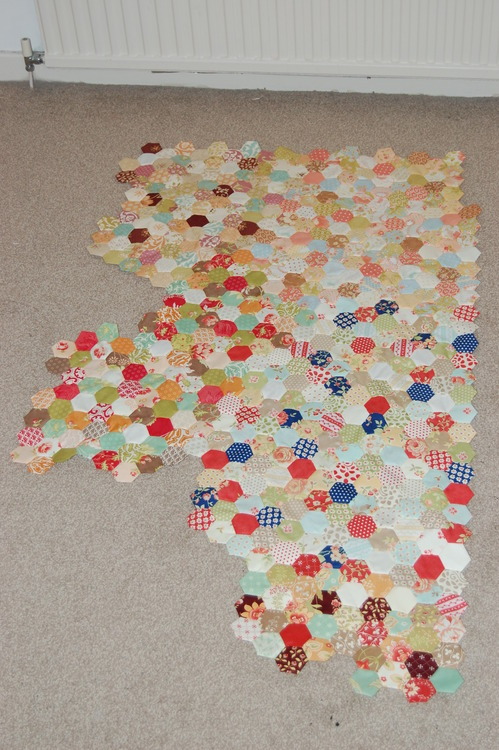
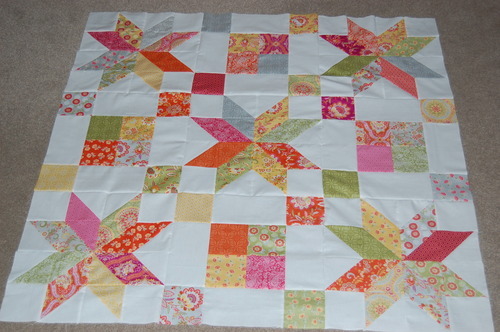
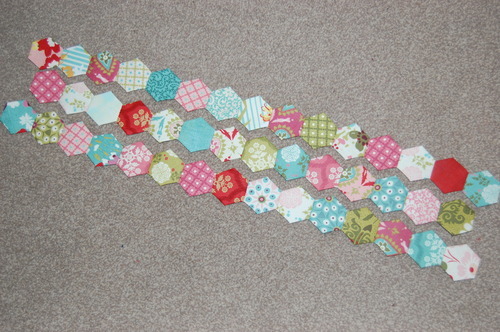
So one day on return, whilst Kiddo was in the bath, I started playing:

image

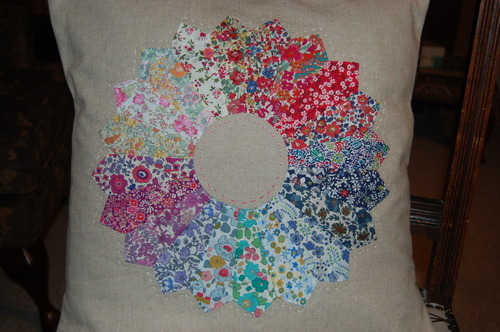
This is the carpet outside the bathroom, and although it’s really lighter than this picture, I think it would be a great base colour for a quilt or project with this collection, don’t you? I decided I’d use them to finally cover the huge 26” square reading cushion I have on my bed, which sadly limits the background to white. I’d need 280 hexies to make a 26” square front by sewing them together patchwork style, and a charm pack only gives me 168, so I settled on applique.

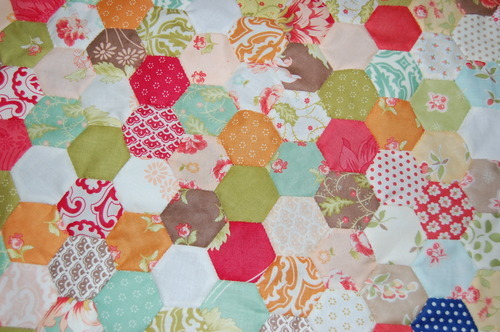
Kiddo got out of his bath and carefully made them all into a snake, so we both played around for ages. A free-floating hexie pattern like above? Or three stripes like below?

image

image

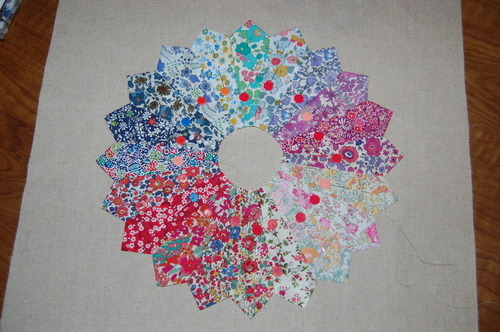
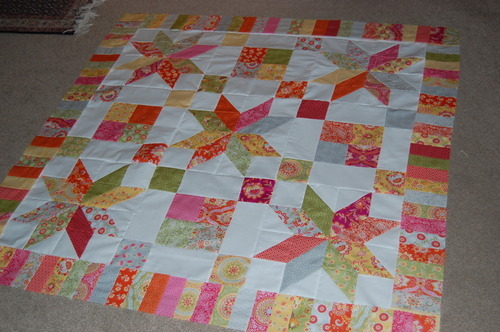
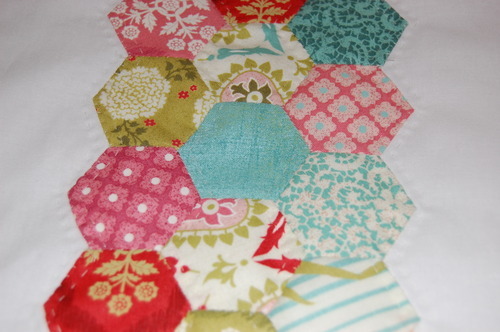
Or sew them together into a thick strip?

image

I actually had decided on 3 stripes, but then once I got it onto a white background it just didn’t look as good, so had to change plans. Well you know what they say about mice and men and their best laid plans. So I whip-stitched them together into this 3-ply strip as above.

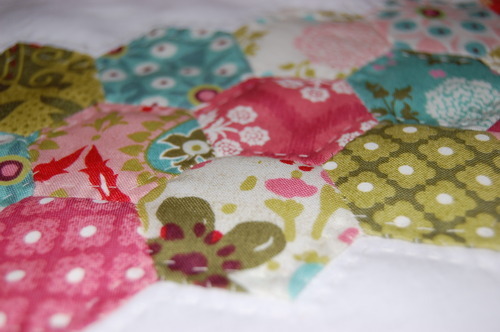
My hesitation about applique-ing hexagons is I never like the “stuck on” look that you see if you machine sew them onto a background with a straight stitch. And these are too small (1” sides) for a zigzag, it’d be all stitch and little fabric I think. I might be wrong…?

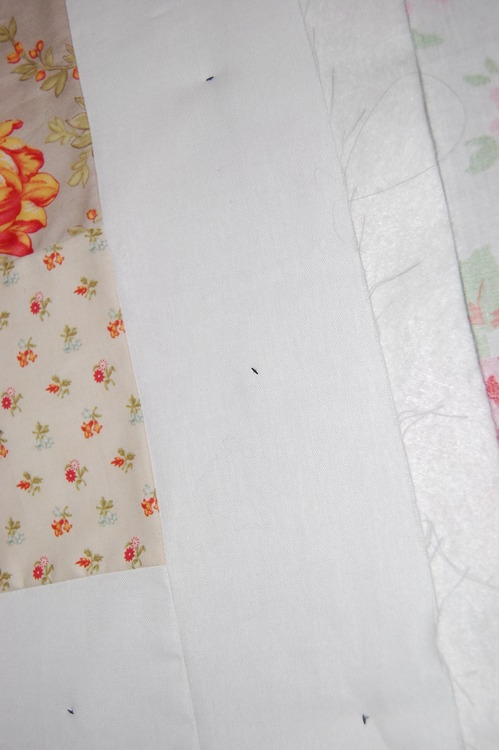
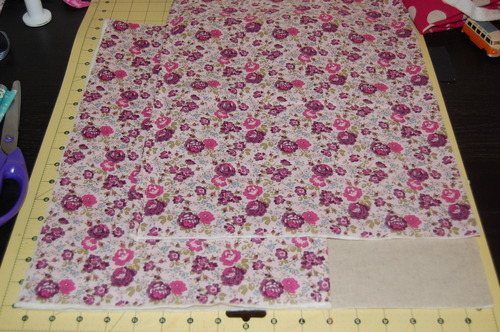
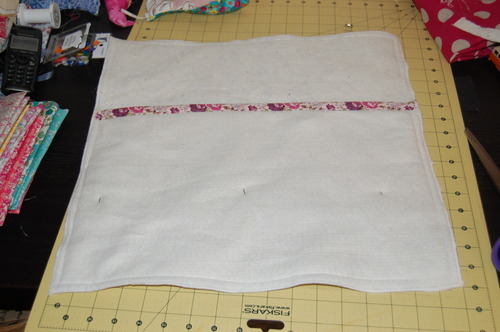
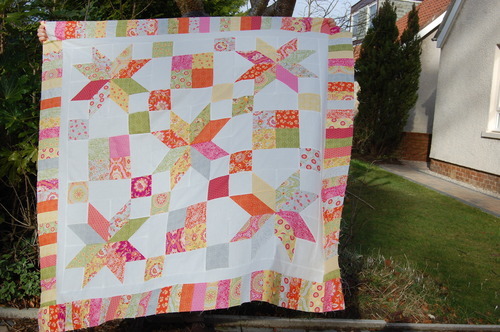
So I hand-stitched them on to a square of fabric with a piece of poly batting behind it. it didn’t take long, whilst watching a film. And I was really pleased that they didn’t look “stuck on”, even though I didn’t try to have invisible stitches etc. They looked lovely! Phew.

image

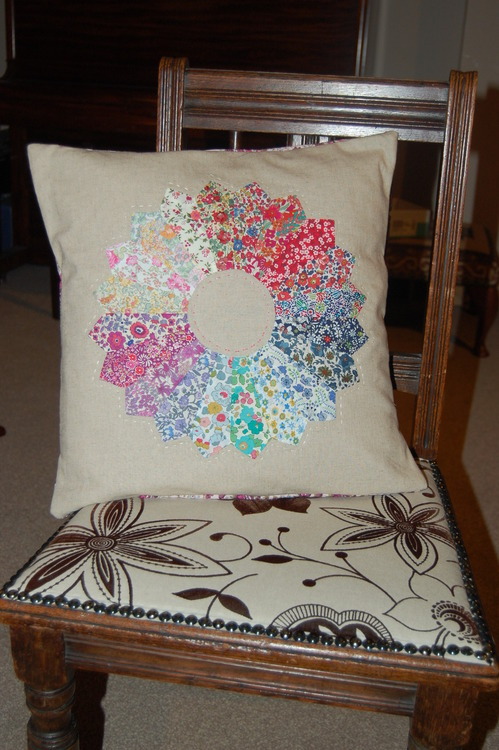
I did a bit of light hand-quilting along the inside edges of the hexagon strips and just on the outside. I think the whole cushion could take more quilting, but actually I rather like it as it is for my bedroom.

image

.

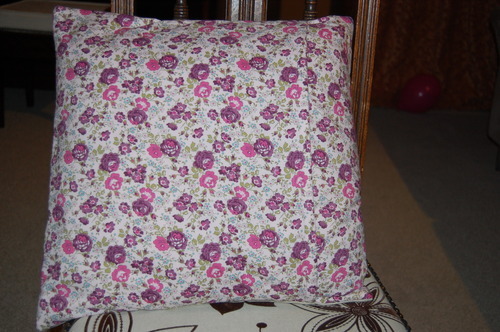
..and – yay, my reading cushion is finally covered. Although I keep glaring at the hubster when he uses it and makes it all rumpled. Although I can’t tell him that we are not allowed to now actually USE the reading cushion any more. So I continue to glare, a little huffily, and no doubt he continues to shrug and think, well, she’ll tell me what craziness is going on in her head at some point… šŸ˜‰

image

Until the next time (which will be sooner, I promise!),

Poppy xx

ps. if you’re making your own hexagon quilt and need to calculate how many hexies you will need, this calculator below is fabulous. Mine are 1” hexies, so the paper piece has sides 1” long – and you need a 2.5” square of fabric to make for each one (4 from each charm square).Good luck and enjoy šŸ™‚

http://www.cddesigns.com/PaperPiecing/number.html

Free motion embroidery fun – A Bird Cushion

image

A year ago little Emily was born, and I made her a quilt in Sophie by Chez Moi for Moda. In fact here it is, hurriedly photographed on our uninspiring then-driveway before bundling into the car to go meet the new wee princess:Ā 

image

You are just going to have to trust me that it’s very sweet when next to a baby instead of thrown over a chair on a driveway

Anyway, she’s one all of a sudden. Yeah, I did mention it was a year ago, but you wouldn’t believe how fast that year has gone, not to mention I am in denial that time is passing this quickly, whatever my grey hairs are saying. And I rather suddenly needed to think up a present. I can’t tell you how much I love this wee girl, she’s just too adorable for words, so I felt like making something special.

Having decided on a freemotion embroidery cushion, I looked to the web for inspiration, feeling too short of time to think up a design – and saw this beautiful cushion which I shamelessly copied (well a little shame, but isn’t imitation the sincerest form of flattery?)

image

It looks like it is made by a German artist, but couldn’t find her name. The link is here; she seems to have a shop of other lovely things:

http://de.dawanda.com/product/33525229-Kissenhuelle-Sommerbrise-40x40cm

It’s been years since I did any freemotion embroidery (I did some bags with birds on very similar to the above and sold them for charity), so wanted simple but effective.

image

I had a 26” x 26” cushion inner from Ikea – these are a great size for a reading pillow in bed by the way – and another moda charm pack in sophie, to match Emily’s baby quilt.

I cut a 17” square piece of white fabricĀ  and chose some charms to cut into 2.5” squares, which I used to cut into the bunting flags. One charm square for the little bird, a scrap for the wing and a scrap of black felt for the dot of the eye. I used wonderweb to fuse the pieces to the fabric and then rougly outlined everything on the machine a couple of times using black thread. Trying to be imprecise goes a bit against the grain, but it was fun, and gave it a “drawn on” effect (as it should be apparently).

image

Then I sewed two strips of 4 charms with 1/4” seam allowance, centred it, sewed to opposite sides of the picture and trimmed the excess. Next I sewed two strips of 6 charms and did the same to complete the “frame”.

I added Emily’s name in pink – I used an alphabet die in my BigShot with Steam-a-seam2 fusible web, but could have printed theĀ  “emily” in Times New Roman font as big as would make the letters about 2” tall, traced it onto the Steam-a-seam2 BACKWARDS, ironed it onto my fabric and cut it out. A bit faffy but worth it. I hand stitched round to secure so as not to lose the neat lines.

image

This is the finished cushion cover lying on my rather rumpled bed. No idea when I will learn to stage my photographs. Although you can’t see in this picture, I backed the front with 100% cotton batting and quilted a straight line round the inside of the big white square 1/4” away from the edge of the charms, and another line all the way round but this time within the charm “frame”. If that makes sense. It’s just to secure it anyway. An envelope back using a pretty wildflower print:

image

And it was all done. It looks quite pretty on the little sofa in the corner of my bedroom. Who says pretty bird pictures are just for little girls? Good thing for her that it has “emily” well and truly stitched on.

image

Ā And the reaction? Emily’s mum loved it. Ooohs and ahhhs from the other mums. Emily toddled off precariously to empty the contents of aĀ  kitchen cupboard onto the floor, pretty much oblivious. Emily’s 4 year old big brother said “But it’s the wrong ‘E’”.

“It’s art,” I said. “It’s modern”.

“It’s wrong,” he said, and busied himself playing with one of Emily’s OTHER, not-wrong gifts. Pah. I’m going to spell his name wrong when I make him one.

šŸ˜‰

Till the next time,

Poppy xx

The 1000th Hexagon

There should be some sort of firework display in my bedroom or something.

image

I have saved you the eye-rolling moment when I take a gazillion photos of 1000 unsewn hexagons all in piles on my bedroom floor, because frankly, it can only be interesting to the person who has made them. I kind of want to lie on my bed throwing them wildly in the air like in 80s movies of people winning the lottery or winning big at the casino. Although that would make me immediately sob for days as I try and re-sort them into collections.

This is that same 1” hexagon quilt made up of fabric collections from the wonderful Fig Tree Quilts that I posted about before. I think there are about 500 hexagons here. I love the fabrics so much! so far this is:

Fig and plum (top left)

Buttercup (top right)

Honeysweet (middle left and below)

image

Avalon (middle right and below), which is a surprise favourite – that dark blue just didn’t look like it would work so well when ordering online – but my oh my. It even makes me sound like Judy Garland on her way home to Kansas. It’s lovely.

image

and Tapestry (bottom right) which is now one of my favourite lines ever. I’ve even bought some for another sofa throw for our living room. I’m going to live in figgy quilty bliss. The Hubster and kiddo may need another room decorated in blue, grey and black as a refuge! My dog doesn’t care, boy though he is, He’ll live in frou-frou perfumed frillyness as long as he gets cuddles, so I’ll have company.

image

The above photo is part-way through sewing a block together. I found I couldn’t keep making hexagons without sewing some together – I think had I tried to make all 1400 and then sewn them all together I would have given up by now. Or turned to gin. So alternating between making hexagons and sewing them up in front of the TV or listening to audiobooks has been the only way I could do it. And having breaks. And not trying to do too much in a day – making 10 -20 hexagons is enough, feel proud… even if the inspiring blog poster you just read made 100 in a day, and still fed the children, went out with her husband, baked a cake and wrote a witty and interesting blog. Whilst looking beautiful, shiny haired and thin. Eventually you will make your 1000th hexagon and feel you too have gone through a rite of passage.

Sadly, their latest collection, Mirabelle, isn’t doing it for me, at least not on the computer screen. That’s OK, just because Joanna Figuera is my favourite designer, it doesn’t mean I have to love everything. I’m Ok with it because I tracked down a really old line called “Strawberry Fields” in a shop in Australia (below). I know, I’m being mental. I’m glad the Hubster doesn’t read my blog.

image

So apart from Butterscotch and Rose which is definitely in the quilt and I have some California girl which might make the cut (see the quilt in my last post if you want to know what it’s like! I clearly like I a lot),Ā  that’s really it for fabric choice. Unless I can find some Mill House Inn or Patisserie, but they are both too old to find now. Darnit. Unless I’m still doing this by the time she releases a new collection…

Arghhhh, and it’s past bedtime again! How does this happen? Night night, and enjoy whatever it is you’re up to,

Till the next time,

Poppy xx

p.s. previous posts about this are here:

https://cuckooblue.co.uk/tagged/hexagon-quilt

A Quilt Quartet

I ran this one up yesterday thinking I really should have a quilt on show at least at this craft fair – which is only TOMORROW by the very way! I must say I have fallen a little bit in love with it myself.

image

It is my favourite “child-size” quilt – two charm packs sewn up and bordered with white. 42” x 51” Quick, but when it’s such a beautiful collection as High Street by Lily Ashbury for Moda so very pretty. And big enough to be useful even as an adult. If you can be bothered to look back through my previous posts, you’ll see 2 other quilts made with this collection, both teamed with white. I had utterly fallen in love with the collection on paper and when it arrived, but haven’t really loved the other quilts / quilt tops I made with it. Now I know why, it needs to be a collection together with no chopping it up, no mixing it with white or anything else. Just bliss. I’m regretting using all my stash in the other quilts when i just want more of this!

image

Cotton batting, stipple quilting (in all these quilts). This quilt was wonderful to quilt – partly because the collection gave me such joy,Ā  partly because I remembered about my quilting table and fixed it on, and partly becasue I got myself some quilting gloves, and something called a sew-slip. The quilting gloves made a huge difference. I’ll tell you about it another time because I’m on a schedule – did I say it’s my craft fair tomorrow?

I said a quartet – I finished some WIPs, binding etc, for the fair, so i thought I’d include them here.

image

This one is California Girl by the wonderful Fig Tree Quilts for Moda. Soft, beautiful, feminine, but so delicate that photos don’t do it justice – and direct sunlight washes out the colour on a picture (yes, spring is springing in Scotland!). I added the white squares to give it a bit of sparkle, and I really like the effect, otherwise it seems a bit too “shabby chic” for a baby. Cotton everything, stippled, 36” x 36”, a pram size or small baby mat.

This next one is the same collection. I really fell hard for it, and loved it when I got it – but made this little baby quilt last year (or maybe 2 years ago??), using the amazing “charm pack baby quilt by Elizabeth Fransson on “sew mama sew”. I love the pattern, but I think this collection is too delicate to be miixed with white.

imageimage

So I kind of lost my California Girl mojo, but having seen the first little pram quilt again, I might make up my remaining fabric into a bigger quilt, like the High Street one at the top of this page. It is beautiful, just not as “out there”.

And finally, this quilt.

image

This is hard to part with. My mother has completely opposite home decor taste to me – she likes white, minimalism, and everything is beautifully spic and span. I like her house, but I know our won’t be like hers. I felt her living room could do with a little colour, and thought a sofa throw might be acceptable to her if it was pretty much all white, with a little strong colour (she like bright colours). This is Dena Designs fabric and white – I have forgotten which collection, I might google it. It is backed in white, and bound in fuschia, and I really like it, although white doesn’t work in our house. It has wool batting which makes it lovely, snuggly and warm. 45” x 51”

image

But much as she loves my work and is appreciative, she’s just not going to go with throws in her house. So she has returned it saying someone else will use it and love it, and I should put it into the fair. Slightly sad, but she’s right. Luckily my good friend happened to be here when my mum came round with it, and stright away asked if she could buy it (she is also a sewist, how flattering) – SOLD to the lovely lady who will give it a good home šŸ™‚

I’ll finish with yet another picture of my favourite! Such lovely lovely vibrant yet feminine colours!

image

Less feminine are those size 10 feet!

Till the next time,

Poppy xx

PS. please check out my previous post if you want to see the things I have made for the craft fair – leftovers may get put onto this blog for sale if I ever get my act together! https://cuckooblue.co.uk/post/82041667739/a-week-of-sewing-like-a-madwoman-i-feel-a-craft-fair

A week of sewing like a madwoman? I feel a craft fair coming on..

image

Of all the things I’d planned to blog about – and there is now a queue – this was not one of them. 6 days ago I agreed to do a craft fair – which is in 5 days time – eeeeeeek! I think I must be a little insane.

It’s the same craft fair that I did a year ago, in our village, usually for a charity, and is part of a stately home open day, where there’s a bouncy castle, facepainting etc. I did it last year at 3 weeks’ notice and thought I was a mentalist then, but apparently that was me being organised, positively relaxed even… The day before it, I launched this blog, and since then I’ve had a nice gentle stream of sales and interest from the village which has been very lovely. So maybe that’s why it felt right to do it again.

image

image

So this is the very popular zippered purse, this one in Sidewalks by Riley Blake. It’s pocket sized but bigger than last year to more comfortably fit cards as well as cash. Interfaced with batting for durability and that soft feel, and of course always a pretty lining, because we deserve eye candy inside our purses even if there’s not as many notes in there as we’d like!

Pretty and floral designs:

image

(Clockwise from top left – Enchant for Riley blake, Flutter for Riley Blake, sweet shoppe Michelle D’Amour for Bernatex, Songbird in white, from Vintage Summer Collection by Little Yellow Bicycle for Blend, Sweet Shoppe, Marmalade by Bonnie and Camille for Moda)

Liberty coin purses:

image

Brights and retro:

image

(Clockwise from top left – Flutter by The Quilted Fish for Riley Blake, Blue birds on lampost by Kate and Birdie from Bluebird Park for Moda, Sidewalks by October Afternoon, Flutter)

Fun or for kids:

image

(Clockwise from top left: oh darn, cannot remember the name/designer/anything about the owl fabric! Sorry! Going Coastal by Emily Herrick, Out at Sea by Sarah Jane fo Michael Miller Fabrics, Ele train shroom by Dan Stiles for Birch fabrics (organic), Bluebird park by Kate and Birdie)

And the most popular thing I seem to make, the large toiletry bag /washbag

image

image

Lined with white canvas, interfaced for stability with softness, I love these! And they have improved the look of my dressing table no end, they are deceptively big and take all my bits and pieces including my hairbrush. That one was in Flutter red for Riley Blake…

image

That was Ele Train Shroom by Dan Stiles for Birch and is Organic cotton – somehow manages to be grown up as well as cute.

image

Not that I made them to be sets, but they could be – the flat pouch is a makeup pouch or handbag organiser for keys/ phone/ purse/ lippy whatever. Or a pencilcase, especially when made in a kid fabric.

image

The above is Sidewalks by October Afternoon for Riley Blake – this is my new current favourite fabric šŸ™‚

image

Jungle Elephants (makower)

image

Peak Hour Ad White by Kellie Wulfsohn for Riley Blake – so cool! Especially with a bright fabric lining (from Space collection by Makower I think)

image

Out at Sea by Sarah Jane – I’m a bit obsessed with those mermaids! Remind me of the Heather Ross Mendocino Swim Sisters which I never got any of but now is so rare it sells for a small fortune on etsy – I actually gasped, even though that’s something you only think happens in novels. This is not a bad second though. I got some of this with my little niece in mind, but haven’t yet managed to make her something yet – a swim bag maybe…?

Not everything is newly made this week, I have a few lavender pillows which still smell divine, and one or two kindle cases – soft yet waterproof and padded to prevent scratches or mishaps with burst waterbottles in your bag or by the pool. This one is in Songbird in white by Little Yellow bicycle for Blend fabrics.

image

And finally… some Scrabble tile pendants! These are fun, sweet and funky – an image on a wooden scrabble tile topped with an epoxy resin seal, a nickel and lead free bail on the back and sold with a silver plated (nickel/lead free) chain (or alone). I’ll have about 50 on the day. They seem to sell well at fairs, so fingers crossed, and though this is a small selection, they are mostly different from each other.Ā 

image

The best thing about doing these this year has been ā€œmeetingā€ (virtual, she being in the US and me being in Scotland) a lovely lovely Etsy seller called Leslie at the Graphicalmuse, whose talented work you see on pendant numbers 2 and 4 above. I love Etsy and love these amazing and lovely creative folk we get to ā€œmeetā€ through the blogging and crafting world. This whole craft fair is worth it for having made a new friend šŸ™‚

So I’m finished sewing now; I don’t want to get too tired before the fair because I found the event fun but tiring last time, and I’m going to follow all my advice I gave myself after doing it last year, but get organised well in advice.

https://cuckooblue.co.uk/post/48960849472/craft-fair-and-other-stories

I wondered why I could blitz through all these makes, when it normally takes a while to do one washbagĀ  – the answer is factory line preparation. I spent 2 days literally collecting all the fabrics I wanted to use, then cutting everything – fabrics, interfacing, gathering all supplies everything. Then sewed it all up. I broke 6 needles. And I sewed like a maniac until I was SO BORED of sewing, which has never happened before that I can remember. And my room looked like this: image

So I’m glad to be getting it back, and am excited about some more quilting, because I got new quilting toys that I can’t wait to try out! I’ll tell you next time. By the way, anything I don’t sell will hopefully finally get put onto this blog and/ or a facebook page for sale, though probably UK only unless I get a lot of pressure!

Meanwhile, enjoy doing whatever you’re doing, and see you very soon.

Till the next time, Poppy xx

Oasis quilt for baby Maisie

A few weeks ago, my neighbour phoned to ask me to run over and meet a very special little girl, who just been adopted by a very special mummy.Ā  My neighbour wanted to commission me to make her a quilt, and asked if I could chat to the mother about it.

image

This lovely lady and her husband had wanted a child for over 10 years – and although it’s not my place to describe her story and health troubles, trust me, it’s so heartbreakingly sad – but also so amazing that this point has arrived!Ā  Anyway,she had heard 6 weeks previously that she could adopt a 5 month old baby girl; adopting a baby is almost unheard of in the UK, the child is usually older, and so it is very special for adoptive parents here not to have missed the first few years of the child’s life.

Anyway, all her previous heartache has been washed away with this sweet baby girl’s smile. My 4 year old son, who likes a captive audience, kept her entertained by doing all his “supercat” jumps and “running like Turbo”, so I saw that smile a lot! Maisie is her name; I used Steam-a-seam to applique letters on, and then slip stitched in place after quilting. Steam-a-seam is the only fusible web I trust to stop the edges fraying too much in the wash, but I still sew the letters in place as a quilt gets so much washing.

image

Maisie’s mother told me she adores “shabby chic” and quite traditional prints – and pink for girls. She has bought some big playroom boxes in the roses design from Ikea and loves them – I knew what she meant as I have the matching fabric from Ikea, which I decided to put on the back –

image

Bearing this in mind, I picked out the two Oasis Trail charm packs by Three Sisters (Moda) which I’ve had for ages and sewed them together in traditional simple patchwork with an off-white border. I still maintainĀ  that 3 Sisters’ fabric is the softest moda fabric hands down – lovely to work with.

image

This was my first opportunity to use my new basting gun – a microtach gun by Avery Dennison so I was a bit excited! Can you see the little black tacks which look like tiny ants? Those are tacks that the gun puts through the fabric layers when you are basting. They are very fine plastic, and come in white (so hard to see to remove when you are using light fabrics like these!) or black – and the gun is easy to use – point the needle of the gun into all three layers of the quilt sandwich, pull trigger, and pow! It’s in place. (A very gentle pow by the way. noone will be calling the police on you). I usually use pins to baste, but they were interfering with my quilting flow, as I had to stop and take them out – and I kept breaking needles when I missed taking them out… Not so with these – you can quilt over them if you need to, and they don’t get in the way. Did it stop the slightly jerky edges I got when I had to stop to remove a pin when stippling?

image

Yes, I think so; although maybe noone else noticed those things, I did.Ā  And the quilting experience was MUCH nicer. The only annoying bit was removing them – hard to see, so you have to be careful, and you cut them out – fiddlier and more time-consuming than pins, but I did it methodically whilst watching TV so it was pretty relaxing. I think I will continue to use them over pins purely because it’s so much easier to quilt with them.

So here’s my patient husband, holding up yet another quilt, this time in Maisie’s mummy’s taste – size 42” xĀ  51”. I used Quilter’s Dream Orient batting for its properties of washability and warmth. So soft and silky too!

image

Having experienced years of miscarriage before Kiddo arrived, I understand how it tortures a very maternal woman not to have a child, a gaping hole which just can’t be filled even if everything else is great. It’s not rational but it’s all consuming, and vanishes once you hold that child in your arms. It was so joyously uplifting and rather moving to meet this baby and mother, so obviously in love with each other, and a real privilege to sew up an heirloom for Maisie, which I hope she will treasure for many years.

Until the next time,

Poppy xx

Vintage Modern Ruby Stars – Charm Pack Busting HST pattern #2 + tutorial

This is a story about Mojo. About abandoning a project for years and ressurecting it, with the bonus of ridding yourself of the nagging guilt that there is abandoned fabric in a box in your house.

Far, far too long ago I bought a Ruby layer cake, used half of it in a well received baby quilt… and then got stuck. Until now:

image

Ruby by Bonnie and Camille for Moda Fabrics was an instant hit with quilters when it came out several years ago, and I was instantly seduced by the bright fresh colours – the red and aqua mostly, which was very ā€œinā€ at the time, and the retro flowers…

But you know, although I rarely say this, I wasn’t as wowed as I wanted to be by the collection. It’s such a modern classic now, and so much beloved that it feels sacrilegious to say it; in hindsight I really should have sold it on to someone who did feel the love. There just seemed to be the wrong balance of what I think of as ā€œheadlining patternsā€ (like the flowers) and ā€œsupporting patternsā€, as in there were just too many mild geometric patterns which I wasn’t all that enamoured with; it was like there was just too much filler. Too many just-okay supporting actors and not enough Daniel Craig.

Daniel Craig.

Anyway, back in Ruby land. Eventually I chopped the equivalent of a charm pack up into HSTs as below:

Quick method to make 4 HSTs from 2 charm squares:

  1. You take two 5ā€ charm squares, one coloured and one white (or one ā€œcoolā€ and one ā€œwarmā€ coloured)image
  2. You put a coloured charm over a white charm and sew 1/4ā€ seam allowance all round the edgeimage
  3. Rotary cut along both diagonalsimage
  4. Open them up and you have 4 HSTs – although beware they are cut on the bias and so can stretch.image
  5. Trim off the dog ear and you’ll have four of these:image

    They measure about 3.25ā€ square, you should probably trim them to 3ā€ square or something at this point, but I didn’t and it was fine. And the quilt police did not appear, although it felt like I was saying ā€œCandymanā€ three times in a mirror… 42 squares in a charm pack will yield 168 of these. I’m not going to lie to you it was DULL. But so satisfying to have a big pile of HSTs to play with at the end!

… And so I merrily played. And played. I had meant to do pinwheels, but was underwhelmed and less merry. So I picked out 144 of them (the equivalent of using 36 coloured and 36 white charm squares) and sewed them together into nine 4×4 star blocks. You can see from the photo that once you have HSTs putting together the stars is really easy – once I’d laid the HSTs out, I sewed them in rows, then sewed the rows together to make the block.

image

I was really very pleased with them and got them out at intervals to look lovingly at them, but mostly they stayed in a box, languishing. I’ve just looked at my flickr stream and it was 2 years ago I made these blocks! All because I wasn’t feeling the Ruby-love, had one Ruby charm pack left to add to it and was wishing I had just sewed them into square patchwork for a baby girl. But now and then you have to slap yourself out of your quilterwhinge and wo-man up, don’t you? So eventually I dug them out and promised to do something with them.

image

Firstly, I laid my blocks into a 3 x 3 grid, added white sashing and red cornerstones. The sashing is 2.5ā€ wide and cornerstones 2.5ā€ square (unfinished).

image

image

And added a 2.5ā€ (unfinished) white sashing border round the edge followed by a 2ā€ inner border of the red main floral Ruby fabric which I love so much. Finally another 2.5ā€ white border, ready for piano keys.

…and then realised my issue was always going to be my feeling that there was a paucity of interesting prints. So I bought a Vintage Modern charm pack – now THIS one is GORGEOUS! I love it. It’s like Ruby plus. Uber Ruby. Anyway, so I mixed my remaining ruby charm pack and vintage modern, cut them in half and made a piano keys border. i used about 54 (maybe 56) charm sqaures for the piano keys border.

I mentioned how to make a piano keys border here, in case you wanted some instructions:

https://cuckooblue.co.uk/post/77412217918/starflowers-chain-quilt-charm-pack-busting-hst

Now I love it. I really do. The mixture of the two collections is great andĀ  the quilt has some ā€œoomphā€ I think. I’m sure I would have loved it even more with a little Vintage Modern in the stars, but you can’t have it all.

image

So, from what I had left over, I seem to have made this quilt with 92 coloured charm squares (and 36 white charm squares plus sashing and borders etc); 36 of them were for the HST star blocks. The quilt top measures about 60ā€ square. I was quite glad that I needed to get some more fabric to make the piano keys border as with the addition of the Vintage Modern I think it ended up being something rather yummy, even against a honeycomb grey house in a weak February Scottish sun:

image

Here’s to abandoned WIPs – sometimes they can surprise and delight you. And here’s hoping your WIPs, whatever they may be, are bringing you much pleasure.

Till the next time,

Poppy xx

*Edited*

p.s. My friend saw this post and sent me a photo of the baby quilt I made for her daughter 2 years ago in Ruby – am now thinking I was a bit harsh on Ruby! Pattern is ā€œflowers in the atticā€ by Sweetjane on etsy, batting is high loft fire retardant polyester.Ā image

p.p.s. Edited in 2015 – you can see the finished quilt here if you like:

Vintage modern-ruby stars quilt – finally finished!

Liberty Dresden Pillow Love

Liberty. Dresden. What’s not to love?

image

Yeah, I knew you’d get it. Maybe only those with such a need for the aesthetically pleasing that they wander through blogland searching for it, really get it as we do.Ā  Liberty Tana Lawn is quite honestly the diamond of fabric – silky soft, so bright and pretty your heart aches, and such magnificently classic prints that I swear they will NEVER date. Never.

Are liberty fabrics expensive? Oh, you bet they are. But did I say they will never date? So, an investment then. And that’s what I’ll be telling the Hubster when he works out how much Liberty has suddenly entered this house.

And then the Dresden. Such a pretty block, and so classic. But they can look a bit old fashioned… I must say I didn’t really think I would ever make one – and I probably wouldn’t have, had they not appeared in blogland with bright, fresh colours and a clean modern feel. And a few years ago I saw Jo from www.mybearpaw.com ‘s lovely dresden pillow in the flesh and it helped change my view that Dresdens weren’t modern:

image

I even got myself an EZ dresden ruler last year , but had never used it. So when my sewing friend Alison had had a hard week, I invited her over for our first (and hopefully not last!) sew-therapy session. I knew just what I wanted to do. I bought a Liberty charm pack fromPickClickSew on Etsy and added a few more prints from my stash until I had 20 x 5” squares. With the Dresden Ruler IĀ  cut 2 wedges from each square, so when Alison came over we each had a pile of 20 wedges ready to get started on. And we did.

I used instructions from this marvellous and easy tutorial from the amazingly talented Elizabeth Fransson:

http://www.sewmamasew.com/2010/04/dresden-plate-block-sew-along/

She made this black and white doll quilt, rather than a cushion, but the principle is the same of course.

image

I used Essex linen in natural for my cushion back, cut to 17” square. In fact Alison and I both decided on linen for our cushion backs, so with identical fabrics and linen, you’d expect the cushions to be very similar wouldn’t you? But whilst I decided on a rainbow effect, Alison went for a scrappier look. Also once we’d made the dresden plates we had to decide on how to applique them onto the background linen; she chose to zigzag hers on the machine with white cotton, whilst I hand stitched mine on, and added batting and a bit of handquilting too. They did end up looking quite different! This is Alison’s:

image

The zigzag applique made a kind of outline effect, which is really pretty. Amazing how all the fabrics just look great together. Her cushion front was finished well before mine!

image

…at which point mine was still pinned to the background, and was being handstitched. I had made the inner circle, but hadn’t appliqued it on yet, so the inner circle is small and raw-edged in this picture below:

image

… and then after a couple of hours watching a film, I’d stitched on the dresden and inner circle, added some cotton batting to the back and lightly handquilted with perle cotton – just a simple running stitch around the outside, and either side of the inner circle. It looks surprisingly like it’s pieced onto the background, it really doesn’t look like applique.

image

It’s taken me almost a week to finally decide on the back – and I decided to splash out and use this lovely piece of purple liberty which I had. It would be so easy to cut corners or scrimp on fabric and then end up with something I don’t love as much as I would have; I’m not making more of these for our house, so it might as well be as close to perfect (in my eyes!) as it can be!

image

I went with an envelope back, very simple to do of course – cut 2 pieces of fabric which when overlapped will make a 17” square to cover the cushion front, like 17” x 14” and 17” x 11”. I pinned mine to cotton batting as the Tana Lawn is very lightweight fabric and I wanted to match the weight of the front. There is a significant overlap as you can see, otherwise the cushion gapes, especially without a button closure, but you can have a smaller overlap and add a button, poppers, whatever. Double hem the two edges which will be in the centre, lay the big piece over the smaller, or however you want the back to look when it’s finished, and pin together.

image

lie the cushion front onto the pinned together back, right sides together, and pin:

image

Sew all round with 1/2 ” seam allowance, then zigzag the edges to prevent fraying.

image

Unpin, turn out and:

image

View of the bit of very simple quilting:

image

You can’t really see the envelope back – benefits of choosing a busy print:

image

My piano and my Liberty Dresden Pillow. Ahhhhh.

image

Whatever you’re up to this weekend, hope you’re having fun!

Till the next time,

Poppy xx

Starflowers Chain Quilt … charm pack busting HST pattern/ tutorial #1

image

I have soooo many charm packs! I think it’s my quilty pleasure (boom!). 42 x 5ā€ coordinating fabric squares, anyone? Oh, I think so. Although they are not cheap in the UK, they feel affordable if you are only getting one at a time. The problem is you can’t do an awful lot with just one on its own – you could make a baby blanket for a newborn, but that’s about it. Mix it with white and you have a small quilt, perfect for a young toddler, but not really big enough after the age of about 2 or 3. Now 2 charm packs is a different matter. I love sewing them together, putting a white 3ā€ border on and making a traditional patchwork child sized quilt, which is actually still big enough (52ā€ x 43ā€) for a throw on the sofa, something to put down on the grass for one adult to sit on, or a student take to college or university. And I’ve made lots of those and will likely make lots more. Still, not exactly BIG.

And I thought I should try and do something more exciting – I appreciate that to some the term exciting might be stretched in the context of sewing bits of fabric together, but in the context of knowing I’m amongst like-minded friends, I’ll just keep that word in. So I’ve made 2 quilt tops so far, each using charm packs to try and be a bigger sized quilt. This first one (above) is a starflower quilt made in High Street by Lily Ashbury for Moda; I’ll tell you about the other one another time!

It was inspired by this lovely quilt, but I wanted it smaller, and also decided to break up the stars. Each block takes 8 charm squares regardless, so a 9 block quilt would be 72 squares whether you do all stars or add the ā€œchainā€. image

You can see this quilt and more of Michelle’s work here:Ā http://cityhousestudio.blogspot.co.uk/p/my-quilts.html?m=1 Ā . She’s really talented.

My quilt is quite simple in construction, but in case you wanted a few directions, I’ve given a few instructions.

This is the first block – block A:

image

It’s straightforward, but you can’t take any shortcuts with the half square triangles – you have to slice the charm squares in half diagonally and sew them back together, making sure not to stretch the bias edges. There aren’t too many in this quilt, so it’s not too much of a pain. Use a scant 1/4″ seam allowance throughout.

For block A you need:

  • 8 x 5ā€ different coloured charm squares, cut in half along the diagonal to make a ā€œcharm triangleā€
  • 4 x 5ā€ white squares cut in half along the diagonal to make a ā€œwhite triangleā€
  • 4 x 4.5ā€ white fabric squares
  1. Each charm square gives you 2 charm triangles. Sew one of these to a white triangle along the long diagonal edge. Carry on with the different colours until you have 8 different charm triangles sewn to a white triangle. When you press these open, you have 8 different HSTs, a colour on one half and white on the other.
  2. Then sew your remaining charm triangles together in pairs and press open to make 4 HSTs with a different colour on each half.
  3. Trim all your HSTs to 4.5ā€ square.
  4. lie them out in the above arrangement, putting a 4.5ā€ white square in the corners to complete the block.
  5. sew together into rows and then sew the rows together to make a block.
  6. Block A finishes at 16ā€ square: you need 5 of these blocks.

This is Block B:

image

For block B you need:

  • 8 x charm squares, cut to be 4.5ā€ square
  • 4 x white rectangles, each measuring 4.5ā€ x 8.5ā€
  1. Sew 4 charms into a four-patch. Next sew the long edge of a white rectangle on each side of your 4-patch. Put this aside.
  2. Take one white rectangle and sew a charm square onto each of the short sides of the rectangle. Do this with the remaining white rectangle.
  3. Put the rows together as shown in the photo and sew together.

Lie your blocks out on the floor in three rows of 2 blocks, starting with Block A and alternating them . Sew the rows together:

image

And ta-da! Easy. This is it at 48ā€ square. I do think it would be really lovely made as 16 blocks, and/or made with smaller HSTs.

image

I’d originally meant to finish here and put a white border on using 2.5ā€ strips of white, intending to bind with something bright and coordinating, probably a deep pink. That would have made a 52ā€ square quilt using 72 charm squares… and mission acomplished – a decent sized lap quilt using fewer than 2 charm packs. The other 12 charms could even have been used as a strip down the back.

image

But in the end I went all out and decided to add a piano keys border to make a larger lap quilt, one which could be used on the beach or as a picnic rug, as well as a sofa quilt or extra layer on a single bed. Partly because I impulsively bought several charm packs in this line and have a male dominated household, not to mention a country-style house interior which is better suited to muted colours and beiges rather than white and brights, so I need to use them up. And partly because although I enjoyed making this, I am likely to stick to my favoured simple patchwork squares. Bah, traditionalist. So I wanted to see it dressed properly this time!

For the piano keys border I used all my 12 remaining charms AND another charm pack… and about another 6 squares, which REALLY annoyed me. I would have liked it to be exactly 3 charm packs… but it would have only worked out if I had omitted the white border round the quilt centre like this (not stitched together, just laid out):

image

I like it. But the Hubster started droning on about negative space being important in design… yadayadayada. He has no concept of running out of fabric. Although he did go on to say it looked as though I ran out of fabric. Drat it all.

So… Piano keys border

– using your remaining 12 charm squares, another charm pack AND 6 more charm squares cut from a fat quarter/stash/layer cake…

  1. First, if using, add a border round your starflower chain quilt, using 2.5ā€ strips of white. Sew a strip to 2 opposite sides of the quilt first and then add the remaining 2 sides.
  2. Cut your charm squares in half, sew together lengthways until you have about 30 in each strip. I chain pieced, sewing them all into pairs, then the pairs into fours, then into eights etc. but others may prefer to just keep adding one to their strip. image
  3. Press all the seams in one direction. Sew a strip to one edge of your quilt and another to the opposite edge, checking first that it’s long enough! Trim the excess. Then add the other two strips on the other sides of the quilt – again check first it’s long enough and add more ā€œkeysā€ if necessary before you sew it on). How folk do the maths for fancy cornerstones, I have no idea.

…And finished! One starflower chain quilt top measuring 61ā€ square from 3 charm packs (+ a fat quarter) and some white fabric (about 2 yards with some spare). Or a 51ā€ square one using 2 charm packs, if you are going to be a stickler for original missions šŸ˜‰

image

It was so windy today in Scotland, this was the best picture I could get! But at least it’s not raining, so you can kind of see the colours in this lovely collection by Lily Ashbury. Now just to back, baste, quilt and bind. But not today! Enjoy your day/night/evening whatever you’re doing lovely peeps,

Till the next time,

Poppy xx

A Little Liberty

A quick post today for a wee blanket – but no less pretty for being small! Well how can it not be pretty, when it’s made with Liberty Of London fabrics? Liberty Tana Lawn is the softest, most feminine cotton fabic ever. And the prints are gorgeous, usually floral, and always exquisite. My good friend is having baby daughter number 3 very soon, and she has lots of my quilts in her house. Loved and used though they all are, she really has enough quilts for the littlest one to roll around on – and she won’t be rolling around fo a few months! So I decided to use my precious little stash of Liberty (“little” because it is so expensive!) and make her a blanket.

image

It’s just basic patchwork squares as you can see; not only is it my favourite, despite enjoying doing some more taxing patterns lately (more in future posts!), but it feels wrong to cut up Liberty any more thanĀ  you have to. Besides, I don’t have enough of the fabric to cope with more seams and still be big enough to use! it’s 30 x 5” squares sewn together.

I just backed it in a beautiful soft cuddle fleece I got at my local quilt shop (Fabrication in Haddington) at a great price, and didn’t put any batting in between. The fleece was a real pain to work with – although I only remembered to use a walking foot after I had begun, so the fleece did stretch and misbehave, and the blanket isn’t perfect. However, it’s not too noticeable, and it is soooo soft and cuddly, perfect for the pram, car, or just a snuggler!

I used perle cotton to hand quilt round the edge:image

and aurifil gold thread to handquilt lightly along the vertical seams

image

The light handquilting (and ahem, imperfections due to the fleece troubles) gives it a “homespun look”, which I don’t normally do, but I actually think it’s really sweet – traditional and lovely for a new baby. i know my friend will love it – she’s worth using the Liberty for, not only because I love her dearly, but also because she has such lovely taste, I know she’ll appreciate it!

I’m rather in love with LIberty after this little blanket – I need to do some saving up and see if I can make myself a quilt. Eeeek. I’d have to save up a lot – but oh, it would be so loved!

Hope you’re all having a fun weekend whatever you’re up to,

till the next time,

Poppy xx