Wedding Quilts and Guilty Quilty Musings…

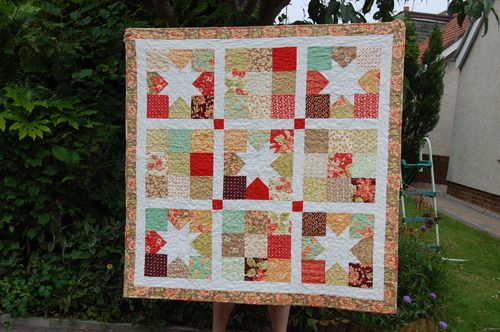
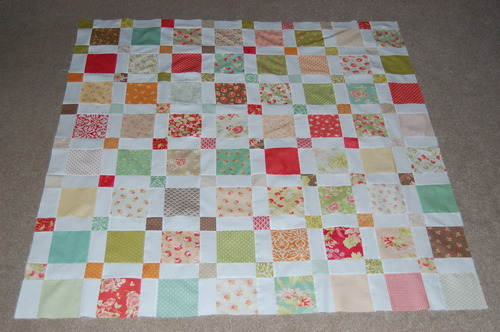
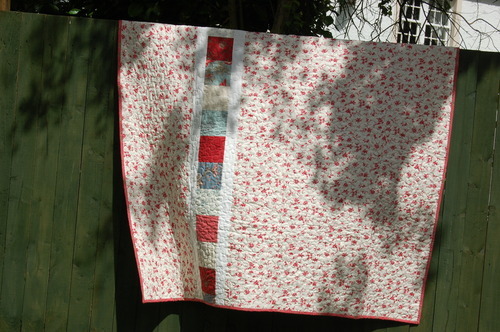
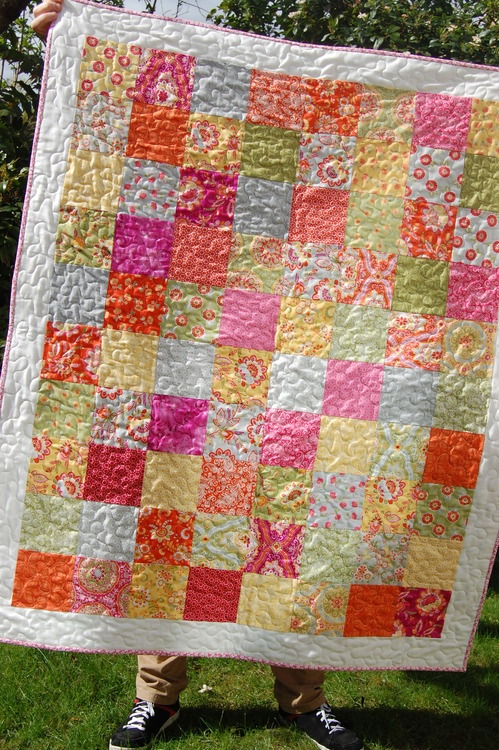
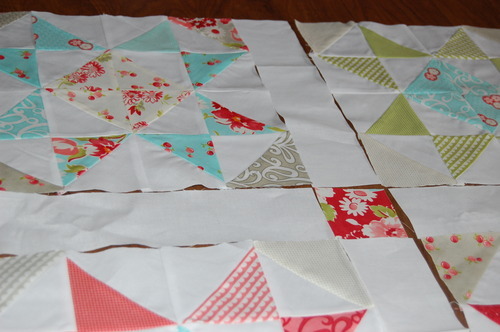
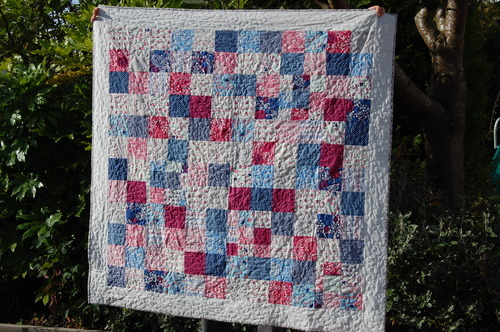
I’ve had to give up this quilt in a hurry, and have only just looked at the hurriedly taken photos and I tell you, they JUST DON’T do this thing justice.

image

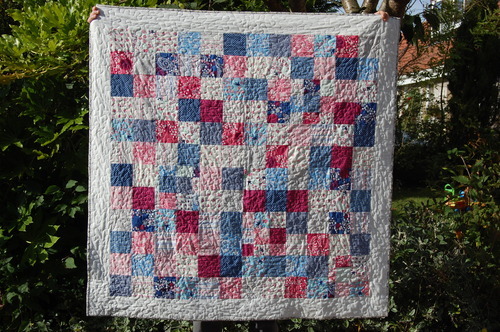
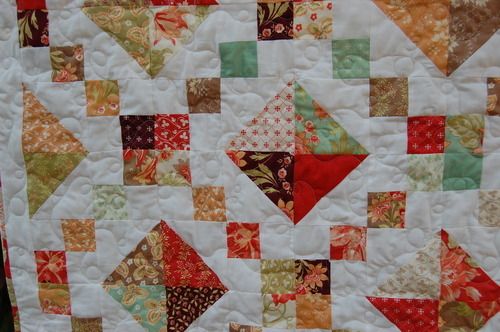
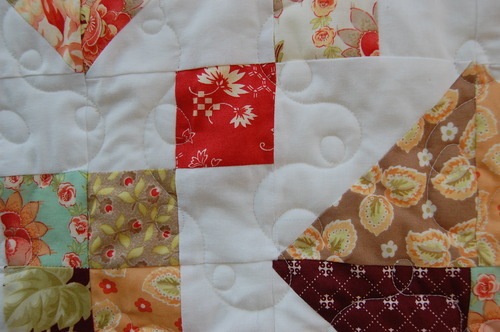
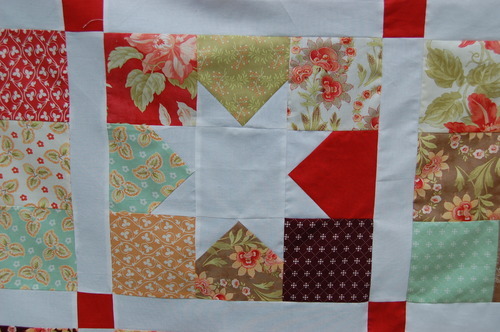
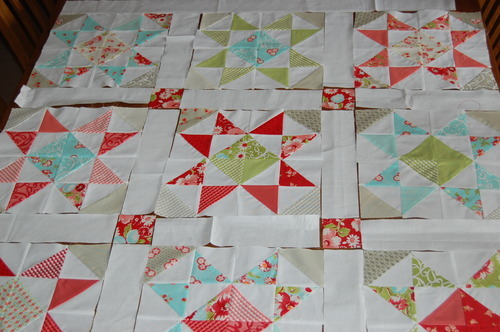
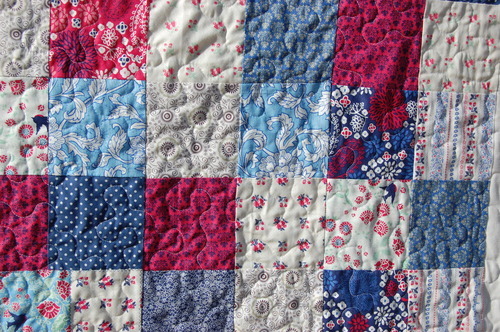
Is it showing up better closer up?

image

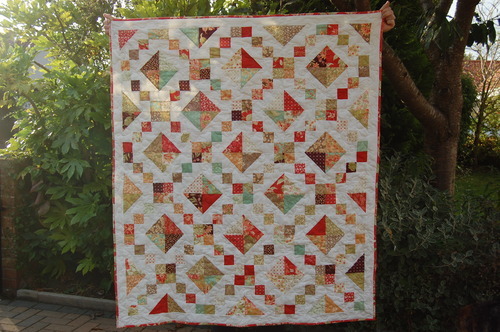
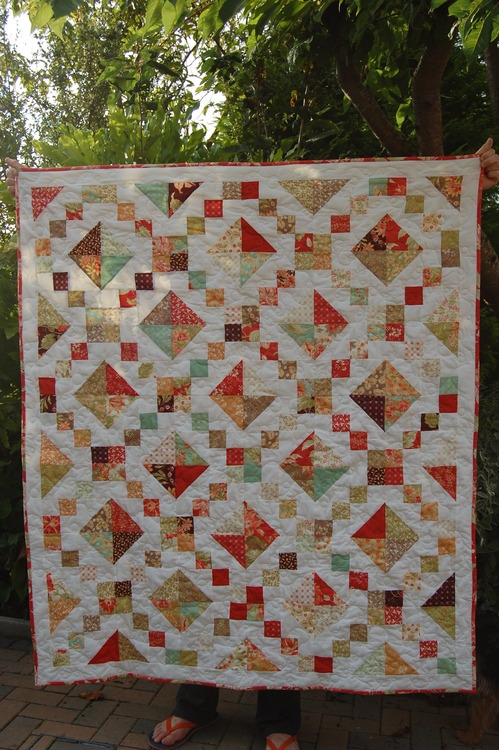
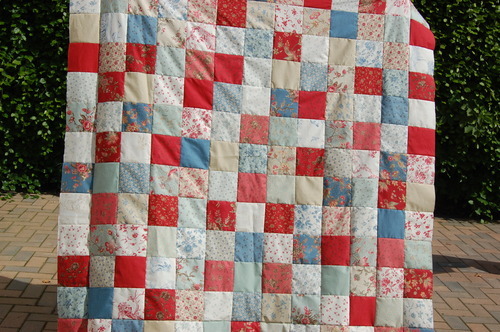
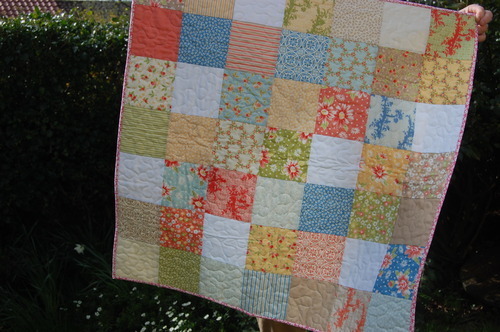
So my neighbour, the one I made this quilt for (Rural Jardin by French General for Moda):

image

…loves hers so much that she asked me if I would make a throw for her  son’s friend’s wedding. Her next door neighbour’s son actually – they grew up together, and of course my neighbour loves him as though he is her nephew. I know I’ve been quilting lots lately, but I thought I could fit another in especially I’m very very fond of said neighbour of mine.

So after going through some ideas – modern, bright, mixed with white, patterned, traditional… She decided she wanted an “heirloom” quilt – something that would grow with them, not bright or modern. We chose “etchings”, which I had used for my brother’s housewarming quilt here: https://cuckooblue.co.uk/post/52416558284/in-love-with-my-machine

image

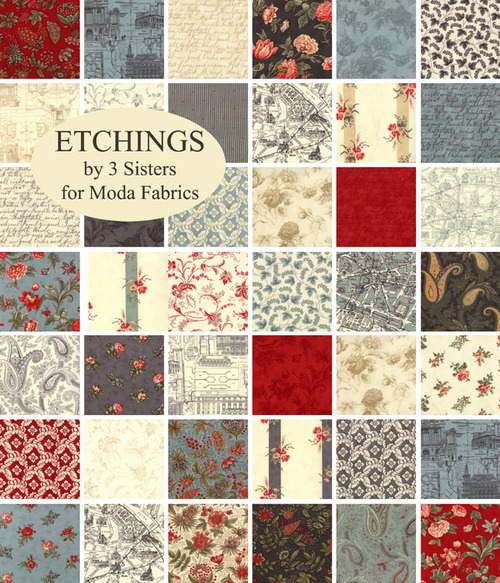
I really thought it was the right one, the little Parisian street maps and blueprints making it quirky but amongst classic prints, the colour palette which fits in anywhere. The fabrics by 3 sisters are remarkably soft and almost luminous yet always so classic. Ordered it. Brandished my rotary cutters with determination ready to cut it – and stopped. It just felt wrong. I think the couple are young, they don’t have a fancypants house like my brother (the Hubster and I are definitely the poor relations!) and I couldn’t see them using it as a picnic blanket or letting their first baby puke on it whilst he tried to fit all his toes in his own mouth as babies are wont to do.

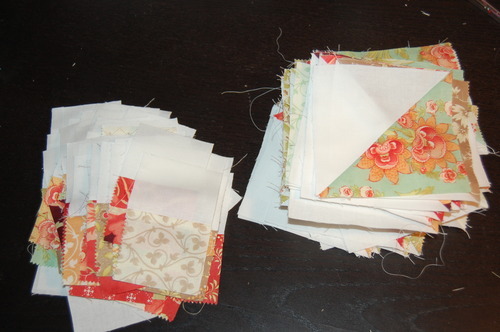
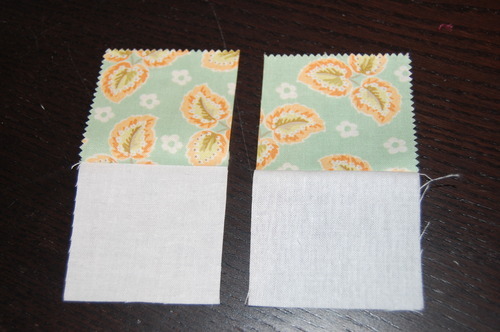
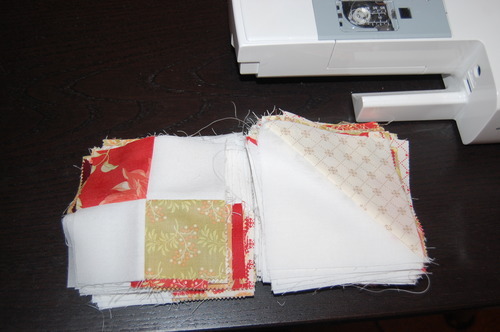
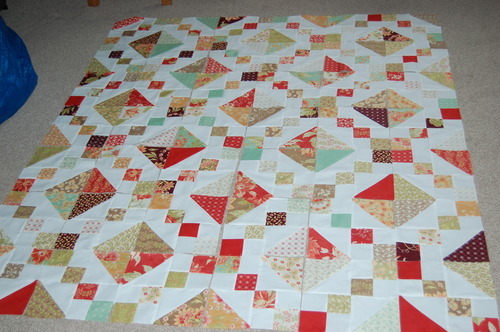
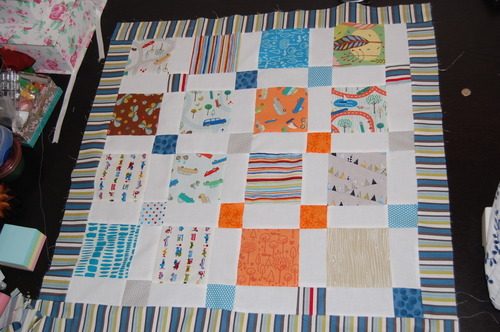
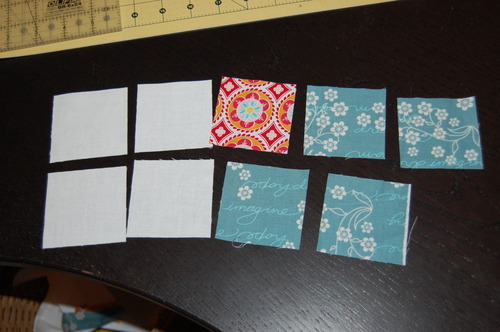
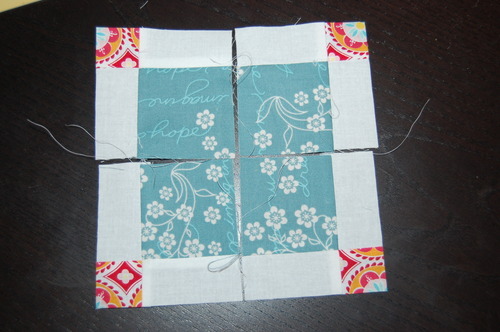
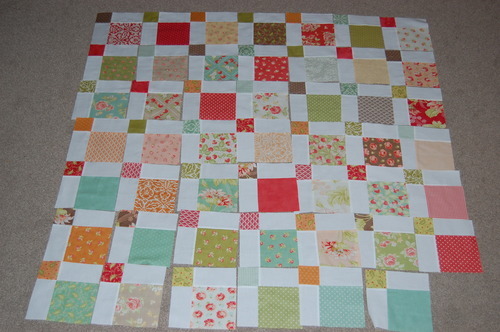
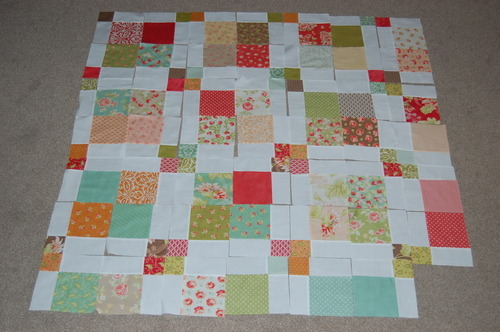
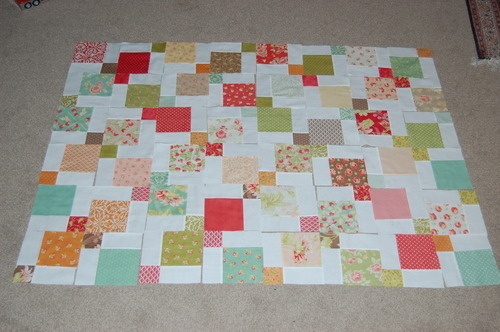
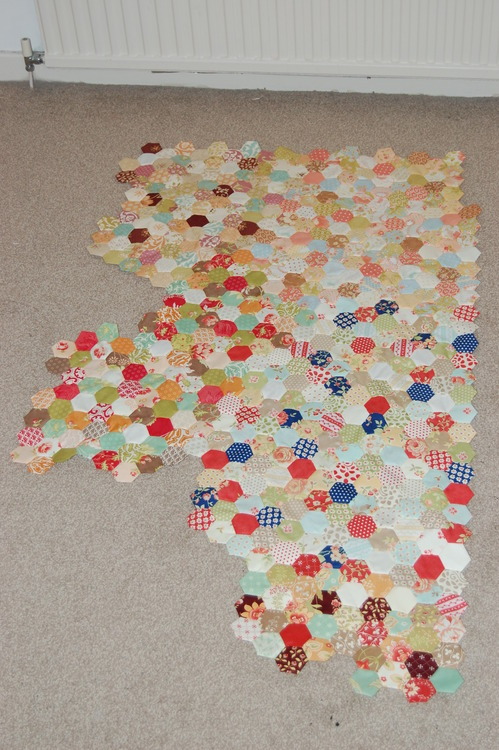
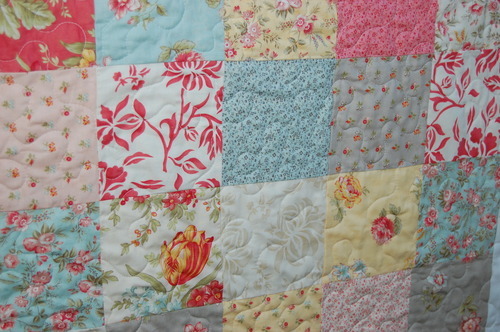
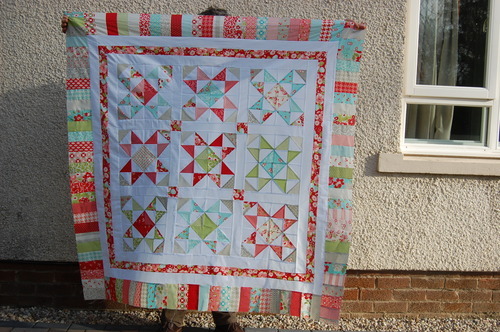
Panic as the deadline was days away. No time to order new fabric. Looked around my fabric laden room – and my eyes settled on these.

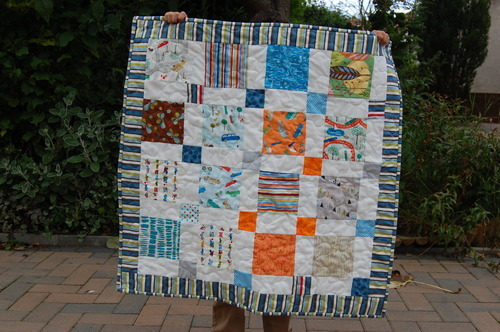
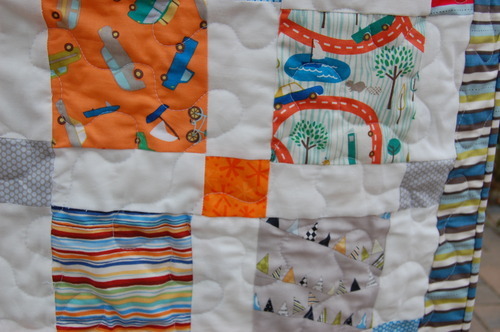
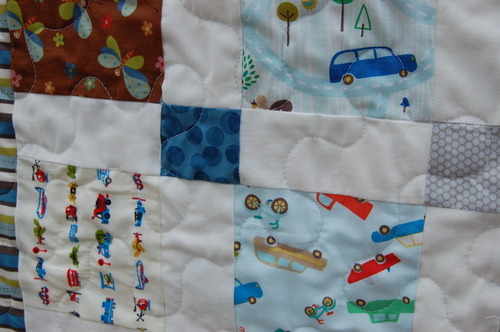
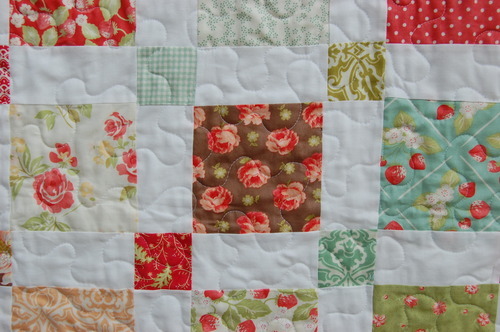
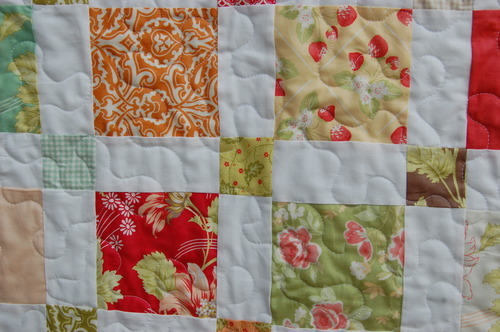
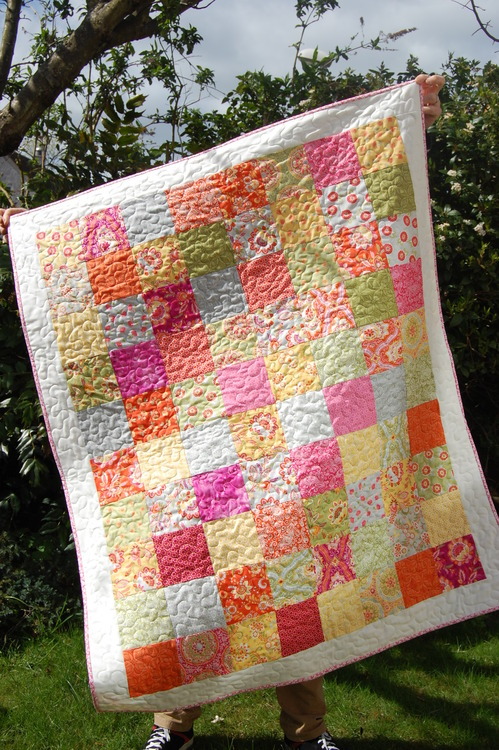
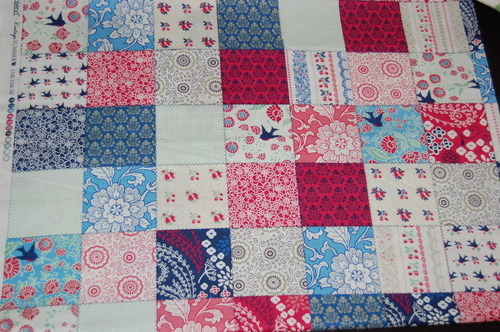
Vintage Summer by Little Yellow Bicycle for Blend fabrics. And my heart sank a little bit.image

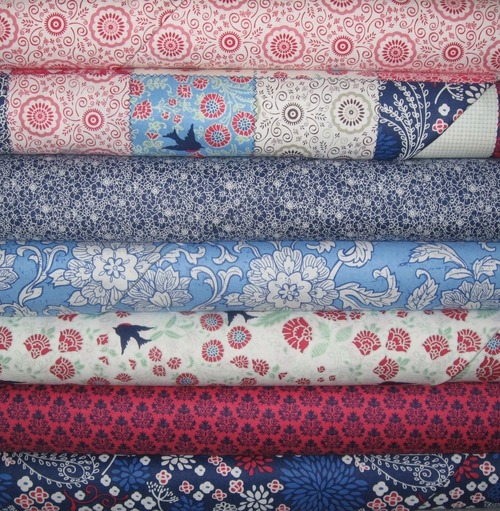
Sank because I KNEW these were the right ones. I had bought them originally for my brother until I saw their very grown up house and decided against. Sank because I had been saving them for almost 2 years for something special and never used them. And here today was the day. For folk I didn’t know. And yet who else just now would they suit this well?

image

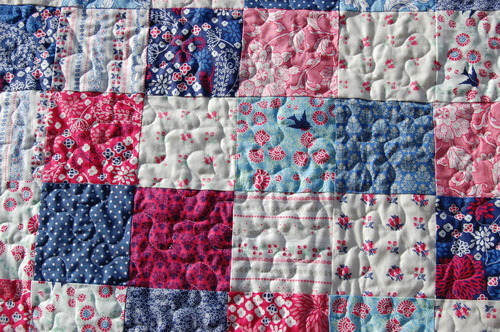
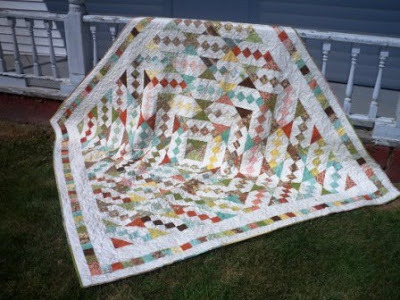
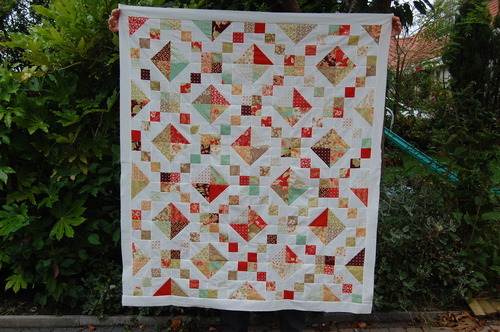
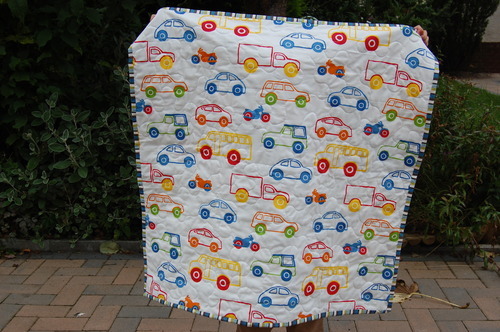
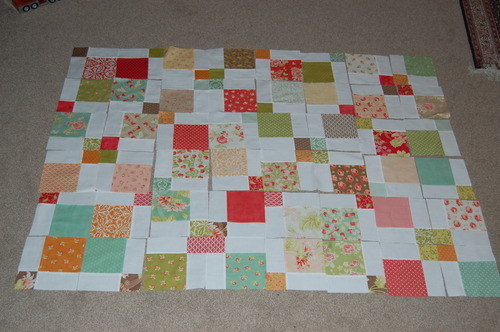
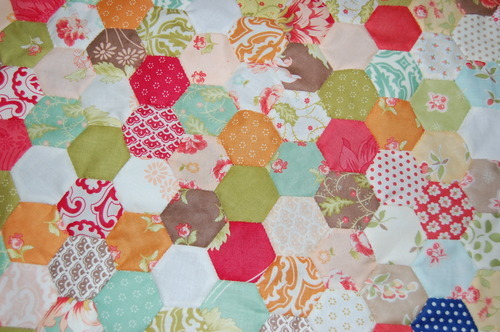
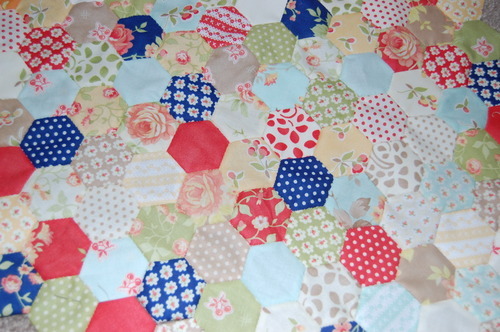
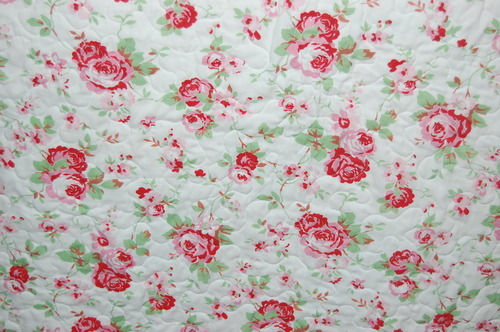
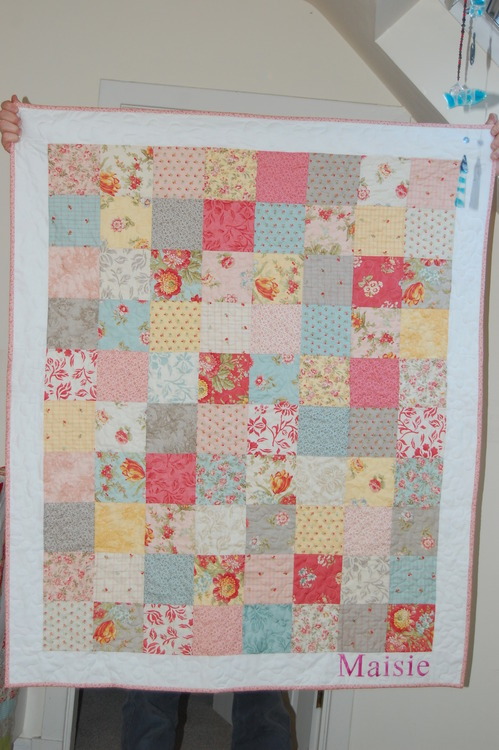
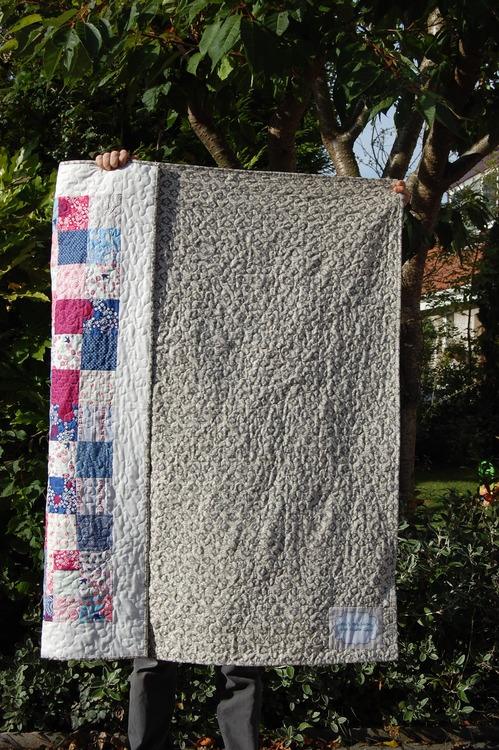
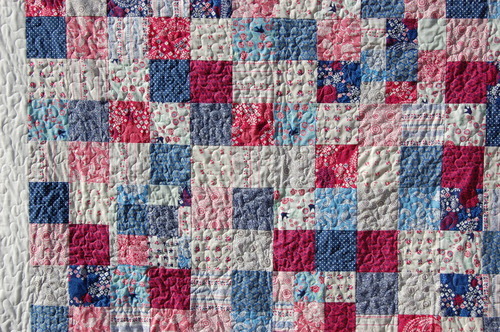
I should have taken better photos, because I can’t tell you how much I love this quilt. The colours are so vibrant, the patterns are cool, fresh, arty, fun, classic and timeless all at the same time. The fabrics are really soft, and because backed it with a grey print from 3 sisters which are always supersoft, and batted it with my favourite Quilter’s Dream Orient – a mixture of bamboo, silk, tencel and cotton, it has a beatiful softness and drape.

This is the most beautiful quilt I have ever made. In my opinion. Even the Hubster said “wow, that’s a NICE quilt.”

And so began 24 hours of incredibly selfish quilty guilty musings. 

image

Can I really bear to let it go?

image

WIll this couple (whom I don’t know) really love it as much as I do?

image

Should I have really used up these fabrics on a commission?

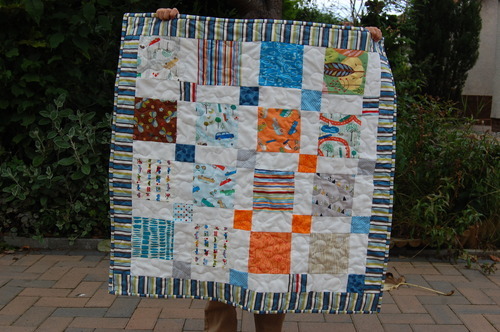
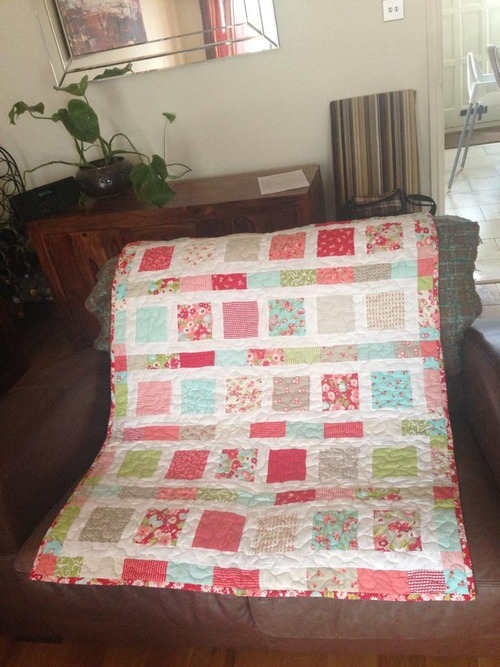
The answer is I’m not sure how I will resolve my own selfish feelings of loss, but I do think it makes the perfect wedding gift for a young couple – classic enough to have as a sofa or bed throw but informal and pretty enough to use as a picnic or beach quilt and lovely for a first baby to discover their fingers and toes on or learn to roll over on, machine washable, full of beautiful comfort and practicality.image

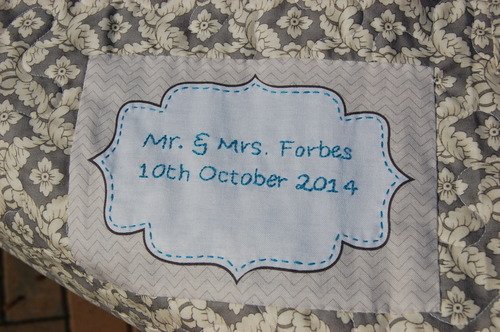
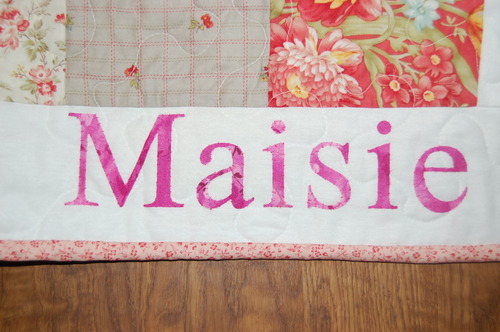
Check out my embroidery! This is a most rare occurence and took ages, but I rather like it. The labels are by Riley Blake – they make a full panel of rather nice labels in 3 colourways, which was much nicer than doing my own.

And then I took it over to my neighbour tonight who was so thrilled. She is a huge fan of handmade and my quilts and fell in love, saying she almost didn’t want to give it away… a sentiment I told her I understood! But she assured me of how highly she thinks of this couple, how much they appreciate attractive, quality things, how much she thinks they will love the quilt. And I walked away feeling happier that it would be loved and go to a good home.

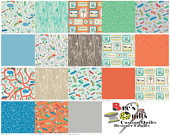
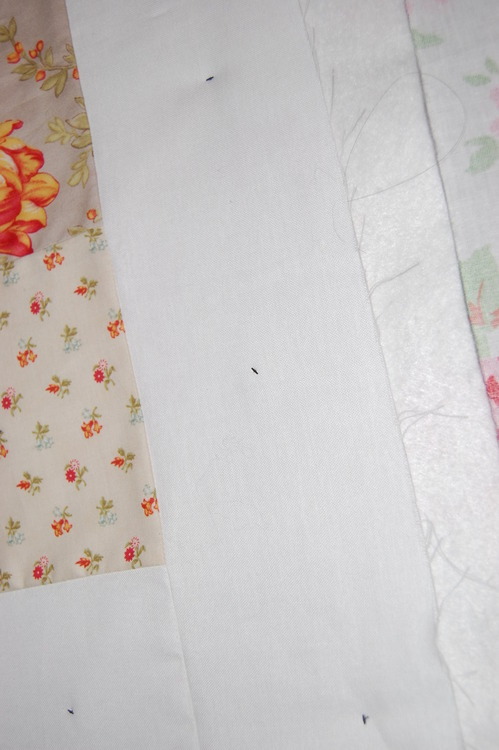
This collection is difficult to find now, but they did a “cheater” print – a patchwork print of all the fabrics, a bit of which is worked into the finished quilt actually and looked pretty convincing. So how did I muster up the strength to walk across the road and hand the quilt over today? By rising above my selfishness of course. And because this piece of loveliness arrived through the post today 😉

image

Until the next time,

Poppy xx

Jewel Box Quilt in Tapestry Fabrics – from 2 charm packs

Ever had fabrics so lovely that you knew exactly what quilt pattern you wanted to make with them? That would be a waste made into anything else? Even when you are REALLY close to the wire with this deadline and should go for simple?

image

I always thought this was traditionally called a Jacob’s ladder quilt, but I’ve also seen it called a Jewel Box quilt. Given that Jacob’s ladder for me will always be that disturbing psychological horror film where the guy (Tim Robbins) sees peoples heads vibrating left and right superfast and is giving me a shiver just thinking about it now, let’s return to the world of pretty things and call mine a Jewel Box quilt shall we?

image

My ex- boss has been my biggest fan for ten years and given me so many opportunities in my working life – and he’s moved the family (to follow jobs), turned 50 (!) and is having a 25th wedding anniversary this year. We’re going to their joint celebration this weekend at their new house, and I wanted to give them something for all those occasions. What better than a quilt using one of my favourite fabric lines – Tapestry by Joanna Figuera for Moda. I made another little quilt using these fabrics not long ago; you can see the blog post here https://cuckooblue.co.uk/post/91088996087/quilts-of-gratitude … looks quite different doesn’t it? it is quite a versatile collection, and especially good for gifts where it can look colourful and classic all at once.

There are a couple of ways you could do this, but the easiest way to get a symmetrical quilt is to make this block:

image

I had two charm packs and some white yardage so that’s what I’ll show you, but there are other ways to do it with precuts. This pattern in the link and photo below uses the same block laid out differently to make quite a different looking (but beautiful!) quilt, and uses a jelly roll and 2 charm packs to make a bigger quilt:

http://www.modabakeshop.com/2011/08/jewels-in-the-curio.html

image

and this one is how I originally thought it would be done from just looking at the design, making 2 different (but simple blocks). http://www.modabakeshop.com/2011/03/sunkissed-jewel-box-quilt . The problem is making all these extra bits at the sides to make it symmetrical. She uses a layer cake to make a bigger quilt. I stuck with the traditional block.

Instructions (sorry I didn’t photograph every step!): For the quilt top you will need:

  • 2 printed charm packs (I used Tapestry) or 84 5” x 5” fabric squares – but remove any fabrics which are solid white or cream and replace with another print, cut from yardage. You need the contrast for this quilt.
  • 84 solid white or cream charm squares (I cut from yardage)

You will use 1 charm pack (42 squares) to make Half-square Triangles (HSTs) with 42 of the white squares
and the other charm pack to make 4-patches with the other 42 white squares.

1. So first the HSTs. Using one printed charm pack and 42 white squares make 84 HSTs with a print on one side and white on the other. I used my sizzix die cuttter to cut them and chain pieced them together, but I appreciate not everyone can or wants to do it that way (I might not next time!). If you need help to know how to make HSTs, try this link below for a picture tutorial from the fabulous Angela Bowman for making 2 HSTs at a time (they are easy!).

https://angelabowmandesign.com/how-to-sew-half-square-triangles-hst-2-at-a-time/

(Essentially you draw a diagonal line corner to corner with pencil on a white square. Lay the white square on the right side of the printed square so you can see the pencil line. Sew a parallel line 1/4” away from both sides of the line. Cut down your pencil line and open with pride to reveal your HSTs. )

2. Open them up and you should have a stack of 84 HSTs like on the right hand side of the picture below. Press the seams to the printed fabric and trim them to be 4.5” square.

image

3. Next the 4-patches. Cut all your printed and white charm squares in half horizonally so you have 2.5” x 5” rectangles. Match each printed one to a white one and sew along the longer edge with a 1/4” seam. Open and press the seam allowance to the printed fabric.

4. Now cut these in half as in the picture below to make what I call little domino units:

image

5. Now take these little domino units, mix them all up and sew them back together to make a pile of 4 patches like these on the left hand side of the picture below. you should have 84.

image

6. Now make up one unit like this. Very carefully. it has to be this way, trust me, make them just the same and save yourself some unpicking. What? Me unpicking? No not me of course *looks up at sky, whistling innocently*. Sew one 4-patch, orientated like this in the picture below to the white edge of an HST.

image

7. To make the block, Make another unit as above exactly the same, turn one upside down and sew together. Make sure it looks like this. It will be your template, and be there in times of doubt! Make a pile of your 4 patches all lying the same way, next to your HSTs, again all the same way as below. Lie them all carefully by your machine.

image

8. And relax! Easy from now on. Chain piece them together into units of 2, then take 2, turn one upside down and sew together to make the complete block. Yippee!

image

9. Now go forth and play! As you lay them together you can see the secondary pattern energing.

image

10. Lay out in a 6 x 7 bloack layout:

image

11. Sew them all together. I sewed on 2.5” white borders, and bound in a strong red.

image

For the first time ever I used Quilter’s Dream wool batting, which is almost impossible to get in the UK… I found mine at www.passion4quilting.com which is a great site with some lovely fabrics at great value. The wool batting was 93” not 122” wide unfortunately, but I have told the shop now, so hopefully the site will be updated too. It is GORGEOUS! The finished quilt has a nice weight to it – it is much higher loft than cotton – and denser than Hobbs wool batting – but also feels much warmer (sewing the binding on whilst watching Tv is a good test of the warmth value!). Machine washable. Easy to quilt. Clung to the fabrics well. My only issue with it was (the price and) that my microstitch basting gun didn’t easily penetrate the batt to take in the bottom layer, and I’m a big fan of the gun now! I have enough for another quilt so will give it another go and report back.

image

The wool’s high loft really accentuated the quilting – finally I did my New Year’s resolution of abandoning the stipple! I quilted in a loop de loop pattern, with some sweeping lines. It was quite easy actually – much easier than mastering the stipple with its echoing and not crossing the lines (I hate ugly stippling), and I really like the result…although I wasn’t sure at first – I wasn’t used to looking at a non-stippled quilt!

image

Well, I loved making this pattern, and I’m sure I will do it again. It was less expensive than many quilts of its size as it only used 2 charm packs, and although it is more complex and I like simple patchwork, it still feels very pleasing to me. I’ll have a hard job parting with it, but I’m really happy it’s going to a good home.

image

Block size – 8” finished. Finished size 52” x 60”.

Have fun, whatever you’re up to, ‘till the next time, Poppy xx

Rescuing a quilt for a friend

Don’t be fooled into thinking this is a big quilt, kindly held up yet again by my ever-patient and rather indulgent husband… no this is a tiny baby quilt about 30” square, held by a small 4 year old boy who liked the idea of doing Daddy’s job.

image

My good friend has started quilting which has been great for me who can now chatter about fabrics and blocks for hours with someone real rather than virtual – I know, it’s like some kind of old-fashioned idyll isn’t it! Anyway, she decided to make a baby quilt for her neighbour using a Riley Blake stacker called Scenic Route. 

image

So anyone NOT been caught out by the way that Riley Blake 5” stackers have 18 – 25 charm squares max compared to Moda’s 42 in their charm packs? Yeah well, well done if you haven’t. I got stung once (that’s all it takes) – and it seems Alison has just been through that rite of passage.  She decided on the disappearing nine patch which I blogged here: https://cuckooblue.co.uk/post/89599354437/the-nine-patch-disappears-tutorial-and-layouts. But needed more charm squares, so I cut her a few from stash and scrap – Moda’s tweet tweet, makower’s space, moda’s summersville, Moda’s reunion, Riley Blake’s Pirates and a few more. I chose brighter colours as I was concerned that Scenic Route’s colours were pale and might just all fade into the white she intended to use. She did a great job making accurate blocks, and sewed it together…

And hated it.

Hated everything about it. Her love for the fabrics together, pattern, everything had just gone. When I went over for coffee, she couldn’t even bear to look at it, just wanted it gone so she could do something else, but was aware of the money she’d spent and the fact she had wanted to do something for the new baby. She refused to unpick it – just wanted nothing to do with it. After we decided to dump a couple of the blocks to make it square, I said I’d take it as a fresh pair of eyes, and see what I could do.

This is it on my sewing table.

image

It’s really easy to lose the love for a project I think. Sometimes you spend so long in the thinking and choosing of fabrics and have been so excited by it that when it doesn’t turn out as you had envisaged you can come crashing down and lose all enthusiasm for the whole thing. I have definitely been there.

Looking at it objectively, there are some sweet fabrics. The colours haven’t been spread over the top that evenly – mainly the orange, but it’s not awful. The fabrics are too far spaced by all that white to be coherent together, they need to be tied together somehow. The biggest problem for me is the low contrast with the white – and that on such a small quilt, this D9P pattern doesn’t look finished. I think you probably do need to use strong colours when using this much white.

Anyway, I decided on a strong border, which ties in all the colours, and had a lovely piece of fabric from Riley Blake’s Pirates in green, white, brown and blue. I added 2.5” borders:

image

And it definitely improved the quilt I thought. I had wondered if it needed more work, but then decided the border did the trick. I used Quilters Dream Orient batting and a fairly loose meander to help keep the little quilt soft and cuddly – I find dense quilting on a small quilt can make it too stiff. I think a free motion pattern helps to add texture and movement to a simple quilt made with squares, rather than using straight line quilting, don’t you?

image

image

image

The back is a cotton print from Ikea – they used to sell 3 wide width metres on a ream for £5.50 or something. When I saw they discontinued it, I bought the last 2 reams they had. Sadly I only have enough left for one more toddler quilt. But I think it looks great on this one anyway, I hope this little lad grows to like it!

image

I just bound it in the same border fabric. It’s really great how it matches so well with so many of the colours in the quilt.

I gave it to Alison today, and she was SO thrilled. She loved it! I must say, the colours are not my ideal, but she was so thrilled. It just goes to show that sometimes a fresh pair of eyes can make all the difference. And that the emotion can sometimes blind you. I guess if she had put it away she would have done the same thing in the end, but she was feeling the pressure of the baby arriving any minute! It’s why it’s so lovely to have other sewing friends to help out in those moments.

image

I wonder if I should get out one or two of my hidden away projects I lost enthusiasm for and look at them again… Or give them to Alison 😉

Hope your creative mojo is all good! Till the next time,

Poppy xx

Quilts of Gratitude

image

Teachers… I’ve always had a lot of respect for them. And now even more.

Last year my little boy started at a local nursery but was utterly distressed to the point where his behaviour changed profoundly (read “lovely boy became a rabid, savage, tantrumming monster”), following which I took him out and put him into another nursery in a neighbouring village with – seriously – THE MOST amazing nursery teachers in the universe. So kind, yet firm, warm, confident, listened to us, listened to him, encouraged us to become part of their school and community. He settled within a few days. Not one tear or tantrum; he has completely thrived. They turned our family around, took out all the worry and stress we were feeling for our son. They gave us so much. All I could give them both on his last day of nursery were quilts:

image

So don’t get me wrong. Anyone who has made a quilt knows this is not a small gift, or even an inexpensive gift. But I was so glad I could give them something in which the evidence of how much I appreciate them was in every little stitch. Of thousands of stitches. Even then, it doesn’t convey all my gratitude (although they were overwhelmed as you would expect lovely folk to be!) – but short of giving them our car, this was the best I could muster 😉

Anyway, the first quilt was a slight variation on the Little Lady Patchwork’s “Charming Stars” quilt pattern from Moda bakeshop, to be found here:

http://www.modabakeshop.com/2010/10/charming-stars-quilt.html

image

As you can see, instead of doing all stars I did 5 star patches and 4 nine-patches. It went together very quickly, partly because charm pack nine-patches are superfast – I didn’t think too much about fabric placement, just went with a variety in each block. Quick, and I think I prefer it like this – now how’s that for a bonus 😉

The fabrics are “Tapestry” by Fig Tree Quilts for Moda. It used 2 charm packs (well, 77 charm squares to be exact), some white cotton and 12.5” of a border print. The fabrics are so timeless, as they always are with Fig Tree Quilts’ collections, but not as “sweet” as some of the collections; she lives in a farmhouse, so I thought this might fit in with that traditional feel. The quilt measures about 52” square.

image

Do I have any regrets about this quilt? Did I preempt a “…brown border??” question which might have been forming in your head? Well, although I like the quilt a lot, especially in our house and double-especially in the flesh, I can’t help but wonder if I might have preferred a different coloured border. I had some red, and some of the minty bluey colour. I think it would have changed the feel of the quilt completely. On reflection though, this will fit into a farmhouse better than the other options. I now can’t work out if that final answer is the truth or if it’s my natural “life’s too short to go round regretting small stuff you can’t change” mentality.

image

You might have seen this second little quilt in the making a couple of posts back, where I showed how to make it (https://cuckooblue.co.uk/post/89599354437/the-nine-patch-disappears-tutorial-and-layouts). I actually really love it finished – although this isn’t a quilt which really works in my house, I found it a tiny bit hard to let it go. This is partly because it is made with a very rare, older, gorgeous Fig Tree Quilts line (Strawberry fields) as well as with a more recent one, Honeysweet. The two collections mixed beautifully. The following pictures show some of the so-pretty-my-heart-aches prints:

image

image

image

I showed them to a few folk, and this one in particular stole several hearts. I bound it in a slightly retro feel blue floral from their “Whimsy” collection, that I had in stash, and it was perfect. I hadn’t really thought I would like this D9P pattern so much, but quilted up it looked really great. The top took much longer to make than the charming stars one, which surprised me somehow – silly really, you make blocks, cut them up and re-sew them – how did I not think that might take a while??

Both quilts measure about 52” square – lap size/ sofa throw size, perfect for those chilly winter evenings in front of the TV in Scotland. Both used 2 charm packs. I used my favourite Quilter’s Dream Orient batting in both, for softness, warmth and washability, used plain white backings (to keep costs down in truth) and stipple quilted both. I resisted washing them, although I love seeing them all crinkly; in this country where the lovely crinkliness of quilts is not well known I think it’s better to give them looking “new” and let them wash them and acquire that beautiful antique look. For once I did put a label on saying thank you and the date – I hope they bring these wonderful teachers warmth and comfort for many years to come!

image

As an aside (kinda), all the other parents felt the same way about these teachers; the nursery parents got our kids together and did fingerprint trees, got them framed and gave them to the teachers all together on the last day of nursery. They were so touched. All very emotional, but in a good way.

I downloaded the finggerprint tree here – edited the legend in Microsoft “Paint”, printed on some nice ivory card and used a lovely non-toxic ink called Tsukineko Memento ink (colour Lilac Posies). The kids did 4 fingerprints each and I wrote the name by one of them. We all really loved how they turned out.

http://onefabday.com/diy-project-free-fingerprint-tree-template/

Now onwards to school and beyond… I’m not sure if I’m ready for this! How can my baby be growing up so fast?? Thankfully at the moment, the thing he seems most aghast at when listening to the story of the three little pigs is not that a wolf can blow down a house and try and eat little talking pigs, it’s why they would possibly want to leave their mother’s house in the first place… I think I’m safe for the moment 😉

Hope you are all enjoying a summer holiday! Until the next time,

Poppy xx

The Nine-Patch Disappears…. (tutorial and layouts)

See? Not a sign of it anywhere…

tumblr_inline_n8azqzzzYd1rjpcb5

image

Hello you lovely craftilicious folk. So I’m in the process of making 2 more charm quilts – and I’m a bit close to the wire with this deadline. Hopefully by next time I will show you them both finished (or I would have had a deadline fail…actually I prefer the words deadline unsuccess).

For quilt 2, I have been playing with the Disappearing Nine-Patch a.k.a. D9P.

This is a pretty common block, and all over blogland, but it’s easy and makes quilts which look more complicated to make than they are. Just in case you’re not too familiar with it, I did these “show + tell” pictures with some 2.5” scrap squares.

How to make a Disappearing Nine Patch block (D9P)

1. Start with making a nine patch. You can use all prints or solids and prints. I decided to use prints and white solid. You need 4 squares of white and 5 prints (my prints were all different in my real quilt).

image

2. Sew them together in rows as shown below. The middle one is special as you will see, but in my real quilt it was just whatever randon charm square came out of the pile.

image

3. … and sew the rows together to make a nine-patch

image

4. Next get your rotary cutter and ruler and slice down the middle of the block, and again at right angles as shown below:

image

5. Play with your new blocks! See what has happened to the middle square? It has become the littlest square in the block and will be distributed more widely throughout the quilt. You might use this in your thinking in some quilts.

image

That was the layout I eventually used.

image

That picture is a very common layout. I once did a baby quilt in that, again using white solid ( https://www.flickr.com/photos/cuckoo-blue/8048473613/ ).

image

Or a “bigsquare-littlesquare” look. Bear in mind that when you use lots of prints it will look more complex and scrappy…

In fact, I’ll just show you how they look. I took pictures of the different layouts whilst I was trying to decide what look I was going for.

Making the Quilt top – finished size 52” square

  • 80 printed 5”x 5” charm squares (2 charm packs with 4 left over)
  • 64 solid white 5” x 5” charm squares (or enough white fabric to cut these)
  • rotary cutter and ruler
  1. Make 16 nine-patches as shown above, and slice into quarters. At this point you should trim your blocks to make sure they are the same size. Mine were pretty much the same, so I didn’t bother out of sheer laziness, and I just tried to match up the seams well when I was sewing.
  2. And then play! Until you get a layout which pleases you.

Note the pictures below are taken with ONLY 12 nine-patch blocks, not 16 as in the finished quilt top. This is the one I eventually went for obviously:

image

I liked this one below, but the hubster wasn’t so keen. I quite liked that it was simple and easy on the eye (some people don’t like complicated patchwork) and the fabrics touch each other. Although I would have needed to do some jiggery pokery and shuffling around of the blocks if I had gone with this layout – still you get the idea). Hubster thought it was too simple for his eye. I think he has seen so many quilts, his brain has progressed beyond simple patterns and now he likes “interesting”. This has an advantage of being symmetrical around the edges, unlike layout 1 (did you spot that?)

image

Next, I alternated the blocks between a square above and a reconstructed nine patch. I think on a bigger quilt or one with more blocks it would have been a more obvious “chain around the 4-patch” look.

image

At this point I realised that with 12 blocks I was better laying it out as a 3 x 4 block grid, so here is that same layout with the pattern a bit easier to see.

image

And finally, this is the one which almost won out. It looks pretty scrappy, but it is organised chaos! In the end I decided to go a safer, less complex pattern as it is for someone else.

image

There are more options of course – you could take each D9P 4-block unit and sash it in white – 2.5” strips or smaller would be nice, choosing any of the layouts above for it, or mixing it up with a traditional nine-patch. And, as you can imagine, if you use all prints you get a very scrappy look! 5” squares would be too busy for me in that case – but 10” (layer cake) squares would be perfect! You could even just place them randomly.

OK, well again it’s wayyyyy past my bedtime. Hopefully next time I can show you these two little lap quilts finished and we can do some prettiness chat! By the way I used a charm pack of Strawberry fields and one of Honeysweet, both by Fig tree Quilts for Moda for this quilt.

Until the next time,

Poppy xx

Edited: more pictures of the finished quilt are here if you would like to see :

https://cuckooblue.co.uk/post/91088996087/quilts-of-gratitude

Quilting tools and a French finish

My neighbour asked me if I’d make her a throw sized quilt pretty much the same as my favourite one which lies on my “snug” sofa most of the time; here is it is finished – clearly not lying on my snug sofa…

image

It’s made with my all-time favourite collection, “Rural Jardin” by French General for Moda. This line is so old and out of print that it is as rare as the proverbial hen’s teeth, and I jealously guard the bit of it I have horded. It’ll probably be with me when I die, scattered for posterity under a tree or something. Size 59.5 square. This is the quilt top – in the sun, gasp:

image

Don’t be misled by the simple square patchwork, the red, white and blue (and beige), and the floral designs – this colection is soft yet rich at the same time, timeless, unmistakeably French inspired and authentic with it, and would look great in anyone’s room – or thrown on the grass for anyone’s picnic. I love that the simple patchwork allows the collection to shine but subtly, and that wrapped around someone it has a warm, heirloom feel. Here are some close ups:

image

image

If nothing else you can see my quilting in the unusually bright sunshine… I usually stipple my quilts, although my new year’s resolution (what!!? June? Really?!?) is to branch out this year, do some loop-de-loop and a few other designs I have my eye on.  But meanwhile I’m finally happy with my stipple, thanks largely to some new tools:

image

Exhibit A: one pair of S/M machingers quilting gloves. Completely genius invention. Before I used to grip the quilt with both hands and haul, I mean move, it around to achieve the meander; these have a grippy surface on the fingertips which allow you to move the quilt with your hands face down on the quilt – so much easier. This hasn’t changed my meander in itself but it has taken the strain out of it. For about £10, it’s absolutely my number one quilting accessory recommendation (I’m assuming folk have the right presser feet etc).

Exhibit B: the basting gun. I talked about this before (https://cuckooblue.co.uk/post/81125927002/oasis-quilt-for-baby-maisie).  Mine is the microstitch basting gun and it puts a little plastic tack instead of safety pins. Tacks, by the way, which you can SEW over. Without breaking needles. This has made the biggest difference, both in terms of enjoyment and the meander itself because I don’t have to keep stopping to take out the pins which was breaking the flow, not to mention far too many needles. The little black ant-like things are the tacks.

image

And finally… the quilting table with the “sew-slip II”. The whattywhatwhat? I got the quilting extension table when I bought the machine a few years ago, but really until I got the gloves it didn’t help all that much. I kept forgetting to use it. Combined with the gloves though, it really does help. Particularly as I got the “sew-slip II” with the gloves – it’s a piece of slippy teflon (I think) with a hole for your presser foot/needle thing; it grips to your sewing machine bed temporarily, and reduces the “drag” when you move your quilt around. I don’t know for sure how much difference it has made, but I like the idea – and certainly my quilting this time seemed easier and more enjoyable. And quicker to boot. Here is an action shot:

image

Anyway, back to the quilt – this is the back: image

Some Rural Jardin in someone’s sale – how lucky is that! A row of charms – I had to add in some leftover “Etchings” by 3 sisters for Moda which toned well with the front – sashed by 2.5” of white cotton… the effect is pretty. And allowed me to join the backing fabric easily!

I used all-natural Dream Orient Batting by Quilter’s Dream – it really is so soft and silky. You can see the drape a little on this picture, and this is not yet washed and fairly densely quilted. I adore this batting. Next warmest to wool apparently, yet machine washable. Although if I could get Quilter’s Dream Wool in the UK, I would as apparently it machine washes well…

image

A binding in one of the faded reds of this collection: image

…And it’s ready to go. If I didn’t already have one of these, I’d struggle to let it go; as it is, I prefer this one’s backing and batting to my own! I wonder if she will notice if I swapped them… Ah well, I hope she enjoys it. It’s a collection that even the menfolk seem to like – this one got the seal of approval from her husband when he saw mine, so at least it should be loved 🙂

It is a shame that this collection is so hard to find, the blues with the two different reds are pretty special. The nearest I can see there is to this is “La Belle Fleur” by French General and looks nice from the pictures, sadly also getting older, which has a regency green in there too – or the latest “Le Bouquet Francais” which has a yellow added. I’m sure the latter is nice – but from the pictures I’m just not sure about the yellow… Still, French General rarely get it wrong, I think their collections are just more beautiful in real life than in photos. I’ll see if I can stretch to trying one! I’m amazed we have money left for food after the quilting supplies are done…

Till the next time, Poppy xx

The 1000th Hexagon

There should be some sort of firework display in my bedroom or something.

image

I have saved you the eye-rolling moment when I take a gazillion photos of 1000 unsewn hexagons all in piles on my bedroom floor, because frankly, it can only be interesting to the person who has made them. I kind of want to lie on my bed throwing them wildly in the air like in 80s movies of people winning the lottery or winning big at the casino. Although that would make me immediately sob for days as I try and re-sort them into collections.

This is that same 1” hexagon quilt made up of fabric collections from the wonderful Fig Tree Quilts that I posted about before. I think there are about 500 hexagons here. I love the fabrics so much! so far this is:

Fig and plum (top left)

Buttercup (top right)

Honeysweet (middle left and below)

image

Avalon (middle right and below), which is a surprise favourite – that dark blue just didn’t look like it would work so well when ordering online – but my oh my. It even makes me sound like Judy Garland on her way home to Kansas. It’s lovely.

image

and Tapestry (bottom right) which is now one of my favourite lines ever. I’ve even bought some for another sofa throw for our living room. I’m going to live in figgy quilty bliss. The Hubster and kiddo may need another room decorated in blue, grey and black as a refuge! My dog doesn’t care, boy though he is, He’ll live in frou-frou perfumed frillyness as long as he gets cuddles, so I’ll have company.

image

The above photo is part-way through sewing a block together. I found I couldn’t keep making hexagons without sewing some together – I think had I tried to make all 1400 and then sewn them all together I would have given up by now. Or turned to gin. So alternating between making hexagons and sewing them up in front of the TV or listening to audiobooks has been the only way I could do it. And having breaks. And not trying to do too much in a day – making 10 -20 hexagons is enough, feel proud… even if the inspiring blog poster you just read made 100 in a day, and still fed the children, went out with her husband, baked a cake and wrote a witty and interesting blog. Whilst looking beautiful, shiny haired and thin. Eventually you will make your 1000th hexagon and feel you too have gone through a rite of passage.

Sadly, their latest collection, Mirabelle, isn’t doing it for me, at least not on the computer screen. That’s OK, just because Joanna Figuera is my favourite designer, it doesn’t mean I have to love everything. I’m Ok with it because I tracked down a really old line called “Strawberry Fields” in a shop in Australia (below). I know, I’m being mental. I’m glad the Hubster doesn’t read my blog.

image

So apart from Butterscotch and Rose which is definitely in the quilt and I have some California girl which might make the cut (see the quilt in my last post if you want to know what it’s like! I clearly like I a lot),  that’s really it for fabric choice. Unless I can find some Mill House Inn or Patisserie, but they are both too old to find now. Darnit. Unless I’m still doing this by the time she releases a new collection…

Arghhhh, and it’s past bedtime again! How does this happen? Night night, and enjoy whatever it is you’re up to,

Till the next time,

Poppy xx

p.s. previous posts about this are here:

https://cuckooblue.co.uk/tagged/hexagon-quilt

A Quilt Quartet

I ran this one up yesterday thinking I really should have a quilt on show at least at this craft fair – which is only TOMORROW by the very way! I must say I have fallen a little bit in love with it myself.

image

It is my favourite “child-size” quilt – two charm packs sewn up and bordered with white. 42” x 51” Quick, but when it’s such a beautiful collection as High Street by Lily Ashbury for Moda so very pretty. And big enough to be useful even as an adult. If you can be bothered to look back through my previous posts, you’ll see 2 other quilts made with this collection, both teamed with white. I had utterly fallen in love with the collection on paper and when it arrived, but haven’t really loved the other quilts / quilt tops I made with it. Now I know why, it needs to be a collection together with no chopping it up, no mixing it with white or anything else. Just bliss. I’m regretting using all my stash in the other quilts when i just want more of this!

image

Cotton batting, stipple quilting (in all these quilts). This quilt was wonderful to quilt – partly because the collection gave me such joy,  partly because I remembered about my quilting table and fixed it on, and partly becasue I got myself some quilting gloves, and something called a sew-slip. The quilting gloves made a huge difference. I’ll tell you about it another time because I’m on a schedule – did I say it’s my craft fair tomorrow?

I said a quartet – I finished some WIPs, binding etc, for the fair, so i thought I’d include them here.

image

This one is California Girl by the wonderful Fig Tree Quilts for Moda. Soft, beautiful, feminine, but so delicate that photos don’t do it justice – and direct sunlight washes out the colour on a picture (yes, spring is springing in Scotland!). I added the white squares to give it a bit of sparkle, and I really like the effect, otherwise it seems a bit too “shabby chic” for a baby. Cotton everything, stippled, 36” x 36”, a pram size or small baby mat.

This next one is the same collection. I really fell hard for it, and loved it when I got it – but made this little baby quilt last year (or maybe 2 years ago??), using the amazing “charm pack baby quilt by Elizabeth Fransson on “sew mama sew”. I love the pattern, but I think this collection is too delicate to be miixed with white.

imageimage

So I kind of lost my California Girl mojo, but having seen the first little pram quilt again, I might make up my remaining fabric into a bigger quilt, like the High Street one at the top of this page. It is beautiful, just not as “out there”.

And finally, this quilt.

image

This is hard to part with. My mother has completely opposite home decor taste to me – she likes white, minimalism, and everything is beautifully spic and span. I like her house, but I know our won’t be like hers. I felt her living room could do with a little colour, and thought a sofa throw might be acceptable to her if it was pretty much all white, with a little strong colour (she like bright colours). This is Dena Designs fabric and white – I have forgotten which collection, I might google it. It is backed in white, and bound in fuschia, and I really like it, although white doesn’t work in our house. It has wool batting which makes it lovely, snuggly and warm. 45” x 51”

image

But much as she loves my work and is appreciative, she’s just not going to go with throws in her house. So she has returned it saying someone else will use it and love it, and I should put it into the fair. Slightly sad, but she’s right. Luckily my good friend happened to be here when my mum came round with it, and stright away asked if she could buy it (she is also a sewist, how flattering) – SOLD to the lovely lady who will give it a good home 🙂

I’ll finish with yet another picture of my favourite! Such lovely lovely vibrant yet feminine colours!

image

Less feminine are those size 10 feet!

Till the next time,

Poppy xx

PS. please check out my previous post if you want to see the things I have made for the craft fair – leftovers may get put onto this blog for sale if I ever get my act together! https://cuckooblue.co.uk/post/82041667739/a-week-of-sewing-like-a-madwoman-i-feel-a-craft-fair

Oasis quilt for baby Maisie

A few weeks ago, my neighbour phoned to ask me to run over and meet a very special little girl, who just been adopted by a very special mummy.  My neighbour wanted to commission me to make her a quilt, and asked if I could chat to the mother about it.

image

This lovely lady and her husband had wanted a child for over 10 years – and although it’s not my place to describe her story and health troubles, trust me, it’s so heartbreakingly sad – but also so amazing that this point has arrived!  Anyway,she had heard 6 weeks previously that she could adopt a 5 month old baby girl; adopting a baby is almost unheard of in the UK, the child is usually older, and so it is very special for adoptive parents here not to have missed the first few years of the child’s life.

Anyway, all her previous heartache has been washed away with this sweet baby girl’s smile. My 4 year old son, who likes a captive audience, kept her entertained by doing all his “supercat” jumps and “running like Turbo”, so I saw that smile a lot! Maisie is her name; I used Steam-a-seam to applique letters on, and then slip stitched in place after quilting. Steam-a-seam is the only fusible web I trust to stop the edges fraying too much in the wash, but I still sew the letters in place as a quilt gets so much washing.

image

Maisie’s mother told me she adores “shabby chic” and quite traditional prints – and pink for girls. She has bought some big playroom boxes in the roses design from Ikea and loves them – I knew what she meant as I have the matching fabric from Ikea, which I decided to put on the back –

image

Bearing this in mind, I picked out the two Oasis Trail charm packs by Three Sisters (Moda) which I’ve had for ages and sewed them together in traditional simple patchwork with an off-white border. I still maintain  that 3 Sisters’ fabric is the softest moda fabric hands down – lovely to work with.

image

This was my first opportunity to use my new basting gun – a microtach gun by Avery Dennison so I was a bit excited! Can you see the little black tacks which look like tiny ants? Those are tacks that the gun puts through the fabric layers when you are basting. They are very fine plastic, and come in white (so hard to see to remove when you are using light fabrics like these!) or black – and the gun is easy to use – point the needle of the gun into all three layers of the quilt sandwich, pull trigger, and pow! It’s in place. (A very gentle pow by the way. noone will be calling the police on you). I usually use pins to baste, but they were interfering with my quilting flow, as I had to stop and take them out – and I kept breaking needles when I missed taking them out… Not so with these – you can quilt over them if you need to, and they don’t get in the way. Did it stop the slightly jerky edges I got when I had to stop to remove a pin when stippling?

image

Yes, I think so; although maybe noone else noticed those things, I did.  And the quilting experience was MUCH nicer. The only annoying bit was removing them – hard to see, so you have to be careful, and you cut them out – fiddlier and more time-consuming than pins, but I did it methodically whilst watching TV so it was pretty relaxing. I think I will continue to use them over pins purely because it’s so much easier to quilt with them.

So here’s my patient husband, holding up yet another quilt, this time in Maisie’s mummy’s taste – size 42” x  51”. I used Quilter’s Dream Orient batting for its properties of washability and warmth. So soft and silky too!

image

Having experienced years of miscarriage before Kiddo arrived, I understand how it tortures a very maternal woman not to have a child, a gaping hole which just can’t be filled even if everything else is great. It’s not rational but it’s all consuming, and vanishes once you hold that child in your arms. It was so joyously uplifting and rather moving to meet this baby and mother, so obviously in love with each other, and a real privilege to sew up an heirloom for Maisie, which I hope she will treasure for many years.

Until the next time,

Poppy xx

Vintage Modern Ruby Stars – Charm Pack Busting HST pattern #2 + tutorial

This is a story about Mojo. About abandoning a project for years and ressurecting it, with the bonus of ridding yourself of the nagging guilt that there is abandoned fabric in a box in your house.

Far, far too long ago I bought a Ruby layer cake, used half of it in a well received baby quilt… and then got stuck. Until now:

image

Ruby by Bonnie and Camille for Moda Fabrics was an instant hit with quilters when it came out several years ago, and I was instantly seduced by the bright fresh colours – the red and aqua mostly, which was very “in” at the time, and the retro flowers…

But you know, although I rarely say this, I wasn’t as wowed as I wanted to be by the collection. It’s such a modern classic now, and so much beloved that it feels sacrilegious to say it; in hindsight I really should have sold it on to someone who did feel the love. There just seemed to be the wrong balance of what I think of as “headlining patterns” (like the flowers) and “supporting patterns”, as in there were just too many mild geometric patterns which I wasn’t all that enamoured with; it was like there was just too much filler. Too many just-okay supporting actors and not enough Daniel Craig.

Daniel Craig.

Anyway, back in Ruby land. Eventually I chopped the equivalent of a charm pack up into HSTs as below:

Quick method to make 4 HSTs from 2 charm squares:

  1. You take two 5” charm squares, one coloured and one white (or one “cool” and one “warm” coloured)image
  2. You put a coloured charm over a white charm and sew 1/4” seam allowance all round the edgeimage
  3. Rotary cut along both diagonalsimage
  4. Open them up and you have 4 HSTs – although beware they are cut on the bias and so can stretch.image
  5. Trim off the dog ear and you’ll have four of these:image

    They measure about 3.25” square, you should probably trim them to 3” square or something at this point, but I didn’t and it was fine. And the quilt police did not appear, although it felt like I was saying “Candyman” three times in a mirror… 42 squares in a charm pack will yield 168 of these. I’m not going to lie to you it was DULL. But so satisfying to have a big pile of HSTs to play with at the end!

… And so I merrily played. And played. I had meant to do pinwheels, but was underwhelmed and less merry. So I picked out 144 of them (the equivalent of using 36 coloured and 36 white charm squares) and sewed them together into nine 4×4 star blocks. You can see from the photo that once you have HSTs putting together the stars is really easy – once I’d laid the HSTs out, I sewed them in rows, then sewed the rows together to make the block.

image

I was really very pleased with them and got them out at intervals to look lovingly at them, but mostly they stayed in a box, languishing. I’ve just looked at my flickr stream and it was 2 years ago I made these blocks! All because I wasn’t feeling the Ruby-love, had one Ruby charm pack left to add to it and was wishing I had just sewed them into square patchwork for a baby girl. But now and then you have to slap yourself out of your quilterwhinge and wo-man up, don’t you? So eventually I dug them out and promised to do something with them.

image

Firstly, I laid my blocks into a 3 x 3 grid, added white sashing and red cornerstones. The sashing is 2.5” wide and cornerstones 2.5” square (unfinished).

image

image

And added a 2.5” (unfinished) white sashing border round the edge followed by a 2” inner border of the red main floral Ruby fabric which I love so much. Finally another 2.5” white border, ready for piano keys.

…and then realised my issue was always going to be my feeling that there was a paucity of interesting prints. So I bought a Vintage Modern charm pack – now THIS one is GORGEOUS! I love it. It’s like Ruby plus. Uber Ruby. Anyway, so I mixed my remaining ruby charm pack and vintage modern, cut them in half and made a piano keys border. i used about 54 (maybe 56) charm sqaures for the piano keys border.

I mentioned how to make a piano keys border here, in case you wanted some instructions:

https://cuckooblue.co.uk/post/77412217918/starflowers-chain-quilt-charm-pack-busting-hst

Now I love it. I really do. The mixture of the two collections is great and  the quilt has some “oomph” I think. I’m sure I would have loved it even more with a little Vintage Modern in the stars, but you can’t have it all.

image

So, from what I had left over, I seem to have made this quilt with 92 coloured charm squares (and 36 white charm squares plus sashing and borders etc); 36 of them were for the HST star blocks. The quilt top measures about 60” square. I was quite glad that I needed to get some more fabric to make the piano keys border as with the addition of the Vintage Modern I think it ended up being something rather yummy, even against a honeycomb grey house in a weak February Scottish sun:

image

Here’s to abandoned WIPs – sometimes they can surprise and delight you. And here’s hoping your WIPs, whatever they may be, are bringing you much pleasure.

Till the next time,

Poppy xx

*Edited*

p.s. My friend saw this post and sent me a photo of the baby quilt I made for her daughter 2 years ago in Ruby – am now thinking I was a bit harsh on Ruby! Pattern is “flowers in the attic” by Sweetjane on etsy, batting is high loft fire retardant polyester. image

p.p.s. Edited in 2015 – you can see the finished quilt here if you like:

Vintage modern-ruby stars quilt – finally finished!