Hello lovely creative types, so… how best to gloss over my prolonged bloggy abstinence? How about we make up with a tutorial? You might not need one as it’s pretty simple, but you know, since I took pictures…


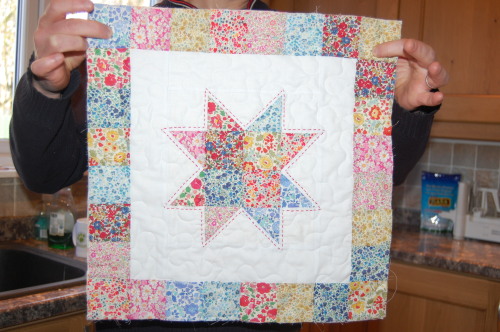
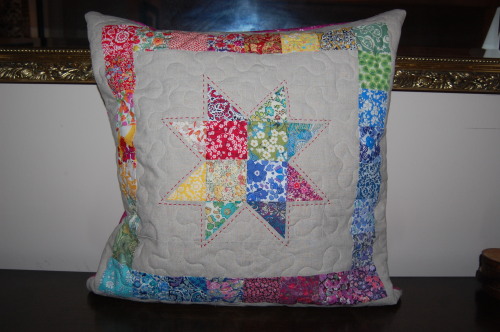
This is Liberty of London fabrics and linen. The pattern was actually born when i decided to make a thank-you present for my lovely neighbour who let me use her shower for 2 weeks whilst our bathroom was ripped out and replaced. I now have a hotel bathroom! I’m so tempted to hold dinner parties in it – it’s the nicest room in the house… Anyway, she is more traditional, so I made her this:

This is made with Kona snow cotton… and Liberty fabrics I actually bought at THE REAL LIBERTY OF LONDON SHOP. In London no less. I was slightly in heaven. But also a bit overwhelmed by all its beauty after this pilgrimage (the shop itself is just aesthetically gorgeous)… and by the prices. I felt I should buy something so bought a little charm pack of 36 2.5″ squares, although I had to add 4 more from stash to make this. I must tell you though they came from Alice Caroline Supply (http://www.alicecaroline.co.uk/) and are cheaper to buy from the website. But that wasn’t really the spirit of it all was it? My neighbour was suitably pleased.

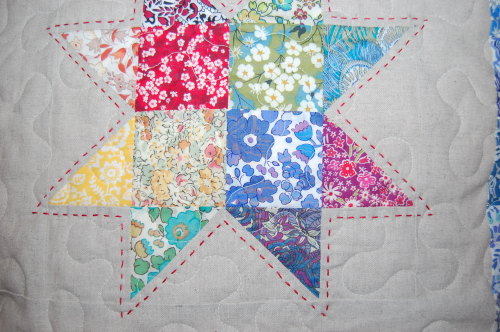
Bit of wobbly hand-quilting action going on there.
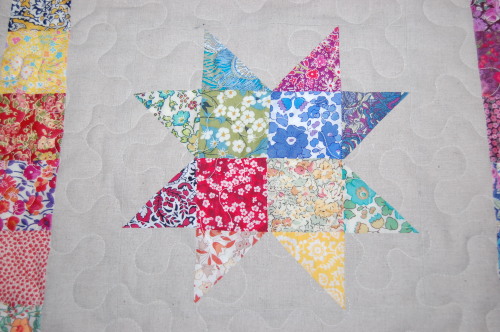
But I wasn’t thrilled to be honest. I thought that the patchwork border got lost round the sides of the cushion. Amateur. This is what it looked like before it became a cushion – I thought it would make a pretty mini-quilt or wall hanging…
See what I mean? So I was a bit disappointed. Anyway, I thought I would try and fix it with an extra row of sashing:
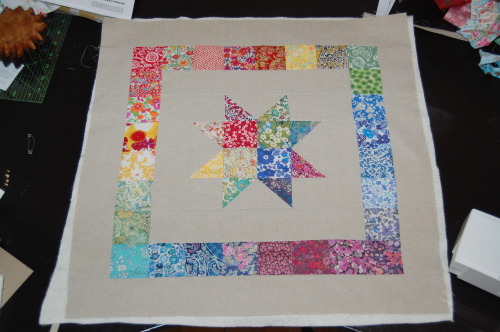
And certainly you can see it better. but if you decide to make one, you can decide on how you like it! So, for many folk, that will be it as it’s quite simple construction and with a little experience it’s straightforward to work this out, but as sometimes it’s nice to work from instructions, here goes! This is for the Liberty and Linen cushion. Clearly you can make it in anything you like – a moda mini-charm pack and white solid would be nice.
To make the patchwork cushion front, you will need:
- A 10″ piece of Linen (44″ wide, I’m assuming your solid comes as 44″ wide)
- Forty 2.5″ x 2.5″ Liberty or patterned fabric squares
- 24″x24″ square piece of batting (I used cotton)
- 24″x 24″ square piece of cotton backing fabric (this will be on the inside of the cushion, so it doesn’t need to be too nice)
- rotary cutter, ruler, scissors, thread, sewing machine, unpicker (you won’t need that) etc
Cutting instructions:
Let’s cut all our fabric up first.
1. Cut the linen fabric into four 2.5” x 44” strips.
2. Strip 1: cut into
Four 2.5” x 2.5″ squares
Four 2.5” x 4.5” rectangles
One 2.5” X 13.5” rectangle
3. Strip 2 : Cut into
One 2.5” x 13.5” rectangle
Two 2.5” x 10” rectangles
4. Strip 3: cut into
One 2.5” x 22” rectangle
One 2.5” x 18” rectangle
5. Strip 4: again cut into
One 2.5” x 22” rectangle
One 2.5” x 18” rectangle
You should now have linen cut into:
4 x (2.5” x 2.5) squares
4 x (2.5” x 4.5”) rectangles
2 x (2.5” x10”) rectangles
2 x (2.5” x 13.5”) rectangles
2 x (2.5” x 18”) rectangle
2 x (2.5” x 22”) rectangles
6. And your 40 Liberty 2.5” x 2.5” fabric squares (either buy as a mini charm pack or cut these)
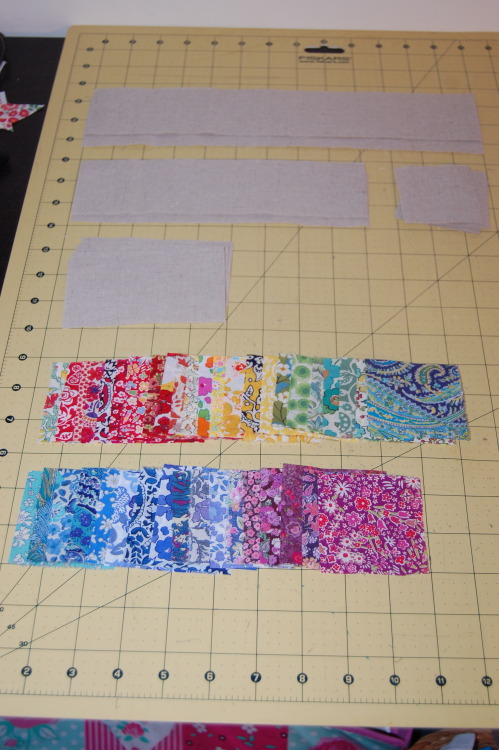
Photo shows my cutting in progress. If you think you’ll get confused, label each pile’s measurements with a scrap of paper. I started to arrange my Liberty fabrics in a rainbow.
Layout
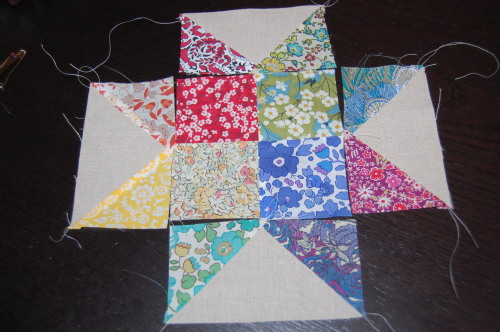
Now arrange your layout as you like it. If you are going for random, this will be easy, you won’t need to lay it all out, you can just start sewing! But I did this:

In the centre, the top two squares will be the top two points of the star, the bottom two will be the bottom points of the star etc. The 4 in the middle will be aa 4-patch which makes the centre of the star.
I think of a rainbow (unsurprisingly!) when thinking about which colours go together. Red – orange – yellow – green – blue – dark blue/indigo – violet/purple – red to enable the colours to meld in a natural way. Obviously orange is made from red and yellow which is why it’s in between them etc, so it works better than red and green next to each other for example, when green has no red in it. Anyway, have a play around until you like it.
Making the patchwork star centre
(BTW I’m not generally a big presser until the end out of sheer laziness, but with this, given it’s going to be a centrepiece and small, I pressed at almost every stage. It keeps everything neater, there’s no doubt.)
1. Sew your centre 4 patch, first by sewing 2 squares together, then the second 2 together, then join them as a 4 patch. Press.

2. The star points are flying geese rather than HSTs – much easier. You are aiming for this:

This is how you do it:
- Draw a diagonal line in pencil joining opposite points on the wrong sides of each of your eight squares reserved for the star points.
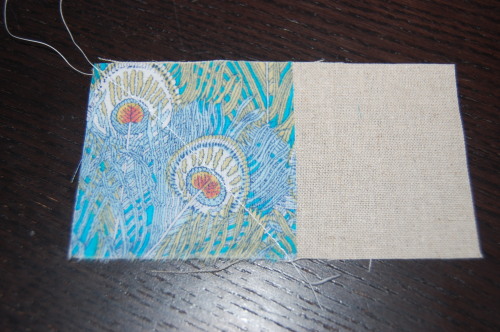
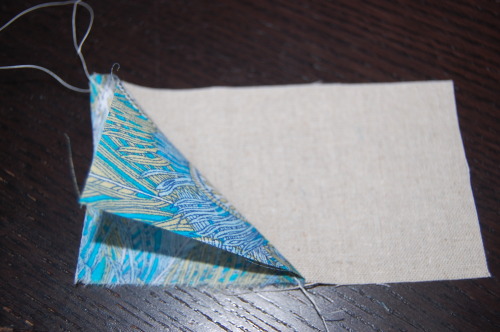
- Lay one of these patterned squares, right side down onto one of the 2.5” x 4.5” pices of linen, with the bottom end of your diagonal line towards the centre of the fabric (it won’t be in the centre). Make sure your edges line up nicely.
- (if you are using directional prints then be careful with this step, you could easily end up with your fabric upside down. Ditto with getting the two fabrics mixed up – I did this and had to change my layout – rather than unpick…)
- Sew along your pencil line.
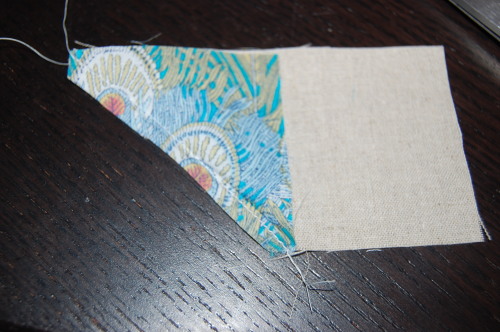
3. Now before you cut off the excess, it’s worth folding down the right side to check you are happy.
4. If you are then you can go ahead and trim that excess piece on the wrong side – both the linen and patterned. You’ll end up with little triangles of scrap for a tiny project. Press.
5. Repeat the process on the other side of your linen rectangle as shown in the picture. Don’t worry that there is a bit of overlap, that’s in the seam allowance when you sew them all together. Press.

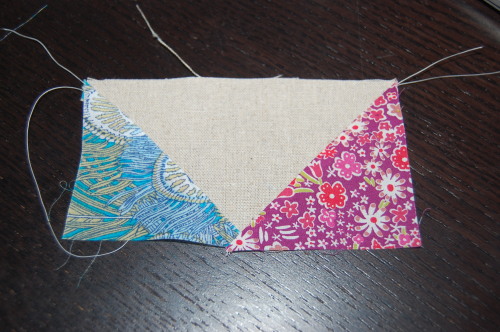
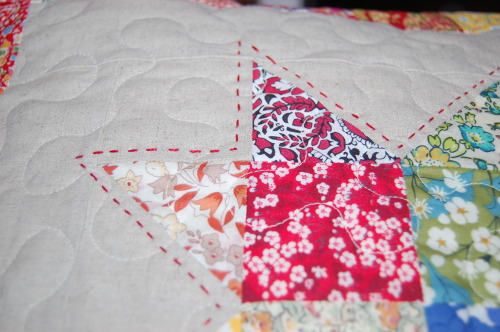
6. And you have one side of your star!. Do this with all 8 points onto your four 2.5” x 4.5” pieces of linen.
7. Now take your top row star points and sew a 2.5” x 2.5” linen square onto either side. Repeat for the bottom two star points.
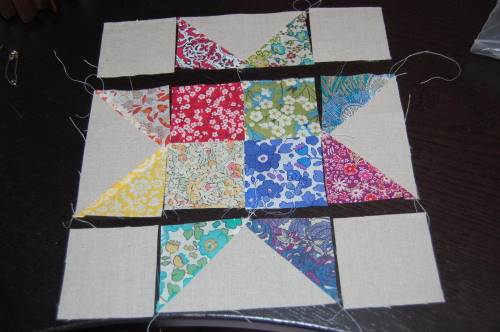
8. Sew your side star point pieces to the centre 4-patch…
9. And then sew the top and bottom rows on.
10. Press everything.
Is it looking lovely yet?
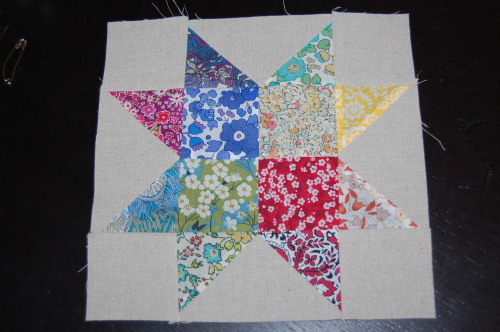
Adding the sashing
11. Sew one 2.5″ x 10″ rectangle to one side of your star. Trim off the excess (I always make sashing bigger and trim in case my seam allowance isn’t always perfect). Repeat on the other side. Trim excess.
12. THEN sew the 2.5 x 13.5″ pieces along the top and bottom, trimming the excess linen afterwards. Press.
Making the patchwork borders
13. Sew your top 8 liberty squares together and put to one side. Repeat for the bottom eight squares. Now make the left side and right sides which will both have 6 squares. Press.
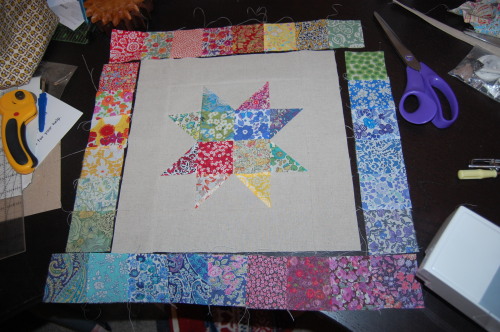
(somehow I managed to sew 9 squares on the bottom row! Doh! Had to unpick after all…)
14. Sew the sides onto your star block first and then press, before sewing on the top and bottom pieces. pin your patchwork strips to the linen first to ensure it reaches the full length, and match up the seams at the corners as best you can. Press.

Now at this point you can batt, back, quilt and bind and use as a mini quilt or wall hanging which measures 16.5” square (above). Or you can add the outer linen border to finish your cushion as I did.
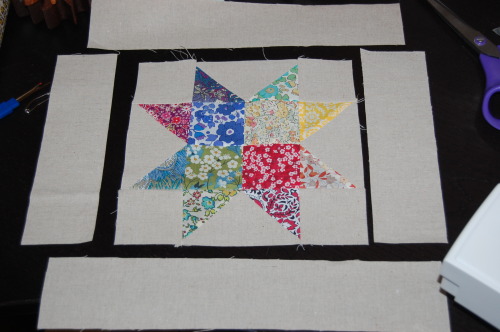
Adding the final linen border
15. This is exactly what you did before. Sew the 2.5” x 18” linen strips onto the sides of your star block and trim the excess.
16. Now sew the final two pieces, the 2.5” x 22” rectangles to the top and bottom and trim the excess. Press everything…

And Ta-Dahhhhhh! You’re done!
17. Now, make a quilt sandwich as normal. Lay the cotton backing fabric face down, lay over the cotton batting, lay over the patchwork piece and smoother everything over to ensure there are no wrinkles. I pinned with safety pins (it’s not worth getting out the gun for such a small piece I found) to baste.
18. Quilt as you like – straight or hand quilting on this would be lovely! I machine- quilted with an overall stipple…
19. And then did a little decorative hand quilting with perle 8 cotton in a red colour.
20. Finally add your cushion back and a zip as I did (or make an envelope back as I showed here: https://cuckooblue.co.uk/post/78267964842/liberty-dresden-pillow-love ).
My back is Heather Ross Unicorn in Purple from Far Far away II – and I LOVE it.

Your cushion cover will measure about 19.5″ square.
Add an insert (go a bit bigger, maybe 22 – 24″ square, as you can see from the picture above, mine isn’t full enough at 20″ square, I’ve ordered another insert) … and enjoy your new cushion!
Well I hope this makes up for the absence. Actually, I Firefox has crashed so many times when I have attempted a blog post, I’ve lost 3 already, and this one crashed at least 15 times. I kept saving as a draft and wrote most on Word and copy/pasted. Anyone else having trouble? I’m either going to have to abandon Firefox (likely) or Tumblr (less likely). As a plus, I have a few posts to share when I resolve this. Meanwhile, hope your creative mojo is mojoing away.
Till the next time,
Poppy xx
Edited: you can see how it looks with a fuller cushion insert and in the sunshine here:

This is absolutely stunning! I was looking through your blog for some quilty inspiration when I came across this tutorial, its so perfect! I think I might make one as a gift sometime soon. I doubt it will look as stunning as your liberty one though – I love the embroidery too!
LikeLike
Dear Anna, apologies for not having replied sooner, I’ve neglected my blog for too long! I’m so delighted you liked the tutorial and hope yours turned out well. Many thanks for visiting! Poppy
LikeLike