Ever had fabrics so lovely that you knew exactly what quilt pattern you wanted to make with them? That would be a waste made into anything else? Even when you are REALLY close to the wire with this deadline and should go for simple?
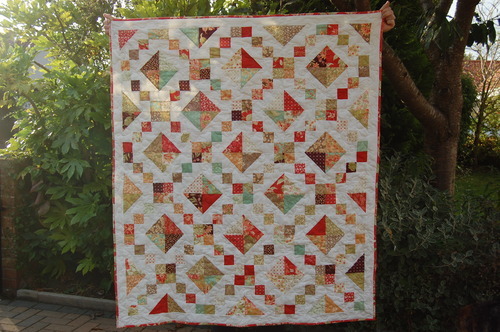
I always thought this was traditionally called a Jacob’s ladder quilt, but I’ve also seen it called a Jewel Box quilt. Given that Jacob’s ladder for me will always be that disturbing psychological horror film where the guy (Tim Robbins) sees peoples heads vibrating left and right superfast and is giving me a shiver just thinking about it now, let’s return to the world of pretty things and call mine a Jewel Box quilt shall we?

My ex- boss has been my biggest fan for ten years and given me so many opportunities in my working life – and he’s moved the family (to follow jobs), turned 50 (!) and is having a 25th wedding anniversary this year. We’re going to their joint celebration this weekend at their new house, and I wanted to give them something for all those occasions. What better than a quilt using one of my favourite fabric lines – Tapestry by Joanna Figuera for Moda. I made another little quilt using these fabrics not long ago; you can see the blog post here https://cuckooblue.co.uk/post/91088996087/quilts-of-gratitude … looks quite different doesn’t it? it is quite a versatile collection, and especially good for gifts where it can look colourful and classic all at once.
There are a couple of ways you could do this, but the easiest way to get a symmetrical quilt is to make this block:

I had two charm packs and some white yardage so that’s what I’ll show you, but there are other ways to do it with precuts. This pattern in the link and photo below uses the same block laid out differently to make quite a different looking (but beautiful!) quilt, and uses a jelly roll and 2 charm packs to make a bigger quilt:
http://www.modabakeshop.com/2011/08/jewels-in-the-curio.html
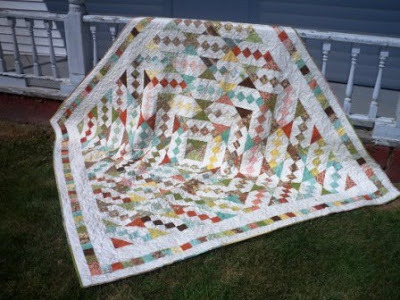
and this one is how I originally thought it would be done from just looking at the design, making 2 different (but simple blocks). http://www.modabakeshop.com/2011/03/sunkissed-jewel-box-quilt . The problem is making all these extra bits at the sides to make it symmetrical. She uses a layer cake to make a bigger quilt. I stuck with the traditional block.
Instructions (sorry I didn’t photograph every step!): For the quilt top you will need:
- 2 printed charm packs (I used Tapestry) or 84 5” x 5” fabric squares – but remove any fabrics which are solid white or cream and replace with another print, cut from yardage. You need the contrast for this quilt.
- 84 solid white or cream charm squares (I cut from yardage)
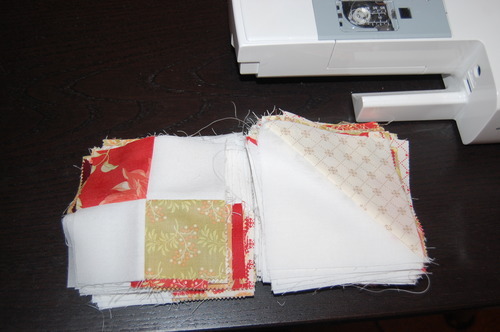
You will use 1 charm pack (42 squares) to make Half-square Triangles (HSTs) with 42 of the white squares
and the other charm pack to make 4-patches with the other 42 white squares.
1. So first the HSTs. Using one printed charm pack and 42 white squares make 84 HSTs with a print on one side and white on the other. I used my sizzix die cuttter to cut them and chain pieced them together, but I appreciate not everyone can or wants to do it that way (I might not next time!). If you need help to know how to make HSTs, try this link below for a picture tutorial from the fabulous Angela Bowman for making 2 HSTs at a time (they are easy!).
https://angelabowmandesign.com/how-to-sew-half-square-triangles-hst-2-at-a-time/
(Essentially you draw a diagonal line corner to corner with pencil on a white square. Lay the white square on the right side of the printed square so you can see the pencil line. Sew a parallel line 1/4” away from both sides of the line. Cut down your pencil line and open with pride to reveal your HSTs. )
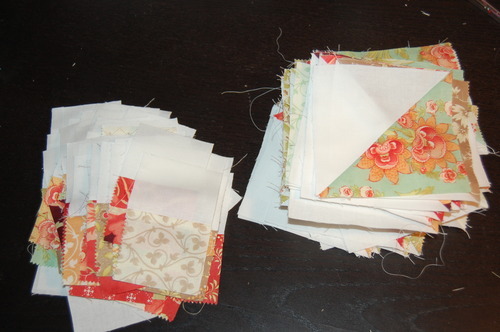
2. Open them up and you should have a stack of 84 HSTs like on the right hand side of the picture below. Press the seams to the printed fabric and trim them to be 4.5” square.
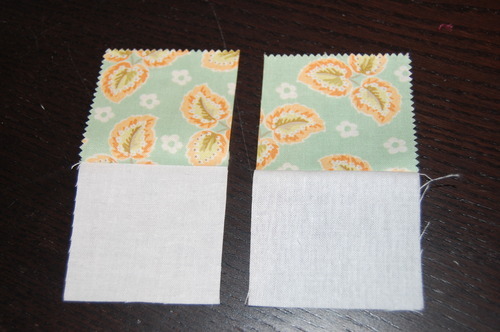
3. Next the 4-patches. Cut all your printed and white charm squares in half horizonally so you have 2.5” x 5” rectangles. Match each printed one to a white one and sew along the longer edge with a 1/4” seam. Open and press the seam allowance to the printed fabric.
4. Now cut these in half as in the picture below to make what I call little domino units:
5. Now take these little domino units, mix them all up and sew them back together to make a pile of 4 patches like these on the left hand side of the picture below. you should have 84.
6. Now make up one unit like this. Very carefully. it has to be this way, trust me, make them just the same and save yourself some unpicking. What? Me unpicking? No not me of course *looks up at sky, whistling innocently*. Sew one 4-patch, orientated like this in the picture below to the white edge of an HST.
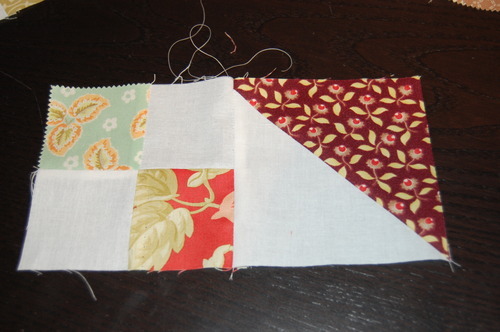
7. To make the block, Make another unit as above exactly the same, turn one upside down and sew together. Make sure it looks like this. It will be your template, and be there in times of doubt! Make a pile of your 4 patches all lying the same way, next to your HSTs, again all the same way as below. Lie them all carefully by your machine.
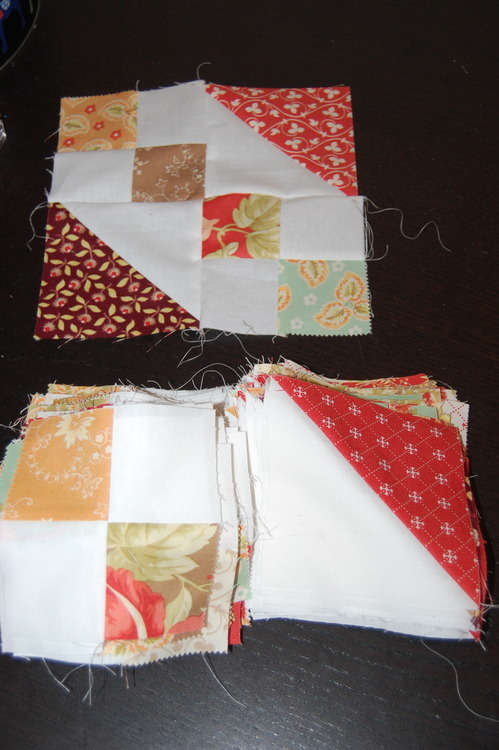
8. And relax! Easy from now on. Chain piece them together into units of 2, then take 2, turn one upside down and sew together to make the complete block. Yippee!
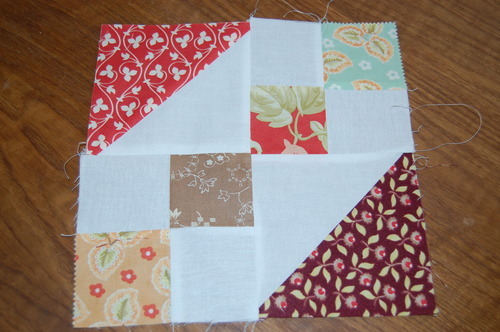
9. Now go forth and play! As you lay them together you can see the secondary pattern energing.

10. Lay out in a 6 x 7 bloack layout:
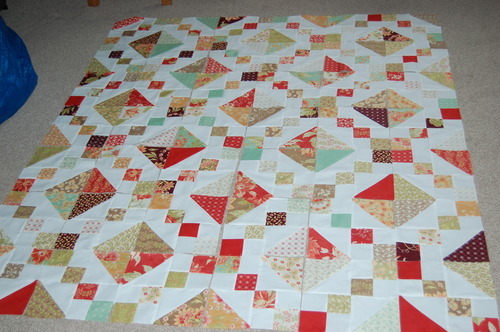
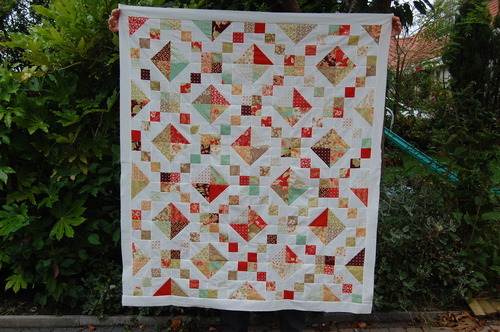
11. Sew them all together. I sewed on 2.5” white borders, and bound in a strong red.
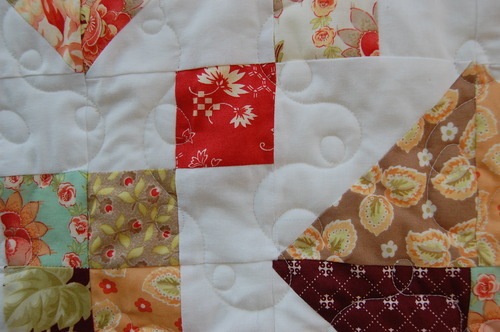
For the first time ever I used Quilter’s Dream wool batting, which is almost impossible to get in the UK… I found mine at www.passion4quilting.com which is a great site with some lovely fabrics at great value. The wool batting was 93” not 122” wide unfortunately, but I have told the shop now, so hopefully the site will be updated too. It is GORGEOUS! The finished quilt has a nice weight to it – it is much higher loft than cotton – and denser than Hobbs wool batting – but also feels much warmer (sewing the binding on whilst watching Tv is a good test of the warmth value!). Machine washable. Easy to quilt. Clung to the fabrics well. My only issue with it was (the price and) that my microstitch basting gun didn’t easily penetrate the batt to take in the bottom layer, and I’m a big fan of the gun now! I have enough for another quilt so will give it another go and report back.
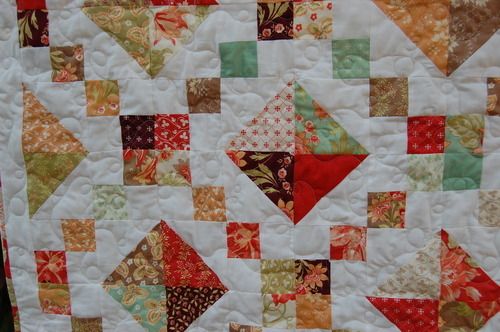
The wool’s high loft really accentuated the quilting – finally I did my New Year’s resolution of abandoning the stipple! I quilted in a loop de loop pattern, with some sweeping lines. It was quite easy actually – much easier than mastering the stipple with its echoing and not crossing the lines (I hate ugly stippling), and I really like the result…although I wasn’t sure at first – I wasn’t used to looking at a non-stippled quilt!
Well, I loved making this pattern, and I’m sure I will do it again. It was less expensive than many quilts of its size as it only used 2 charm packs, and although it is more complex and I like simple patchwork, it still feels very pleasing to me. I’ll have a hard job parting with it, but I’m really happy it’s going to a good home.
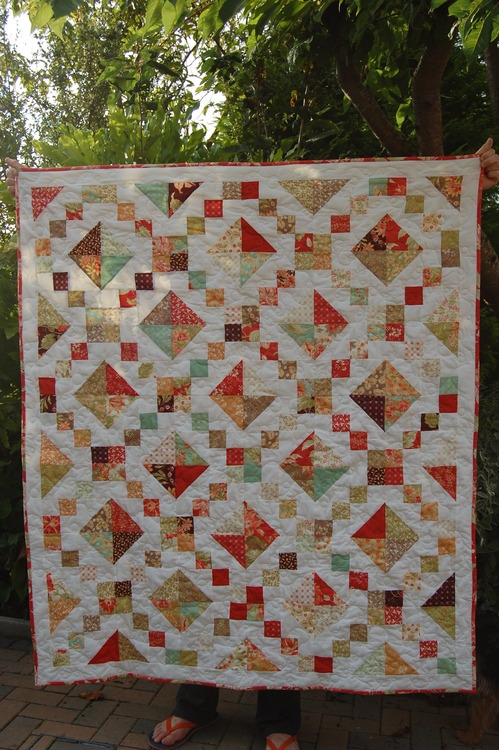
Block size – 8” finished. Finished size 52” x 60”.
Have fun, whatever you’re up to, ‘till the next time, Poppy xx

Beautifully explained. I think this is so easy to get messed up. I am going try it and refer to your pictures often. Thank you for sharing this
Brenda
LikeLike
Apologies for replying so late! Thank you so much, you made my day with that comment, I’m so pleased it helped!
LikeLike
The link to the first Moda Bake Shop Jewel Box quilt is incorrect. This is the correct link:
https://www.modabakeshop.com/2011/08/jewels-in-the-curio.html
LikeLike
Thank you! Yeah, some time after this post was written the Moda Bakeshop site was moved to a new host or something – I thought all my then-saved bookmarks were lost! But they were all the same, as long as you added “.html”. Took me a long time to work that out, finally saw it on a blog post! Anyway I’ve tried to fix some of my old blog post links, but I’m sure I’ve missed loads. I’ll fix this one in the blog psst when I get chance! Thank you again.
LikeLike