Bitten by the tatting bug…

Tatting. Is it just me, or does the name not sound AT ALL like the thing it describes? Things should really. Like wobbly jelly. Sounds like it is. And belly. Well, as a mum I now know why that sounds like wobbly jelly. But tatting?

image

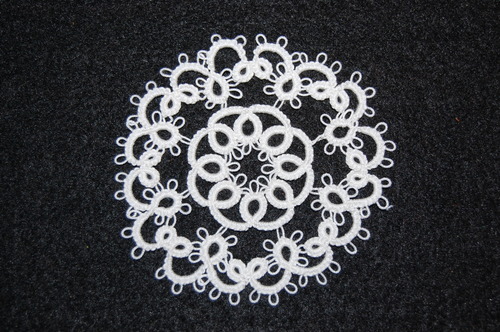
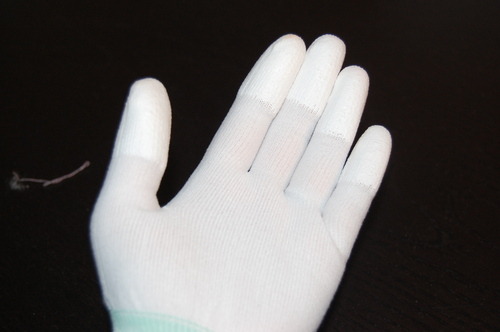
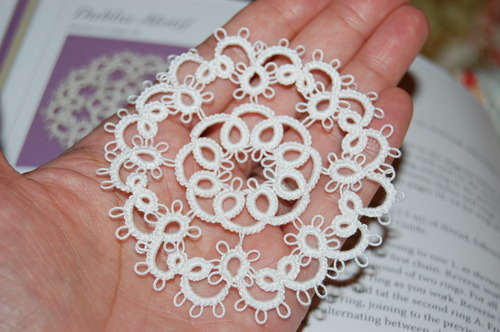
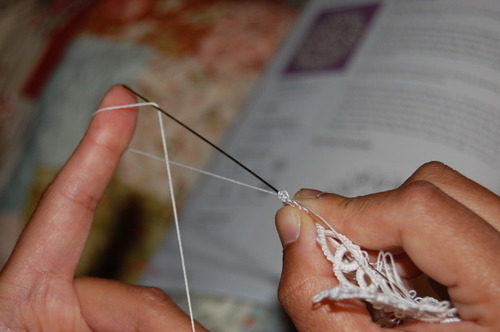
This is tatting. Not some sort of shabby gossipping (tatty/chatting – see where I went there?) – or tapping your feet absent mindedly on a hard surface. It’s a form of lace. This is the above motif on my hand:

image

Yes, as if I didn’t have enough craft and needlework inspiration going on in my head, I dusted off an old craft I learned when I was 12. Tatting is a really really old art, lace made from knotted thread and actually pretty robust because of all the knots. It’s normally made with a shuttle, but I never got the hang of it. I learned needle tatting because it’s MUCH easier. It’s probably not as neat or perfect, but really? Perfect lace? Am I that OCD?

I learned it from this book, although didn’t get that good at it then, it required more patience and time than my 12 year old self was (quite rightly) willing to put in.

image

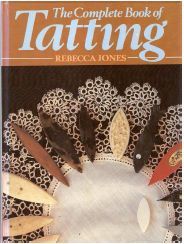
Sadly I have lent out or misplaced this book. Those teardrop shaped things on the front are shuttles, made of everything from plastic to bone. I have always used a darning needle – the needle should be as long as possible, and thin without much of an eye; about the same width as your thread, or not much bigger. I never found the perfect needle for my occasional craft. Until a few weeks ago when I half-interestedly googled “tatting needle” – and it seems in the last 28 years (28!! how can that be?) a couple of shops selling tatting equipment have opened. I got myself a bone-fide tatting needle from here: http://www.roseground.com/ , and some beautiful threads made for crochet and tatting made by “Lizbeth” and started:

image

image

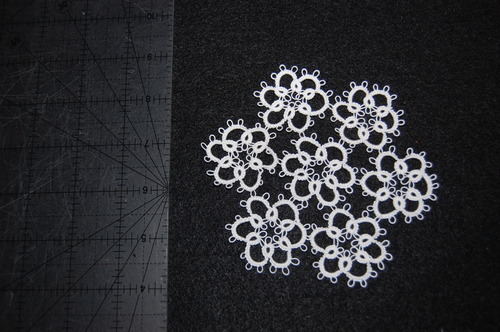
The above is going to have an edge all the way round to make a… doily. I have never had a doily in my life. but seems I am going to change that very soon.

The above 2 patterns came from this book which I treated myself to along with the tatting needle:

image

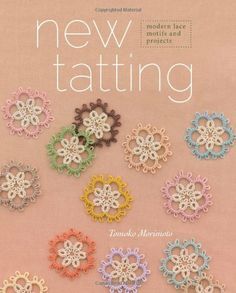
It’s a really beautiful book – BUT the “how to tat” is written for shuttle tatters only. If you can needle tat already, then it has some really lovely patterns. I never learned how to tat with 2 needles, although I think you can – some of the patterns are for 2 shuttles, so if that puts you off then so be it.

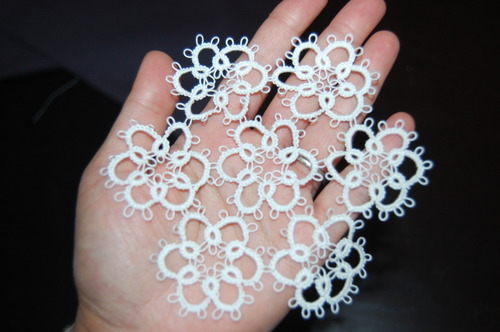
The next 2 are also from the book, although I misread the pattern of the first, so it’s not really accurate. image

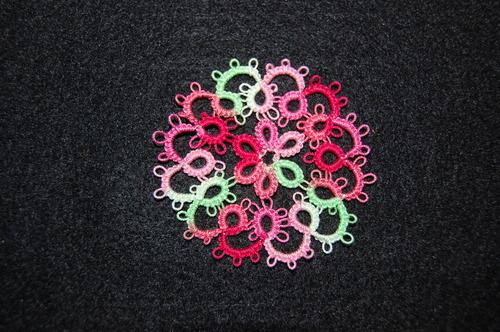
This motif above is worked in LIzbeth crochet thread size 20 in “juicy watermelon”

…and this bookmark is Lizbeth crochet cotton size 20 in “Tropical Punch”

image

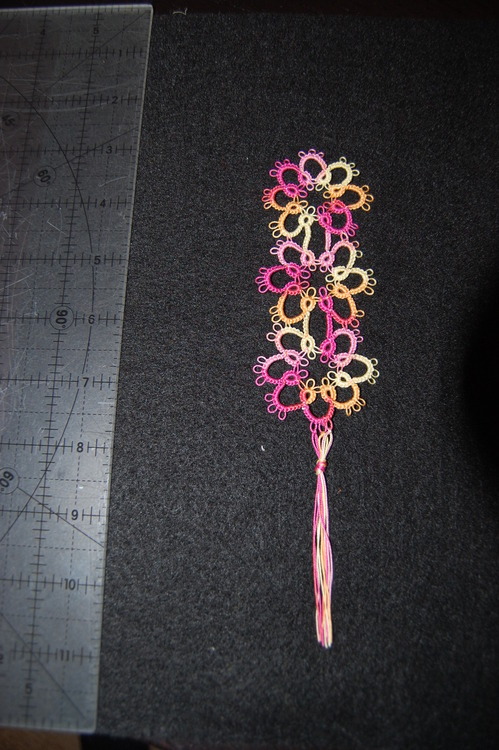
All these have been worked with size 20 thread and a size 7 tatting needle, which seemed to give the nicest result. I tried tatting size 20 thread on a bigger needle (paradoxically a size 5 needle, they, like thread, get smaller as the number gets bigger), but the stitches were loose and the whole thing looked… well, tatty. Boom.

The “brick” of tatting is one stitch only – the double knot, consisting of two halves which you make separately. With needle tatting you put the stitches onto the needle and then slide them off onto thread. Here are some action shots – I borrowed the Hubster’s camera arm to help last night in front of the TV

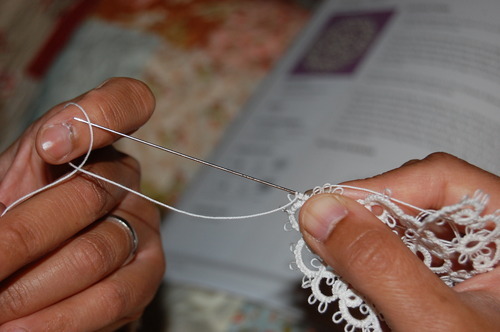
First half of double stitch:

image

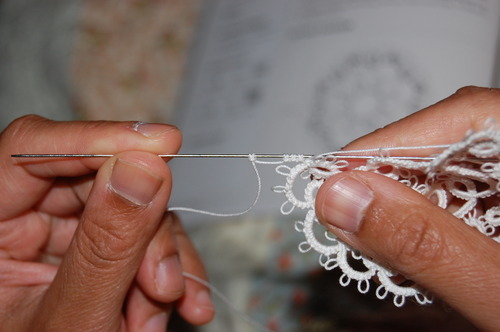
Second half of double stitch

image

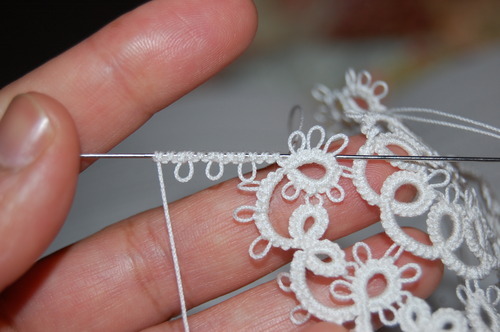
Leaving a space between stitches makes a picot (“pee-coh”) which is a decorative loop of thread which can also be used to join:

image

Some stitches on the needle – when these slide off they will make the next chain:

image

Obviously I just wanted to give you a flavour of the craft – in no way is this a tutorial! I’m not going to lie to you, learning it can be a fiddly process and it will probably take time – and a fair amount of unpicked stitches when you have fogotten to join picots – but it is a cheap, pretty hobby and very satisfying somehow.

image

(A bookmark made with an immediate download PDF pattern I bought for £1.25 from an ETSY seller here: https://www.etsy.com/uk/listing/164157235/5710-vintage-tatting-pattern-for-tatted?ref=shop_home_feat_2 . See, tatting is alive and well!)

If you fancied giving it a go, I would recommend getting a tatting needle and some nice thread, maybe in variegated (changing) colours – the needle was £3 and the thread slightly less. Probably start with a bigger needle (number 5) and a chunkier thread – maybe perle cotton size 8 would be nice and comes in gorgeous colours to make it easier to see when you are starting out. The thinner the thread (and needle) the daintier the tatting. I’m thinking of trying size 40 Lizbeth next. I guess the outlay will be a good book, or finding a good youtube video to teach you. You never know, once Kiddo is settled into school (his second day today!) I might do a wee “how to” series myself! It’s a shame to let this lovely craft die.

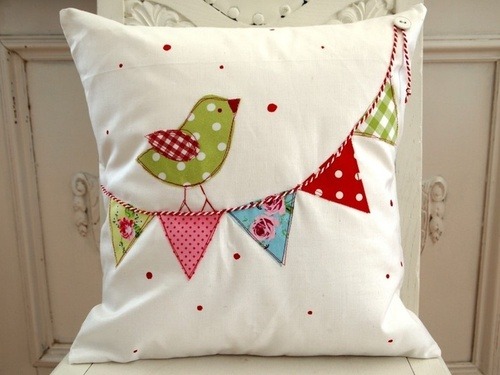
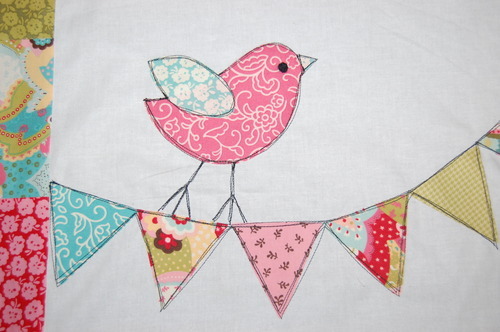
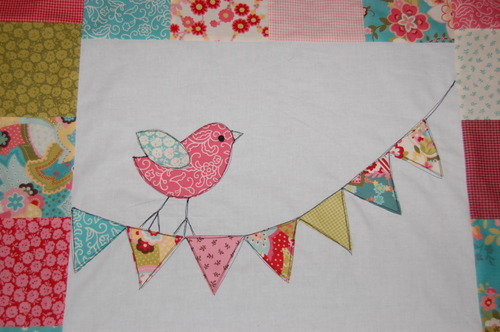
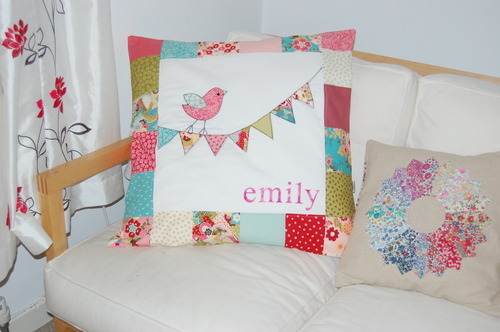
And what am I going to do with all these? I have NO idea. No wonder my practical husband is completely baffled by this! Wait until I sew one onto a beautiful lavender pillow, then he’ll be impressed. Or not…

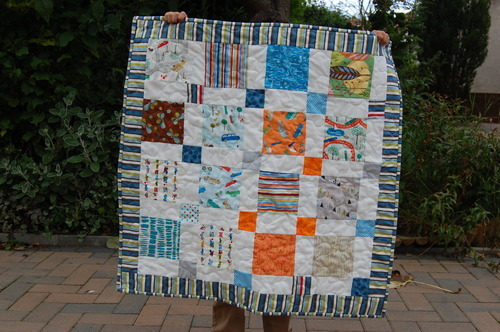
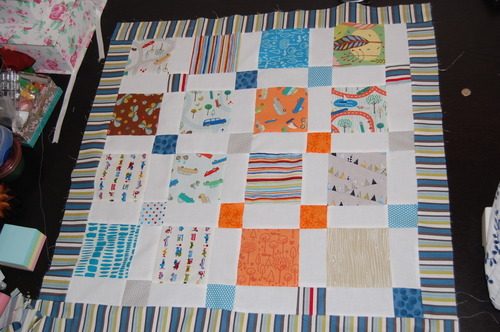
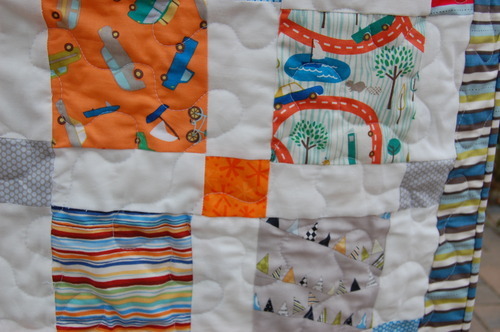
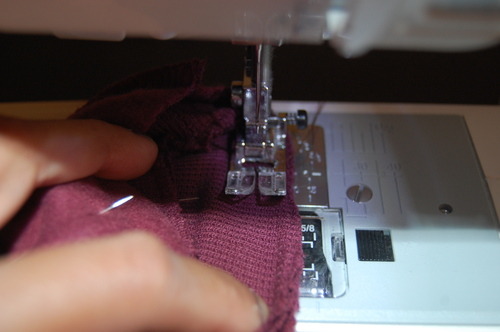
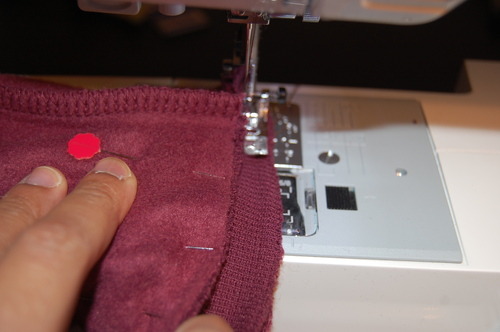
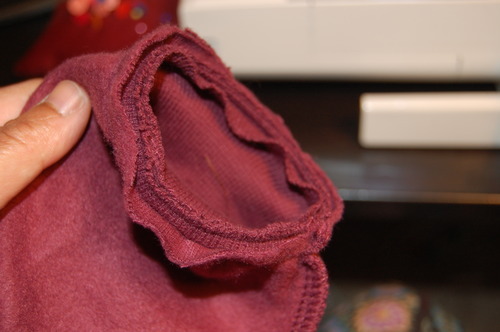
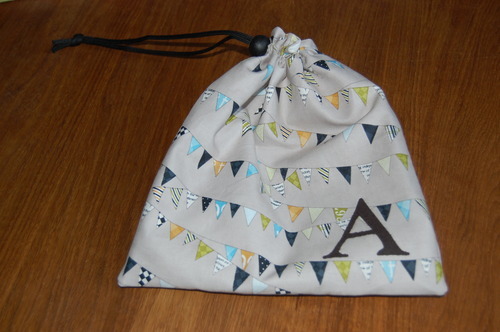
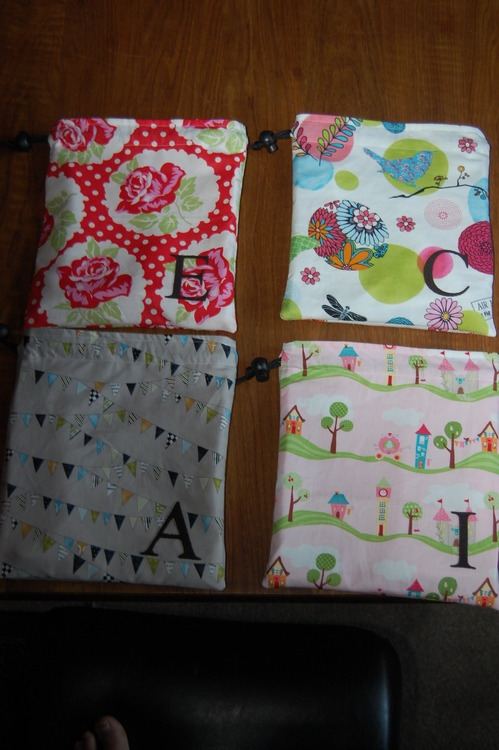
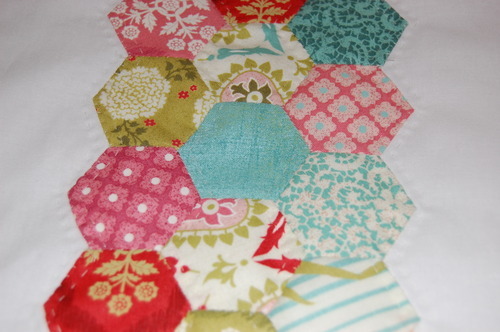
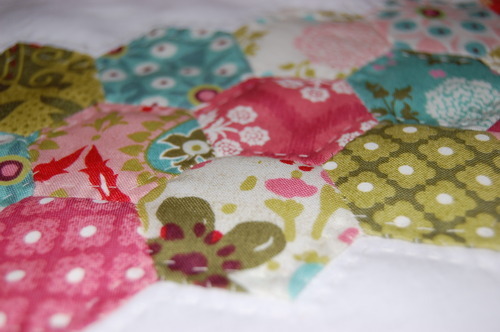
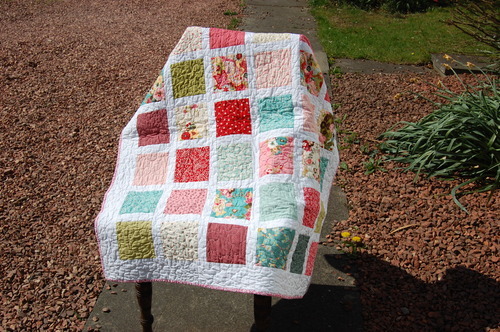
Back to sewing next time, kiddo and his pals starting school has prompted a little flurry of sewing happiness – pencilcases, zippered money-pouches, lunch bags… ahhhh, bliss!

Until the next time, Poppy xx

Rescuing a quilt for a friend

Don’t be fooled into thinking this is a big quilt, kindly held up yet again by my ever-patient and rather indulgent husband… no this is a tiny baby quilt about 30” square, held by a small 4 year old boy who liked the idea of doing Daddy’s job.

image

My good friend has started quilting which has been great for me who can now chatter about fabrics and blocks for hours with someone real rather than virtual – I know, it’s like some kind of old-fashioned idyll isn’t it! Anyway, she decided to make a baby quilt for her neighbour using a Riley Blake stacker called Scenic Route. 

image

So anyone NOT been caught out by the way that Riley Blake 5” stackers have 18 – 25 charm squares max compared to Moda’s 42 in their charm packs? Yeah well, well done if you haven’t. I got stung once (that’s all it takes) – and it seems Alison has just been through that rite of passage.  She decided on the disappearing nine patch which I blogged here: https://cuckooblue.co.uk/post/89599354437/the-nine-patch-disappears-tutorial-and-layouts. But needed more charm squares, so I cut her a few from stash and scrap – Moda’s tweet tweet, makower’s space, moda’s summersville, Moda’s reunion, Riley Blake’s Pirates and a few more. I chose brighter colours as I was concerned that Scenic Route’s colours were pale and might just all fade into the white she intended to use. She did a great job making accurate blocks, and sewed it together…

And hated it.

Hated everything about it. Her love for the fabrics together, pattern, everything had just gone. When I went over for coffee, she couldn’t even bear to look at it, just wanted it gone so she could do something else, but was aware of the money she’d spent and the fact she had wanted to do something for the new baby. She refused to unpick it – just wanted nothing to do with it. After we decided to dump a couple of the blocks to make it square, I said I’d take it as a fresh pair of eyes, and see what I could do.

This is it on my sewing table.

image

It’s really easy to lose the love for a project I think. Sometimes you spend so long in the thinking and choosing of fabrics and have been so excited by it that when it doesn’t turn out as you had envisaged you can come crashing down and lose all enthusiasm for the whole thing. I have definitely been there.

Looking at it objectively, there are some sweet fabrics. The colours haven’t been spread over the top that evenly – mainly the orange, but it’s not awful. The fabrics are too far spaced by all that white to be coherent together, they need to be tied together somehow. The biggest problem for me is the low contrast with the white – and that on such a small quilt, this D9P pattern doesn’t look finished. I think you probably do need to use strong colours when using this much white.

Anyway, I decided on a strong border, which ties in all the colours, and had a lovely piece of fabric from Riley Blake’s Pirates in green, white, brown and blue. I added 2.5” borders:

image

And it definitely improved the quilt I thought. I had wondered if it needed more work, but then decided the border did the trick. I used Quilters Dream Orient batting and a fairly loose meander to help keep the little quilt soft and cuddly – I find dense quilting on a small quilt can make it too stiff. I think a free motion pattern helps to add texture and movement to a simple quilt made with squares, rather than using straight line quilting, don’t you?

image

image

image

The back is a cotton print from Ikea – they used to sell 3 wide width metres on a ream for £5.50 or something. When I saw they discontinued it, I bought the last 2 reams they had. Sadly I only have enough left for one more toddler quilt. But I think it looks great on this one anyway, I hope this little lad grows to like it!

image

I just bound it in the same border fabric. It’s really great how it matches so well with so many of the colours in the quilt.

I gave it to Alison today, and she was SO thrilled. She loved it! I must say, the colours are not my ideal, but she was so thrilled. It just goes to show that sometimes a fresh pair of eyes can make all the difference. And that the emotion can sometimes blind you. I guess if she had put it away she would have done the same thing in the end, but she was feeling the pressure of the baby arriving any minute! It’s why it’s so lovely to have other sewing friends to help out in those moments.

image

I wonder if I should get out one or two of my hidden away projects I lost enthusiasm for and look at them again… Or give them to Alison 😉

Hope your creative mojo is all good! Till the next time,

Poppy xx

Anyone else need to shorten sweatshirt sleeves? A life-hack tutorial

So I appreciate this is a massive step away from what I normally blog about, but anyway, this is what I did today that made me feel proud:

image

Seriously. What do mums do if sewing isn’t their thing? 4 year old Kiddo is starting school in 2 weeks; he’s a tall enough but a wiry little kid rather than a solid/ chunky wee man. Meanwhile his school sweatshirts come in size 3-4 and then 5-6. What the?! Isn’t there a whole age they missed out there? The 3-4 was too tight for him to get on and off himself, so I got the 5-6 and convinced myself he would grow. A lot. In 2 months.

He hasn’t.

He’s played, he’s eaten (well as much as he’s ever going to), he’s slept, he’s run, climbed, learned and laughed (a lot) – he’s done pretty much everything a kid should. Except grow those arms! The age 5-6 is comfily baggy but not outrageously big everywhere else – except for those neanderthal arms which are literally falling  way down below his hands all the time. Grrrr. I defy any child to learn to write or draw like that. And I defy any parent to teach a 4 year old boy to roll up their sleeves. Teaching them not to shout “poo-poo pants!” in an alarmingly mock-tourette way to break the tension of formal silence is enough achievement for mums of small boys to feel they deserve some kind of award.

So here goes if you have a similar problem, or maybe need to buy a bigger size for your child’s body but struggle with the long arms. Now, because although I’m not in ANY WAY a clothes maker/ alterer (a sewist but rarely of clothes) and I winged it, I’m calling it a life-hack. And because that sounds unashamedly cool. If you are comfortable sewing with a machine it’s pretty easy (I think). I was lucky to have a secondhand sweatshirt to practice on before cuttting up the new one, so you might want to do have a practice run too (though my prototype run turned out fine too).

DISCLAIMER: I’m just telling you what worked for me, and won’t be held responsible if it doesn’t work for you 😉

How to shorten a child’s sweatshirt sleeves

1. Right. Well this is what the original cuff of the school sweatshirt looked like. My cuff looks smaller afterwards, because I took a bigger seam allowance than I probably needed to, and I didn’t topstitch afterwards (because that was never going to look this neat).

image

2. Inside out it looks like this:

image

3. Arm yourself with a good sharp seam-ripper – and unpick all those stitches. You want to unpick all the stitches which attach the cuff to the sleeve. It takes a while. Have a cup of tea to hand, maybe some tunes and take your time. You especially don’t want to damage the cuff itself – the sleeve you’ll be cutting off anyway.

4. Done? Good. At this point you need your model. Bribe child with chocolate to get him to put on the sweatshirt and stay still for 30 seconds whilst you decide where you want your new sleeve to end.

Mine was about 3 and 3/4 inches from the end of the sleeve*. Next subtract about 3/4” from that to allow for your seam allowances when you sew your cuff back on. So I needed to cut off 3 inches. I left the sleeve just slightly long (maybe up to his first knuckles) to give some growing room but keep his fingers free.

(Note: I said subtract 3/4” because I was later going to sew my cuff back on with a 3/8” seam allowance, so the maths works for that allowance. If you don’t want to shorten your cuff as much as that, you could use a 1/4” seam allowance to sew the cuff back on; in this case you only need to subtract 1/2”  from your cutting measurement* here. Etc. It’s a small difference, not sure how much it matters, but thought I would be accurate!)

5. image

On the left is the sleeve still attached to the shirt. In the middle is the bit I cut off. I just got my ruler and cut parallel to the unpicked line where the cuff was. I didn’t worry about the fact the sleeve was sloping or whatever. it was parallel, so it would do. On the right is the cuff. See how small it is next to the sleeve? Obviously that’s because it’s a cuff and so is stretchy. Don’t worry about that, it all works out fine…

6. And this is the sleeve (on the left) that I am going to attach to the cuff (on the right):

image

Freakily different sizes huh? It didn’t matter too much for this sweatshirt as it wasn’t too much bigger than the original difference but see below if yours is a much bigger difference.

(NOTE: If you were really cutting a lot off the sleeve so the sleeve was really wide and the difference between sleeve and cuff was much bigger than the original, then you will need to take in the sleeve a bit, otherwise you’ll get a bunched-up “puffy” look round the cuff. Especially for an adult shirt. Turn the sleeve inside out and kind of draw a gentle line from about the elbow to the cut end of the sleeve, aiming to make the cut end of the sleeve about as big as it was before you cut a big chunk of sleeve off. You might want to do it on top and bottom of the sleeve which shouldn’t be too obvious. Sew along your drawn lines. Make sure you do exactly the same on the other sleeve. I wasn’t too concerned about it as it’s for a 4 year old boy who really couldn’t care less – and it all worked out fine, but you should bear it in mind if you think it’s going to look too bunched up)

7.  Turn your sweatshirt inside out. Put the cuff into the cut end of the sleeve, raw edges matching at the top – and the seam line matching. There should be no “right” or “wrong” side of the cuff as they seem to be double sided and folded over, but if there was, you would put right-sides together.image

8. Match up the seam lines on one side and pin:

image

image

9. Now put your fingers inside and stretch the cuff so that it lies flat against the inside of the sleeve:

image

10. …and pin the opposite side, then pin all the way round. Pin like crazy baby! The more the better.

image

11. And when you let go, the cuff will spring back giving a puckered look. This is completely fine..

image

image

12. Take to your trusty sewing machine. At this point I  wished the sleeve went round my machine, but the sleeve diameter was too tiny. Still I was just a bit careful and it was very straightforward. I sewed on the inside of the sleeve/cuff as Ifelt I could see better what I was doing that way and ensure I wasn’t sewing through the other side. Taking a 3/8” seam allowance (you could make this smaller if you like), carefully sew the raw edges of cuff and sleeve together. Make sure you stretch out the cuff to ensure the sleeve is nice and flat as you sew. The cuff will spring back just fine.

image

image

Sorry, these are not natural sewing pictures – I was using my right hand to take a picture and clearly not actually sewing. You can see the sleeve fabric is not bunched up and the cuff fabric is stretched to lie against it nicely. sew all the way round.

13. Backstitch to finish and take it off the machine to admire, and check the right side looks good. By the way, I used a universal needle, polyester thread and a straight stich with normal tension and pressor foot and it was all OK, but you could test it all on the scrap you cut off the sleeve if you like.

image

image

14. That is still the reverse by the way. Pretty! Not. Never mind, put it back on the machine and zigzag round to finish the seams. I warn you, on my practice sweatshirt I first did a fancy tight overlock-type stitch, and it made it very stiff and possibly annoying to wear I’m guessing, so on the others I just did a gentle, fairly loose zigzag. To be honest the raw edges felt nice and soft and I almost left it like that for comfort, but I wasn’t sure how long it would take before they unravelled, so chose to zigzag the edges.

image

15. Turn inside out – and beam. Try it on your wee man who will say “Oh! It’s good!” quickly followed by “I want to take it off” before running away to play some more.

image

16. Hear M-People’s song warbling round in your head “What have you done today to make you feel proud?” – and think “This.” 🙂

Back to prettiness next time folks. Meanwhile enjoy the summer and whatever it is that makes you feel proud.

Till the next time, Poppy xx

Minute Monday – A Fun Kindle Case

My father in law kindly looked after our dog at short notice so we could have an impromptu holiday… that deserves a wee present, right?

He had actually asked me to make him a Kindle case – apparently he felt his leather bound book-style case was too bulky, and he preferred to read the kindle as it was. Just exactly what I felt before making my own (and then several since as is always the way!). He also liked the idea that my cases are waterproof in case of spillages – coffee, waterbottles, water splashed on the poolside in that fantasy bahama life we all wish we led. Water proofing felt important to me too – we must be a clumsy family, though clearly not through genetics..

I adore this fabric. My father-in-law has a definite sense of fun and I thought this fabric managed to stay on the right side of fun without being too childish, and masculine without being too sombre. I could have chosen Harris Tweed, or a black or grey damask – or all manner of lovely masculine fabrics, but somehow they are just not quite HIM. Yes, sure, for luggage or something, but he’s definitely a slightly quirky accessoriser.

The fabric is called Rocket Ads in navy colourway (it also comes in navy and red) and is by October Afternoon for Riley Blake fabrics. It’s so deliciously retro.

The case looks bigger than the kindle itself – it is bigger, but because I use a felted wool as lining fabric (like coat fabric) which is pretty thick, it’s a nice cosy fit in there. It is padded too for extra scratch-resistance and has a waterproof interlining so needs to be a bit bigger on the outside. It’s still actually a slender handsized thing, because the kindle is actually quite wee.

But my own case is actually smaller, slimmer, neater, a little more made-to-measure – I used interfaced soft dress fabric as the lining and it’s just fine. I’m thinking I might return to that… I see some experiementing in my future.

Meanwhile, more importantly my father in law loved it – he says he’s been reading all the wee adverts all over it. Er… I think he’s supposed to be reading the kindle…? One challenge done. Except now he’s asked me to make a Kobo case for his girlfriend “my choice of fabric” as a surprise for her. Yikes. Ok. Um, but what’s a Kobo again…? Might be in trouble with this one!

Till the next time, hope your craftilicious projects are all going well,

Poppy xx

Quilts of Gratitude

image

Teachers… I’ve always had a lot of respect for them. And now even more.

Last year my little boy started at a local nursery but was utterly distressed to the point where his behaviour changed profoundly (read “lovely boy became a rabid, savage, tantrumming monster”), following which I took him out and put him into another nursery in a neighbouring village with – seriously – THE MOST amazing nursery teachers in the universe. So kind, yet firm, warm, confident, listened to us, listened to him, encouraged us to become part of their school and community. He settled within a few days. Not one tear or tantrum; he has completely thrived. They turned our family around, took out all the worry and stress we were feeling for our son. They gave us so much. All I could give them both on his last day of nursery were quilts:

image

So don’t get me wrong. Anyone who has made a quilt knows this is not a small gift, or even an inexpensive gift. But I was so glad I could give them something in which the evidence of how much I appreciate them was in every little stitch. Of thousands of stitches. Even then, it doesn’t convey all my gratitude (although they were overwhelmed as you would expect lovely folk to be!) – but short of giving them our car, this was the best I could muster 😉

Anyway, the first quilt was a slight variation on the Little Lady Patchwork’s “Charming Stars” quilt pattern from Moda bakeshop, to be found here:

http://www.modabakeshop.com/2010/10/charming-stars-quilt.html

image

As you can see, instead of doing all stars I did 5 star patches and 4 nine-patches. It went together very quickly, partly because charm pack nine-patches are superfast – I didn’t think too much about fabric placement, just went with a variety in each block. Quick, and I think I prefer it like this – now how’s that for a bonus 😉

The fabrics are “Tapestry” by Fig Tree Quilts for Moda. It used 2 charm packs (well, 77 charm squares to be exact), some white cotton and 12.5” of a border print. The fabrics are so timeless, as they always are with Fig Tree Quilts’ collections, but not as “sweet” as some of the collections; she lives in a farmhouse, so I thought this might fit in with that traditional feel. The quilt measures about 52” square.

image

Do I have any regrets about this quilt? Did I preempt a “…brown border??” question which might have been forming in your head? Well, although I like the quilt a lot, especially in our house and double-especially in the flesh, I can’t help but wonder if I might have preferred a different coloured border. I had some red, and some of the minty bluey colour. I think it would have changed the feel of the quilt completely. On reflection though, this will fit into a farmhouse better than the other options. I now can’t work out if that final answer is the truth or if it’s my natural “life’s too short to go round regretting small stuff you can’t change” mentality.

image

You might have seen this second little quilt in the making a couple of posts back, where I showed how to make it (https://cuckooblue.co.uk/post/89599354437/the-nine-patch-disappears-tutorial-and-layouts). I actually really love it finished – although this isn’t a quilt which really works in my house, I found it a tiny bit hard to let it go. This is partly because it is made with a very rare, older, gorgeous Fig Tree Quilts line (Strawberry fields) as well as with a more recent one, Honeysweet. The two collections mixed beautifully. The following pictures show some of the so-pretty-my-heart-aches prints:

image

image

image

I showed them to a few folk, and this one in particular stole several hearts. I bound it in a slightly retro feel blue floral from their “Whimsy” collection, that I had in stash, and it was perfect. I hadn’t really thought I would like this D9P pattern so much, but quilted up it looked really great. The top took much longer to make than the charming stars one, which surprised me somehow – silly really, you make blocks, cut them up and re-sew them – how did I not think that might take a while??

Both quilts measure about 52” square – lap size/ sofa throw size, perfect for those chilly winter evenings in front of the TV in Scotland. Both used 2 charm packs. I used my favourite Quilter’s Dream Orient batting in both, for softness, warmth and washability, used plain white backings (to keep costs down in truth) and stipple quilted both. I resisted washing them, although I love seeing them all crinkly; in this country where the lovely crinkliness of quilts is not well known I think it’s better to give them looking “new” and let them wash them and acquire that beautiful antique look. For once I did put a label on saying thank you and the date – I hope they bring these wonderful teachers warmth and comfort for many years to come!

image

As an aside (kinda), all the other parents felt the same way about these teachers; the nursery parents got our kids together and did fingerprint trees, got them framed and gave them to the teachers all together on the last day of nursery. They were so touched. All very emotional, but in a good way.

I downloaded the finggerprint tree here – edited the legend in Microsoft “Paint”, printed on some nice ivory card and used a lovely non-toxic ink called Tsukineko Memento ink (colour Lilac Posies). The kids did 4 fingerprints each and I wrote the name by one of them. We all really loved how they turned out.

http://onefabday.com/diy-project-free-fingerprint-tree-template/

Now onwards to school and beyond… I’m not sure if I’m ready for this! How can my baby be growing up so fast?? Thankfully at the moment, the thing he seems most aghast at when listening to the story of the three little pigs is not that a wolf can blow down a house and try and eat little talking pigs, it’s why they would possibly want to leave their mother’s house in the first place… I think I’m safe for the moment 😉

Hope you are all enjoying a summer holiday! Until the next time,

Poppy xx

Minute Monday

A minute to read this – or minute as in teeny weeny makes, either way – here we are:

image

A Harris Tweed coin purse, requested by a friend of mine, who didn’t want it big enough for cards, just a nice pocket size. Lined with a bright blue cotton which matches that thin vertical stripe left of centre – turned out very sweet!

And then some monogrammed drawstring washbags for our friends’ four children as they are all off in a big caravan for 6 weeks around Europe. They are Aussies and naturally adventurous (they’d have to be – 4 little kids!?! I feel I need to psyche up and the have cavalry on speed dial  when I take 4 kids to the park…). It made me smile that they wanted some personalised prettiness for their journey.

image

The kids got to choose their own fabrics from my stash. I am always amazed at the choices children make. Emily is only 6 and chose this lovely retro Tanya Whelan print called lulu Rose from her Delilah collection (Freespirit fabrics). Size 9”x10” approx.

image

Angus is 4 and liked this bunting print above from Reunion by Sweetwater for Moda. I like it too – it’ll grow with him better than the cars I thought he might have liked.

image

That picture is one lying flat. You can see the channel I made for threading the cord through. I used a spring-loaded cord lock (like you get on rucksacks) rather than a traditional drawstring – I think it makes them look more substantial and the opening stays shut better.

My friend wanted them to have a waterproof lining, so I lined them in a white PUL – “polyurethane laminate” – which is a polyester knit  laminated on one side to make it waterproof. It is slightly stretchy so you have to be a bit careful sewing it. I would have liked to use my walking foot, but needed to use a teflon foot because of the shiny side.  The sewing then went OK – except I had to turn the tension dial WAY down. Then all was good! Although my friend said to just use a bit of cut up shower curtain (!!!), I am obviously far more safety aware than that – this PUL contains no lead, phlalates or BPAs so are suitable for products intended for children under 12. It also inhibits the growth of fungi, which is good for this purpose, especially because these kids will be throwing their toothbrush in there with their wee shampoos and soap apparently. It can be washed at 60 degrees, so all good. I would like to try “procare” at some point too – a foodsafe medical grade fabric with similar (but even better!) properties to PUL – and less stretch…

image

I know a bad picture, but I had to give them up in a hurry. This is the four together. Charlotte’s washbag is Paula Prass’ “Par Avion” from the Flight of Fancy collection for Michael Miller, an old print, but rather lovely. I never have managed to use up the bit I have somehow. I was glad she chose it. Isla’ chose princess castles from Happy Ever After for Riley Blake. Apparently they were all very pleased with their finished bags – phew! You get no sparing of feelings from unsatisfied children…

I used steam-a-seam2 to make the monogramme appliques, and a well-washed, almost felted dark grey jersey I had lying around. Steam-a-seam 2 is the best I’ve found for reducing fray on letters. I hand- stitched them on to be sure they won’t fall off. Fingers crossed they still look good after a few washes. It’s OK though, the family are heading back to Australia in a couple of months, so I won’t know if the monograms fall apart 😉 It’d be a bit embarrassing if it happened before they lleft though… (I’m sure it’ll all be fine really!)

Ok, maybe forget I even attempted a “quick minute” Monday. in my dreams. Speaking of which… Night night all, hope summer is treating you all well and the creative juices are flowing freely! Till the next time,

Poppy xx

The Nine-Patch Disappears…. (tutorial and layouts)

See? Not a sign of it anywhere…

tumblr_inline_n8azqzzzYd1rjpcb5

image

Hello you lovely craftilicious folk. So I’m in the process of making 2 more charm quilts – and I’m a bit close to the wire with this deadline. Hopefully by next time I will show you them both finished (or I would have had a deadline fail…actually I prefer the words deadline unsuccess).

For quilt 2, I have been playing with the Disappearing Nine-Patch a.k.a. D9P.

This is a pretty common block, and all over blogland, but it’s easy and makes quilts which look more complicated to make than they are. Just in case you’re not too familiar with it, I did these “show + tell” pictures with some 2.5” scrap squares.

How to make a Disappearing Nine Patch block (D9P)

1. Start with making a nine patch. You can use all prints or solids and prints. I decided to use prints and white solid. You need 4 squares of white and 5 prints (my prints were all different in my real quilt).

image

2. Sew them together in rows as shown below. The middle one is special as you will see, but in my real quilt it was just whatever randon charm square came out of the pile.

image

3. … and sew the rows together to make a nine-patch

image

4. Next get your rotary cutter and ruler and slice down the middle of the block, and again at right angles as shown below:

image

5. Play with your new blocks! See what has happened to the middle square? It has become the littlest square in the block and will be distributed more widely throughout the quilt. You might use this in your thinking in some quilts.

image

That was the layout I eventually used.

image

That picture is a very common layout. I once did a baby quilt in that, again using white solid ( https://www.flickr.com/photos/cuckoo-blue/8048473613/ ).

image

Or a “bigsquare-littlesquare” look. Bear in mind that when you use lots of prints it will look more complex and scrappy…

In fact, I’ll just show you how they look. I took pictures of the different layouts whilst I was trying to decide what look I was going for.

Making the Quilt top – finished size 52” square

  • 80 printed 5”x 5” charm squares (2 charm packs with 4 left over)
  • 64 solid white 5” x 5” charm squares (or enough white fabric to cut these)
  • rotary cutter and ruler
  1. Make 16 nine-patches as shown above, and slice into quarters. At this point you should trim your blocks to make sure they are the same size. Mine were pretty much the same, so I didn’t bother out of sheer laziness, and I just tried to match up the seams well when I was sewing.
  2. And then play! Until you get a layout which pleases you.

Note the pictures below are taken with ONLY 12 nine-patch blocks, not 16 as in the finished quilt top. This is the one I eventually went for obviously:

image

I liked this one below, but the hubster wasn’t so keen. I quite liked that it was simple and easy on the eye (some people don’t like complicated patchwork) and the fabrics touch each other. Although I would have needed to do some jiggery pokery and shuffling around of the blocks if I had gone with this layout – still you get the idea). Hubster thought it was too simple for his eye. I think he has seen so many quilts, his brain has progressed beyond simple patterns and now he likes “interesting”. This has an advantage of being symmetrical around the edges, unlike layout 1 (did you spot that?)

image

Next, I alternated the blocks between a square above and a reconstructed nine patch. I think on a bigger quilt or one with more blocks it would have been a more obvious “chain around the 4-patch” look.

image

At this point I realised that with 12 blocks I was better laying it out as a 3 x 4 block grid, so here is that same layout with the pattern a bit easier to see.

image

And finally, this is the one which almost won out. It looks pretty scrappy, but it is organised chaos! In the end I decided to go a safer, less complex pattern as it is for someone else.

image

There are more options of course – you could take each D9P 4-block unit and sash it in white – 2.5” strips or smaller would be nice, choosing any of the layouts above for it, or mixing it up with a traditional nine-patch. And, as you can imagine, if you use all prints you get a very scrappy look! 5” squares would be too busy for me in that case – but 10” (layer cake) squares would be perfect! You could even just place them randomly.

OK, well again it’s wayyyyy past my bedtime. Hopefully next time I can show you these two little lap quilts finished and we can do some prettiness chat! By the way I used a charm pack of Strawberry fields and one of Honeysweet, both by Fig tree Quilts for Moda for this quilt.

Until the next time,

Poppy xx

Edited: more pictures of the finished quilt are here if you would like to see :

https://cuckooblue.co.uk/post/91088996087/quilts-of-gratitude

Quilting tools and a French finish

My neighbour asked me if I’d make her a throw sized quilt pretty much the same as my favourite one which lies on my “snug” sofa most of the time; here is it is finished – clearly not lying on my snug sofa…

image

It’s made with my all-time favourite collection, “Rural Jardin” by French General for Moda. This line is so old and out of print that it is as rare as the proverbial hen’s teeth, and I jealously guard the bit of it I have horded. It’ll probably be with me when I die, scattered for posterity under a tree or something. Size 59.5 square. This is the quilt top – in the sun, gasp:

image

Don’t be misled by the simple square patchwork, the red, white and blue (and beige), and the floral designs – this colection is soft yet rich at the same time, timeless, unmistakeably French inspired and authentic with it, and would look great in anyone’s room – or thrown on the grass for anyone’s picnic. I love that the simple patchwork allows the collection to shine but subtly, and that wrapped around someone it has a warm, heirloom feel. Here are some close ups:

image

image

If nothing else you can see my quilting in the unusually bright sunshine… I usually stipple my quilts, although my new year’s resolution (what!!? June? Really?!?) is to branch out this year, do some loop-de-loop and a few other designs I have my eye on.  But meanwhile I’m finally happy with my stipple, thanks largely to some new tools:

image

Exhibit A: one pair of S/M machingers quilting gloves. Completely genius invention. Before I used to grip the quilt with both hands and haul, I mean move, it around to achieve the meander; these have a grippy surface on the fingertips which allow you to move the quilt with your hands face down on the quilt – so much easier. This hasn’t changed my meander in itself but it has taken the strain out of it. For about £10, it’s absolutely my number one quilting accessory recommendation (I’m assuming folk have the right presser feet etc).

Exhibit B: the basting gun. I talked about this before (https://cuckooblue.co.uk/post/81125927002/oasis-quilt-for-baby-maisie).  Mine is the microstitch basting gun and it puts a little plastic tack instead of safety pins. Tacks, by the way, which you can SEW over. Without breaking needles. This has made the biggest difference, both in terms of enjoyment and the meander itself because I don’t have to keep stopping to take out the pins which was breaking the flow, not to mention far too many needles. The little black ant-like things are the tacks.

image

And finally… the quilting table with the “sew-slip II”. The whattywhatwhat? I got the quilting extension table when I bought the machine a few years ago, but really until I got the gloves it didn’t help all that much. I kept forgetting to use it. Combined with the gloves though, it really does help. Particularly as I got the “sew-slip II” with the gloves – it’s a piece of slippy teflon (I think) with a hole for your presser foot/needle thing; it grips to your sewing machine bed temporarily, and reduces the “drag” when you move your quilt around. I don’t know for sure how much difference it has made, but I like the idea – and certainly my quilting this time seemed easier and more enjoyable. And quicker to boot. Here is an action shot:

image

Anyway, back to the quilt – this is the back: image

Some Rural Jardin in someone’s sale – how lucky is that! A row of charms – I had to add in some leftover “Etchings” by 3 sisters for Moda which toned well with the front – sashed by 2.5” of white cotton… the effect is pretty. And allowed me to join the backing fabric easily!

I used all-natural Dream Orient Batting by Quilter’s Dream – it really is so soft and silky. You can see the drape a little on this picture, and this is not yet washed and fairly densely quilted. I adore this batting. Next warmest to wool apparently, yet machine washable. Although if I could get Quilter’s Dream Wool in the UK, I would as apparently it machine washes well…

image

A binding in one of the faded reds of this collection: image

…And it’s ready to go. If I didn’t already have one of these, I’d struggle to let it go; as it is, I prefer this one’s backing and batting to my own! I wonder if she will notice if I swapped them… Ah well, I hope she enjoys it. It’s a collection that even the menfolk seem to like – this one got the seal of approval from her husband when he saw mine, so at least it should be loved 🙂

It is a shame that this collection is so hard to find, the blues with the two different reds are pretty special. The nearest I can see there is to this is “La Belle Fleur” by French General and looks nice from the pictures, sadly also getting older, which has a regency green in there too – or the latest “Le Bouquet Francais” which has a yellow added. I’m sure the latter is nice – but from the pictures I’m just not sure about the yellow… Still, French General rarely get it wrong, I think their collections are just more beautiful in real life than in photos. I’ll see if I can stretch to trying one! I’m amazed we have money left for food after the quilting supplies are done…

Till the next time, Poppy xx

Hello Luscious Hexagon Cushion

Well Hello Luscious!

Before you get a bit creeped out that I hardly know you and yet am blatantly hitting on you, pyjama-d, hair in scrunchied bedhead-pineapple and all, Hello Luscious is the name of this beautiful collection of fabrics from Basic Grey for Moda fabrics. I love it – as you can see by my “buddy icon” quilt picture.

image

So… yeah. I realise I am making, and nowhere near finished, a 1400 1” hexagon quilt, and that really all hexagony activity should be being poured into said quilt if I’m ever going to have it finished this decade…. but do you know how frustrating it is to have these cute little fabric hexagons all over the house and not have them in something holdable to admire? Frustrating enough for me to chop into one of my precious Hello Luscious charm packs and take as a holiday project a couple of months ago.

This is hello Luscious: image

Isn’t it lovely? Lovely enough fabric goodness for you to ignore the fact it has been a WHOLE MONTH since I said hi? I was trying to gloss over it, but hey, let’s now just skip past it like nothing happened.

I must be getting much faster at making hexagons, because in a few evenings watching films with the hubster in a holiday cottage, I had about 80 little hexagons, with which I was uncommonly delighted… and no idea what to do with them.

So one day on return, whilst Kiddo was in the bath, I started playing:

image

This is the carpet outside the bathroom, and although it’s really lighter than this picture, I think it would be a great base colour for a quilt or project with this collection, don’t you? I decided I’d use them to finally cover the huge 26” square reading cushion I have on my bed, which sadly limits the background to white. I’d need 280 hexies to make a 26” square front by sewing them together patchwork style, and a charm pack only gives me 168, so I settled on applique.

Kiddo got out of his bath and carefully made them all into a snake, so we both played around for ages. A free-floating hexie pattern like above? Or three stripes like below?

image

image

Or sew them together into a thick strip?

image

I actually had decided on 3 stripes, but then once I got it onto a white background it just didn’t look as good, so had to change plans. Well you know what they say about mice and men and their best laid plans. So I whip-stitched them together into this 3-ply strip as above.

My hesitation about applique-ing hexagons is I never like the “stuck on” look that you see if you machine sew them onto a background with a straight stitch. And these are too small (1” sides) for a zigzag, it’d be all stitch and little fabric I think. I might be wrong…?

So I hand-stitched them on to a square of fabric with a piece of poly batting behind it. it didn’t take long, whilst watching a film. And I was really pleased that they didn’t look “stuck on”, even though I didn’t try to have invisible stitches etc. They looked lovely! Phew.

image

I did a bit of light hand-quilting along the inside edges of the hexagon strips and just on the outside. I think the whole cushion could take more quilting, but actually I rather like it as it is for my bedroom.

image

.

..and – yay, my reading cushion is finally covered. Although I keep glaring at the hubster when he uses it and makes it all rumpled. Although I can’t tell him that we are not allowed to now actually USE the reading cushion any more. So I continue to glare, a little huffily, and no doubt he continues to shrug and think, well, she’ll tell me what craziness is going on in her head at some point… 😉

image

Until the next time (which will be sooner, I promise!),

Poppy xx

ps. if you’re making your own hexagon quilt and need to calculate how many hexies you will need, this calculator below is fabulous. Mine are 1” hexies, so the paper piece has sides 1” long – and you need a 2.5” square of fabric to make for each one (4 from each charm square).Good luck and enjoy 🙂

http://www.cddesigns.com/PaperPiecing/number.html

Free motion embroidery fun – A Bird Cushion

image

A year ago little Emily was born, and I made her a quilt in Sophie by Chez Moi for Moda. In fact here it is, hurriedly photographed on our uninspiring then-driveway before bundling into the car to go meet the new wee princess: 

image

You are just going to have to trust me that it’s very sweet when next to a baby instead of thrown over a chair on a driveway

Anyway, she’s one all of a sudden. Yeah, I did mention it was a year ago, but you wouldn’t believe how fast that year has gone, not to mention I am in denial that time is passing this quickly, whatever my grey hairs are saying. And I rather suddenly needed to think up a present. I can’t tell you how much I love this wee girl, she’s just too adorable for words, so I felt like making something special.

Having decided on a freemotion embroidery cushion, I looked to the web for inspiration, feeling too short of time to think up a design – and saw this beautiful cushion which I shamelessly copied (well a little shame, but isn’t imitation the sincerest form of flattery?)

image

It looks like it is made by a German artist, but couldn’t find her name. The link is here; she seems to have a shop of other lovely things:

http://de.dawanda.com/product/33525229-Kissenhuelle-Sommerbrise-40x40cm

It’s been years since I did any freemotion embroidery (I did some bags with birds on very similar to the above and sold them for charity), so wanted simple but effective.

image

I had a 26” x 26” cushion inner from Ikea – these are a great size for a reading pillow in bed by the way – and another moda charm pack in sophie, to match Emily’s baby quilt.

I cut a 17” square piece of white fabric  and chose some charms to cut into 2.5” squares, which I used to cut into the bunting flags. One charm square for the little bird, a scrap for the wing and a scrap of black felt for the dot of the eye. I used wonderweb to fuse the pieces to the fabric and then rougly outlined everything on the machine a couple of times using black thread. Trying to be imprecise goes a bit against the grain, but it was fun, and gave it a “drawn on” effect (as it should be apparently).

image

Then I sewed two strips of 4 charms with 1/4” seam allowance, centred it, sewed to opposite sides of the picture and trimmed the excess. Next I sewed two strips of 6 charms and did the same to complete the “frame”.

I added Emily’s name in pink – I used an alphabet die in my BigShot with Steam-a-seam2 fusible web, but could have printed the  “emily” in Times New Roman font as big as would make the letters about 2” tall, traced it onto the Steam-a-seam2 BACKWARDS, ironed it onto my fabric and cut it out. A bit faffy but worth it. I hand stitched round to secure so as not to lose the neat lines.

image

This is the finished cushion cover lying on my rather rumpled bed. No idea when I will learn to stage my photographs. Although you can’t see in this picture, I backed the front with 100% cotton batting and quilted a straight line round the inside of the big white square 1/4” away from the edge of the charms, and another line all the way round but this time within the charm “frame”. If that makes sense. It’s just to secure it anyway. An envelope back using a pretty wildflower print:

image

And it was all done. It looks quite pretty on the little sofa in the corner of my bedroom. Who says pretty bird pictures are just for little girls? Good thing for her that it has “emily” well and truly stitched on.

image

 And the reaction? Emily’s mum loved it. Ooohs and ahhhs from the other mums. Emily toddled off precariously to empty the contents of a  kitchen cupboard onto the floor, pretty much oblivious. Emily’s 4 year old big brother said “But it’s the wrong ‘E’”.

“It’s art,” I said. “It’s modern”.

“It’s wrong,” he said, and busied himself playing with one of Emily’s OTHER, not-wrong gifts. Pah. I’m going to spell his name wrong when I make him one.

😉

Till the next time,

Poppy xx