Elizabeth Hartmann of http://www.OhFransson.com is a genius. Everyone knows it, but really, until you make her Fancy Fox quilt (or another of her patterns I assume), you don’t really appreciate it.
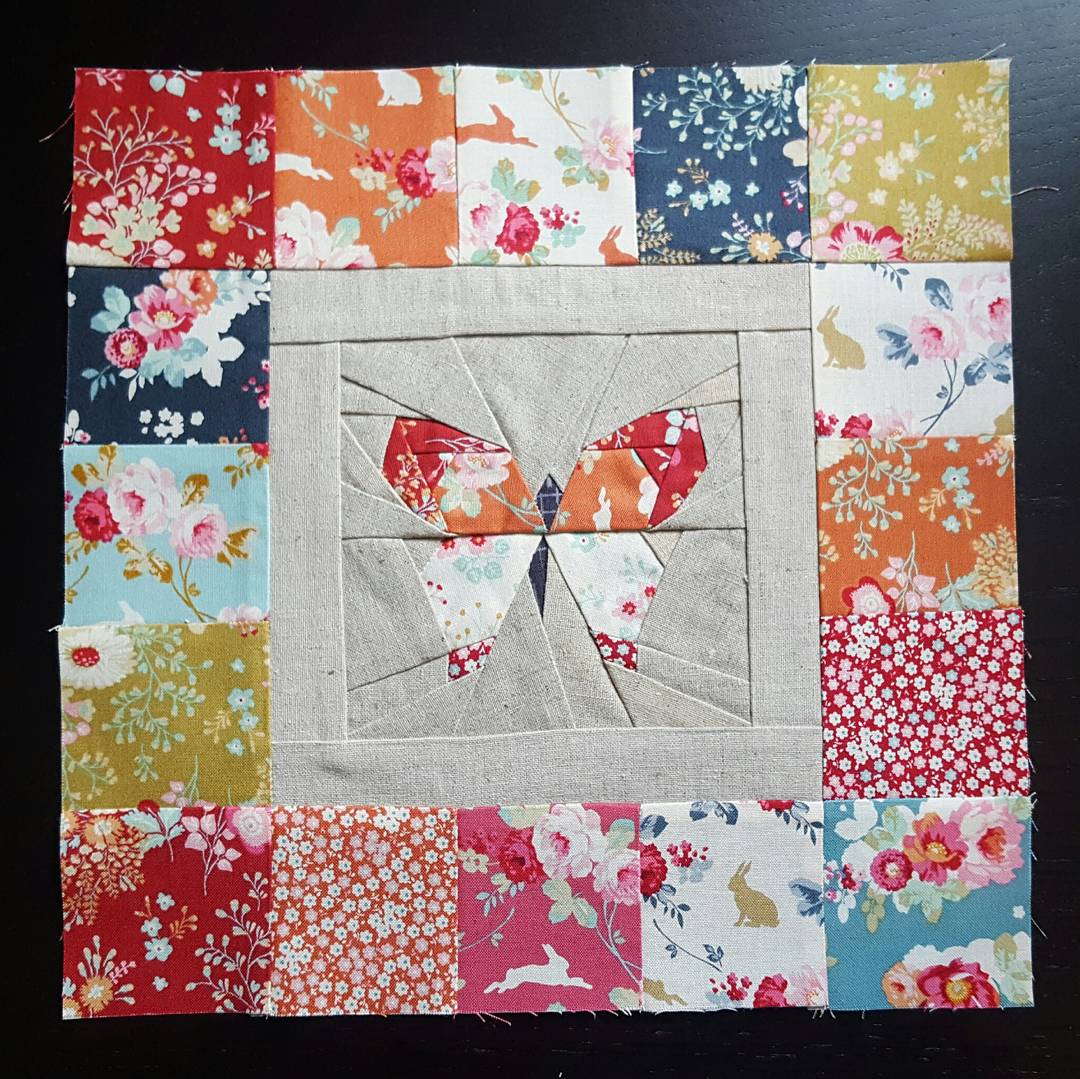
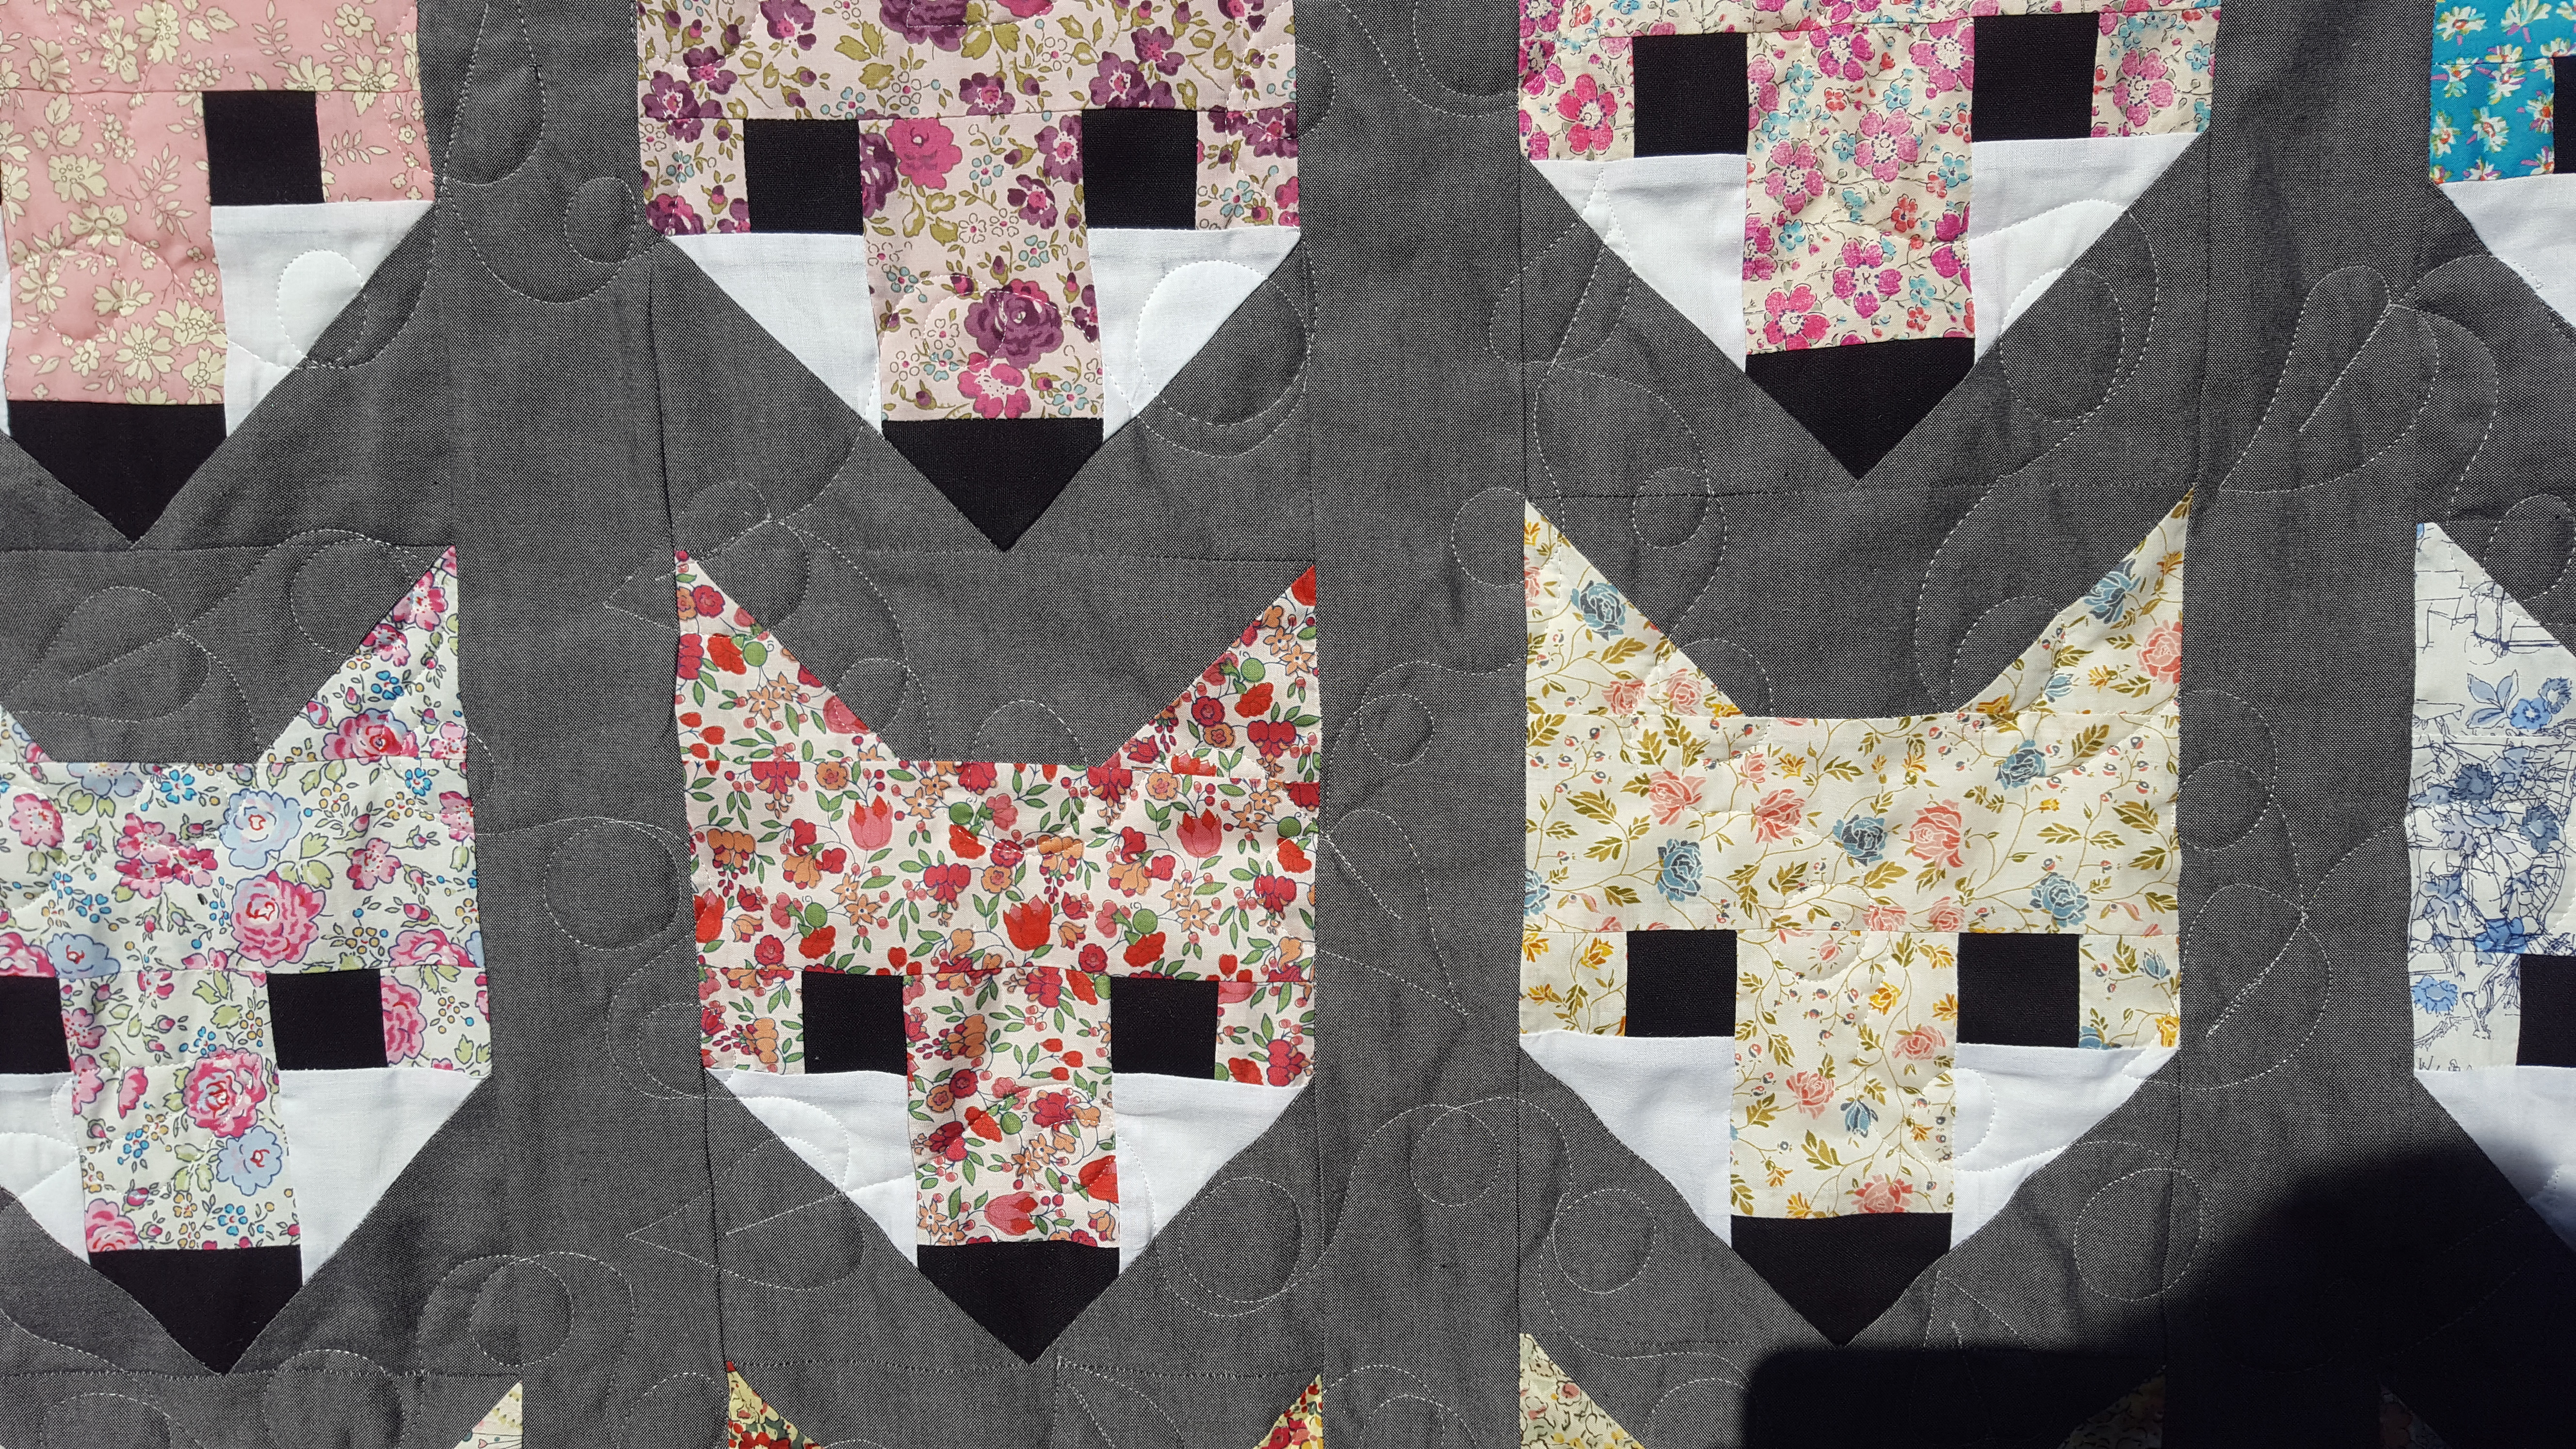
It really is a great pattern. Simple to piece using basic techniques, fun and cute, and the fox face is beautifully realised. She gives you all the cutting instructions and fabric requirements – and it all seemed to work out exactly as she said. I chose to make the original fancy fox pattern (there is a larger/giant block too with a different pattern) which you can get as an immediate pdf download here in her shop:
http://ohfransson.bigcartel.com/product/fancy-fox-quilts-pdf-quilt-pattern

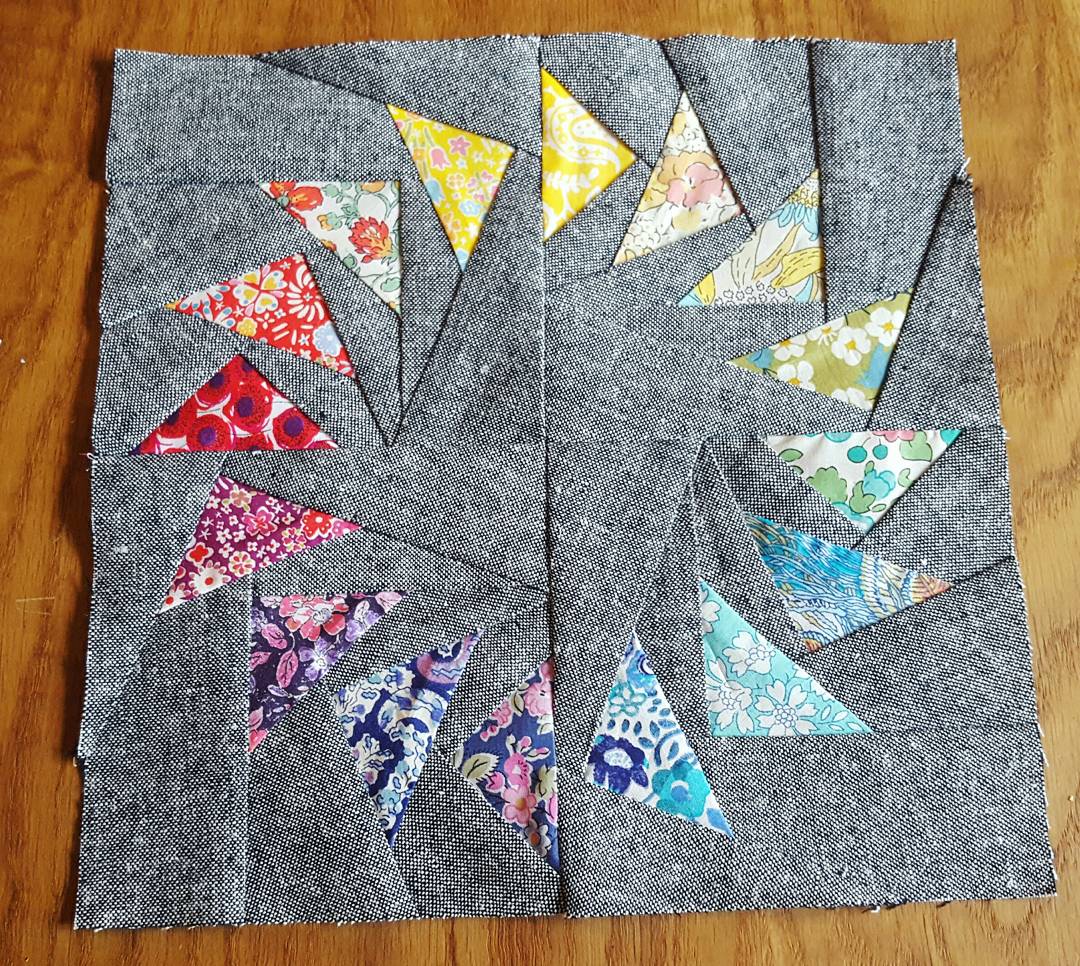
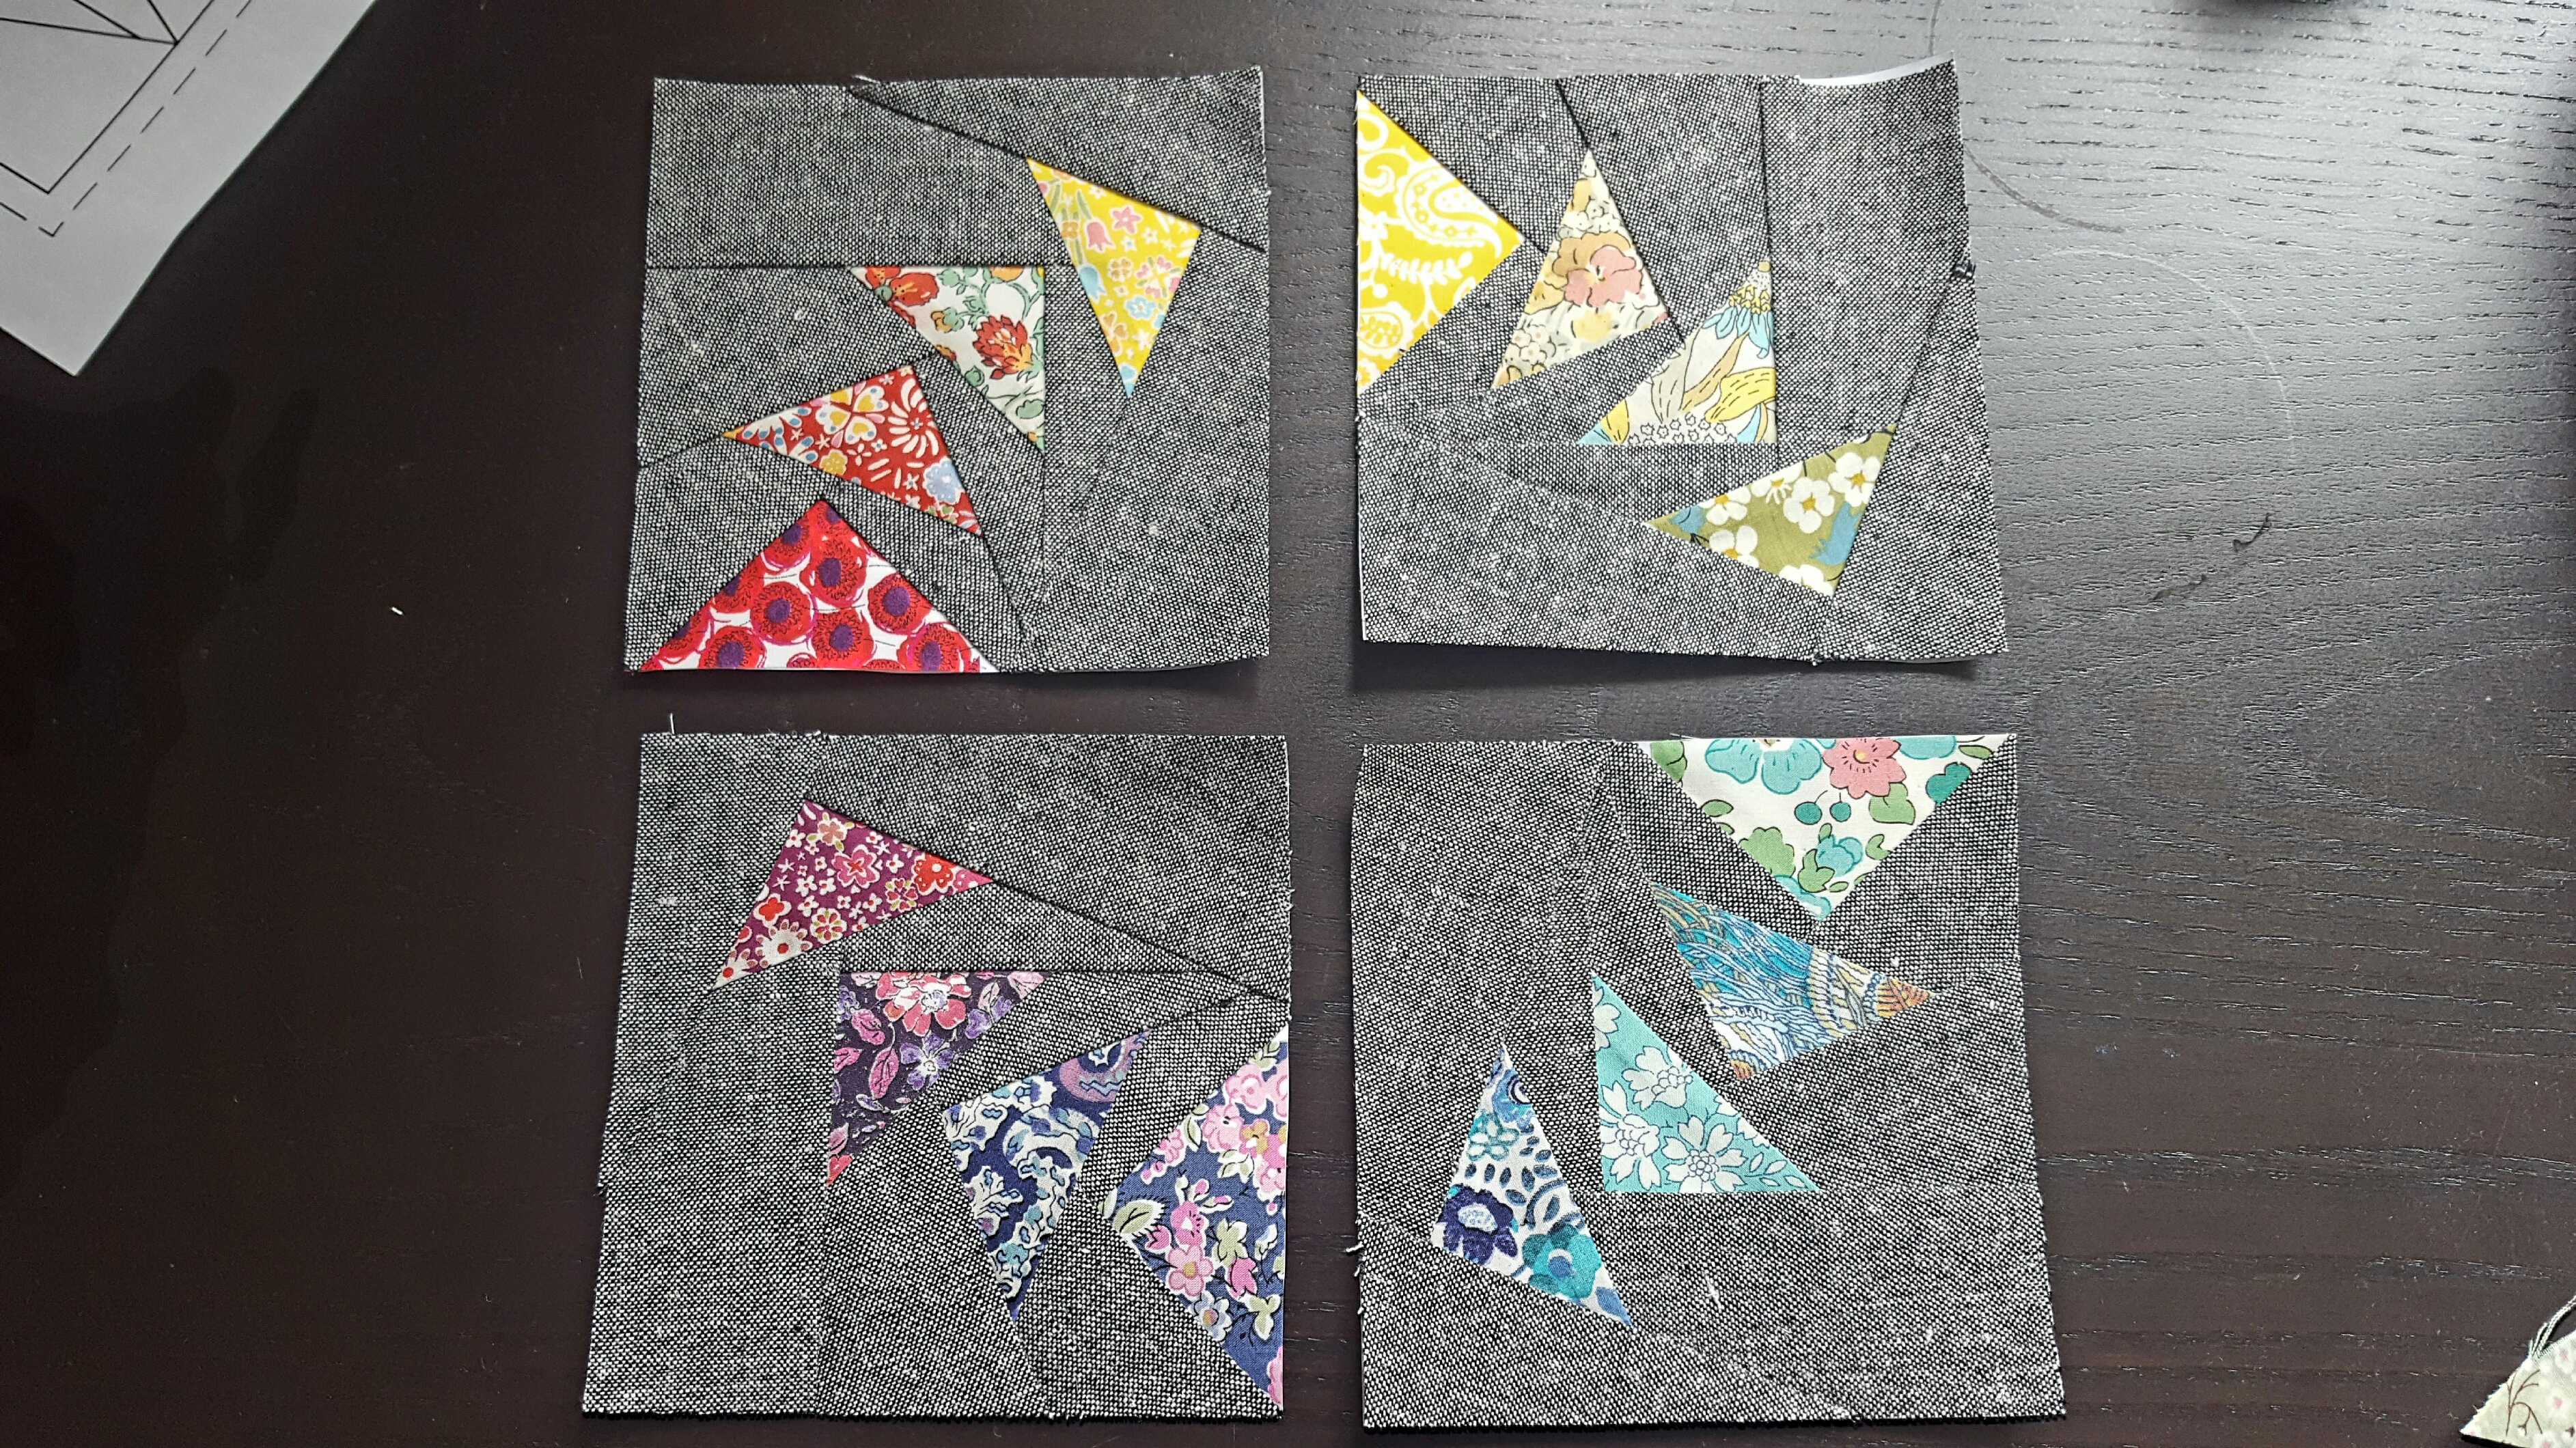
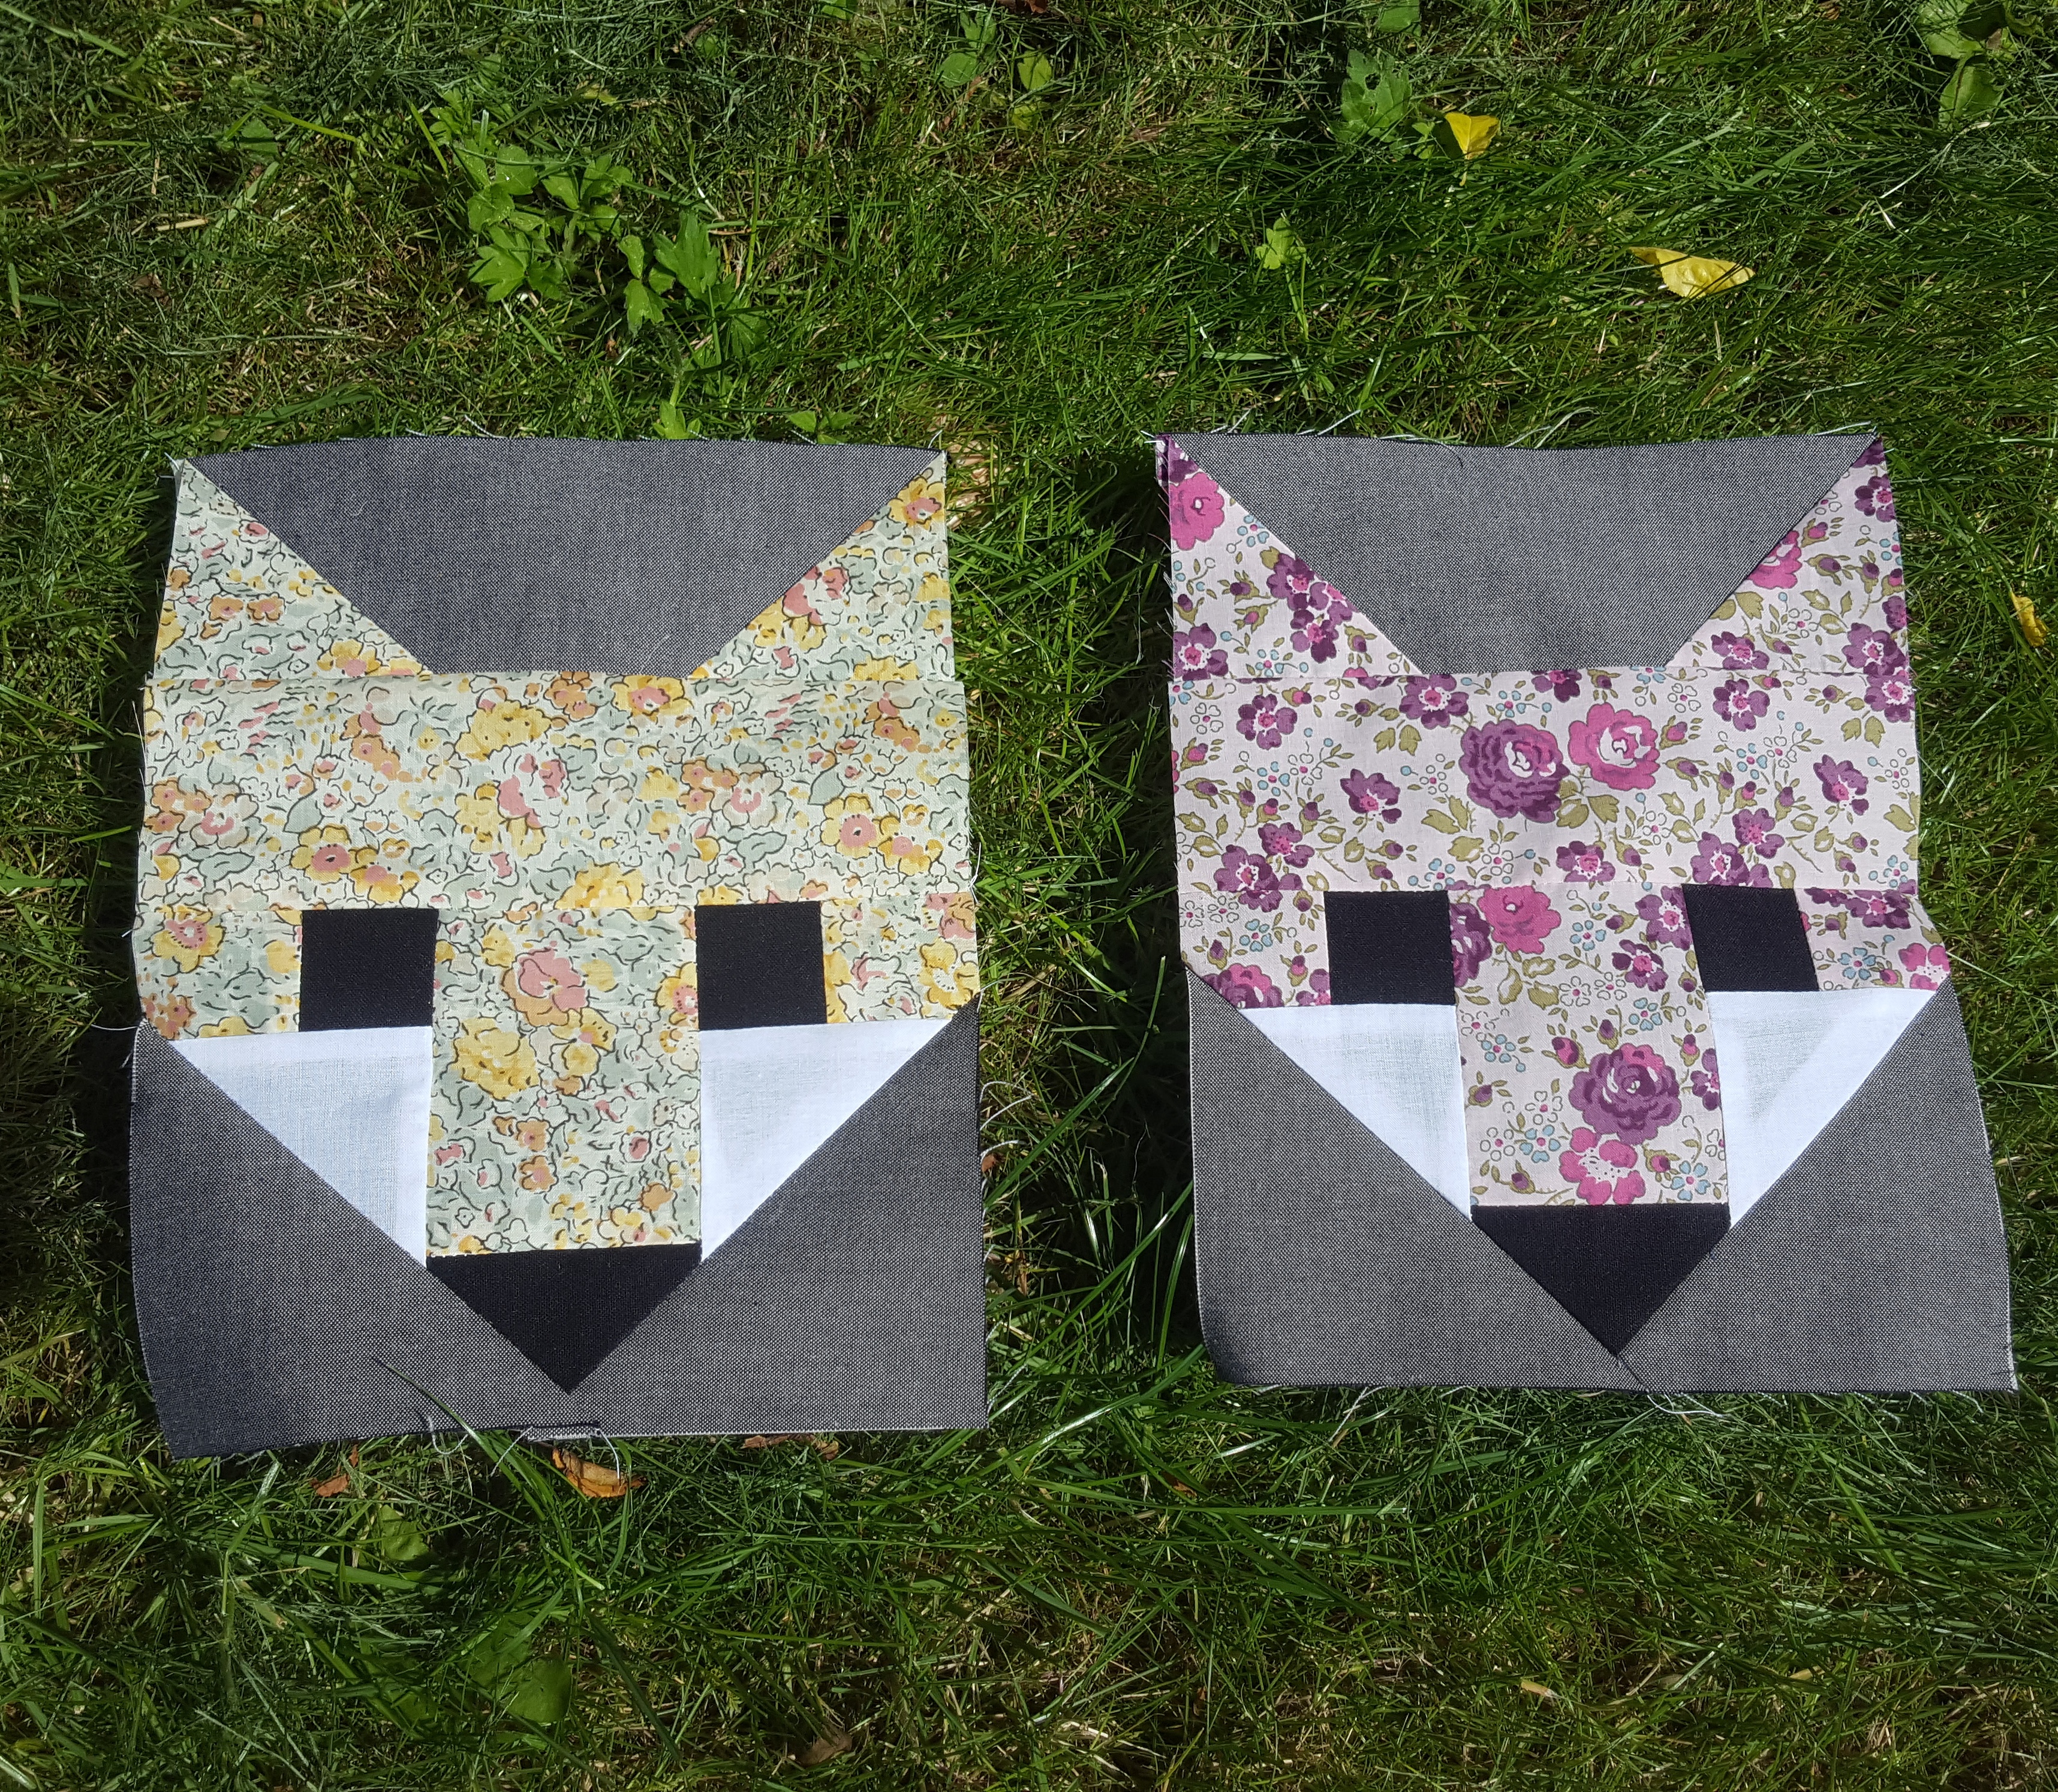
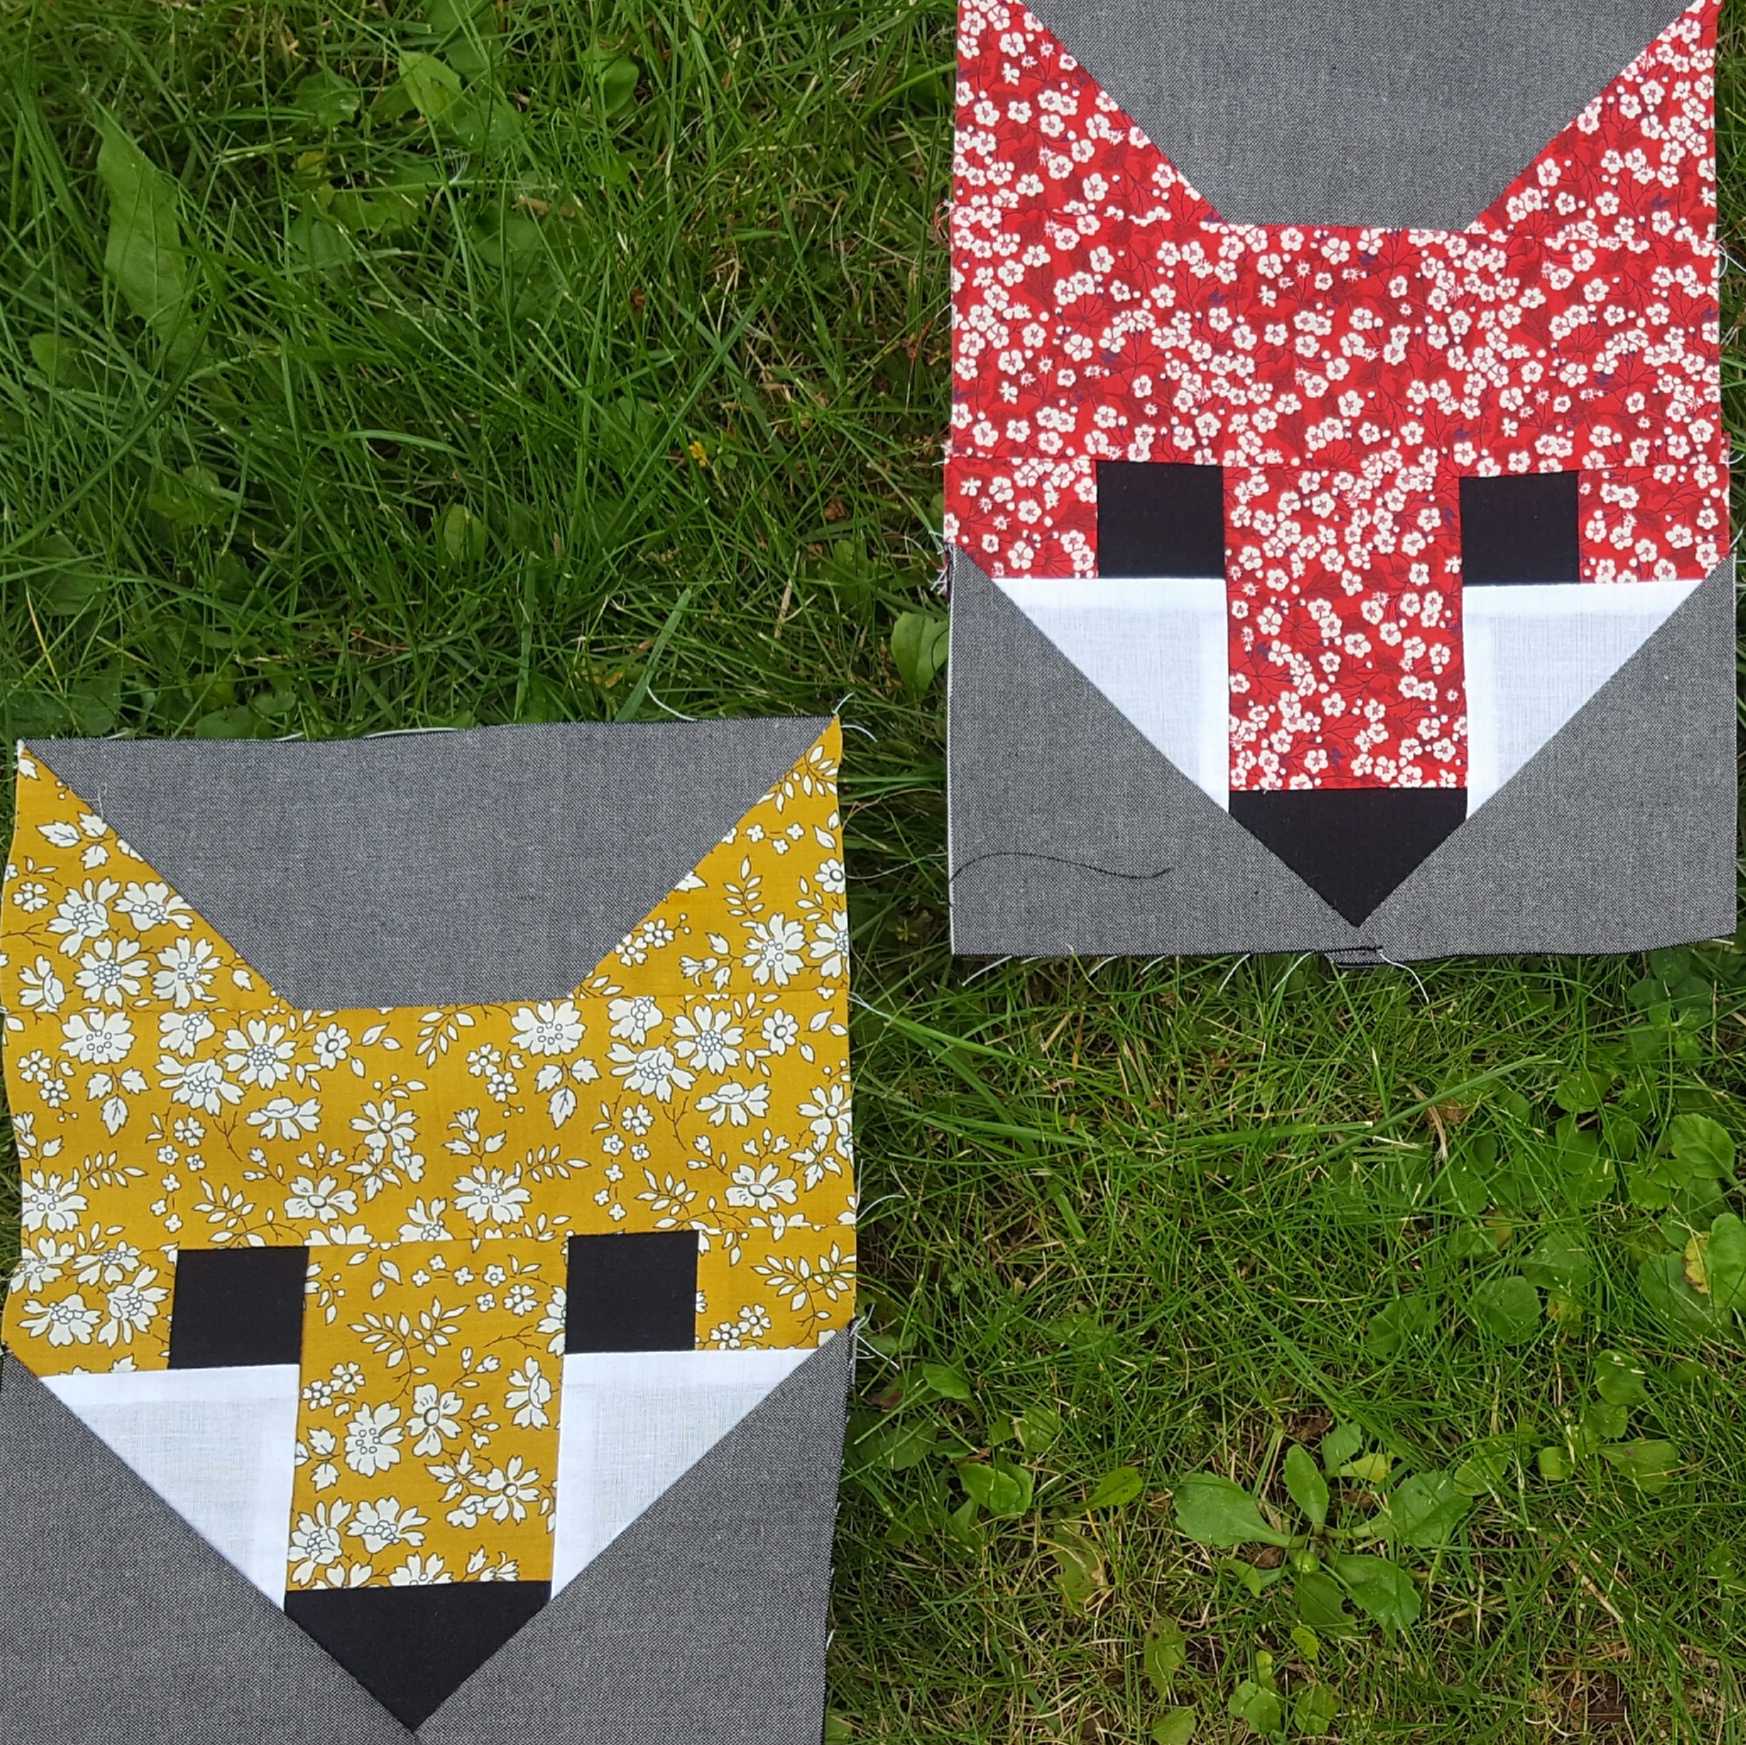
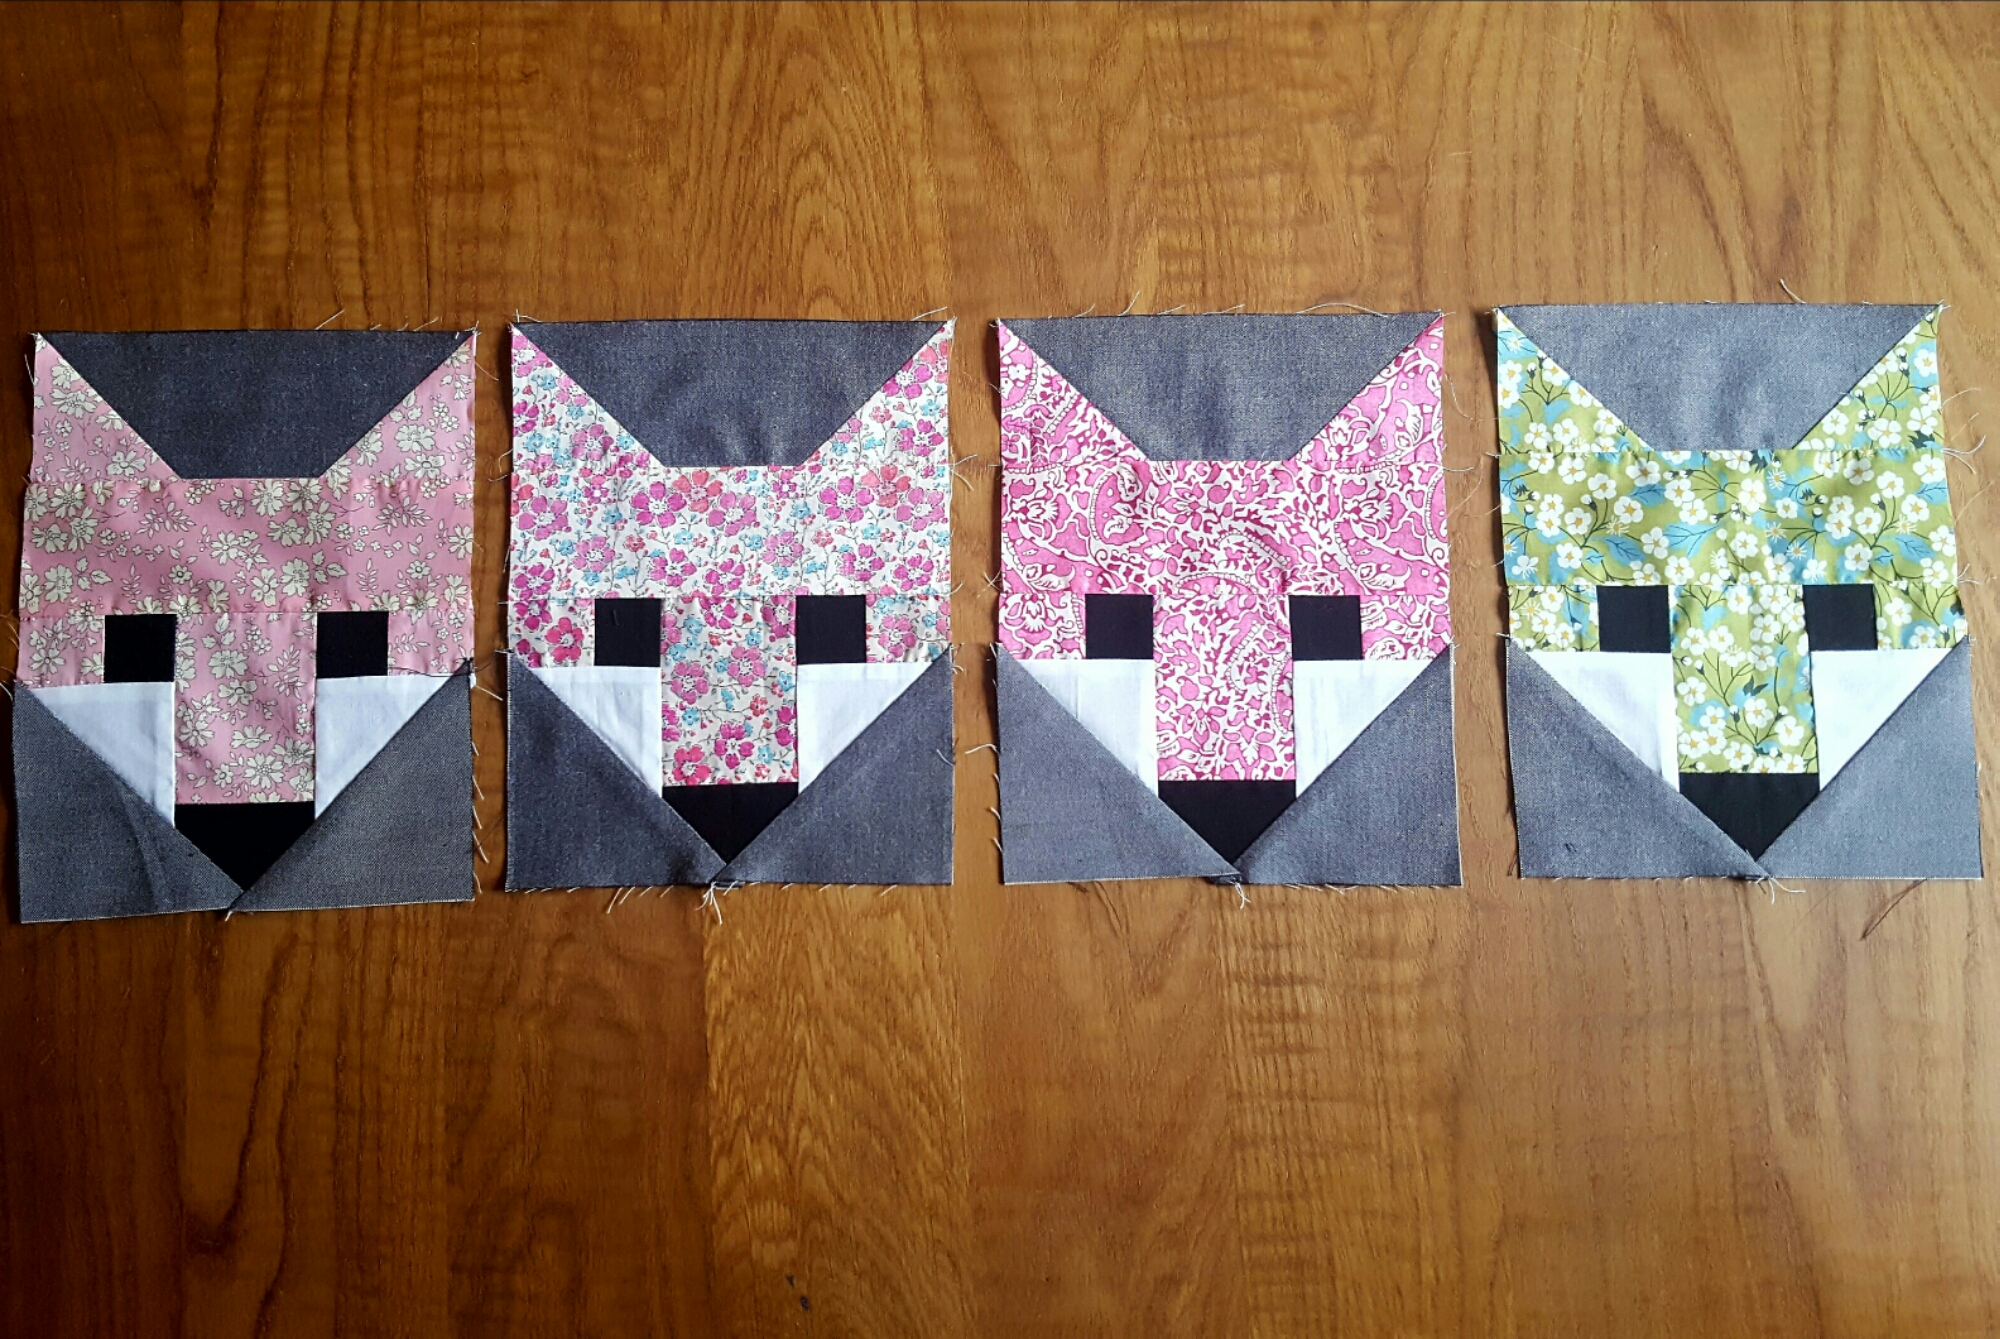
It started with a friend of mine who fell in love with the fancy fox quilt but wanted me to make it alongside her. She sent me a gazillion pictures of Fancy Fox quilts, all of which I resisted, until finally I saw one in beautiful Liberty of London Tana lawn fabrics and I suddenly saw potential. I cut all my background fabric, noses and eyes, made these 4 with her, and then stopped for months as life took over. My friend decided not to go ahead with her project so no longer needed me to make them with her (she’s dyslexic), and these little foxes lay forgotten.
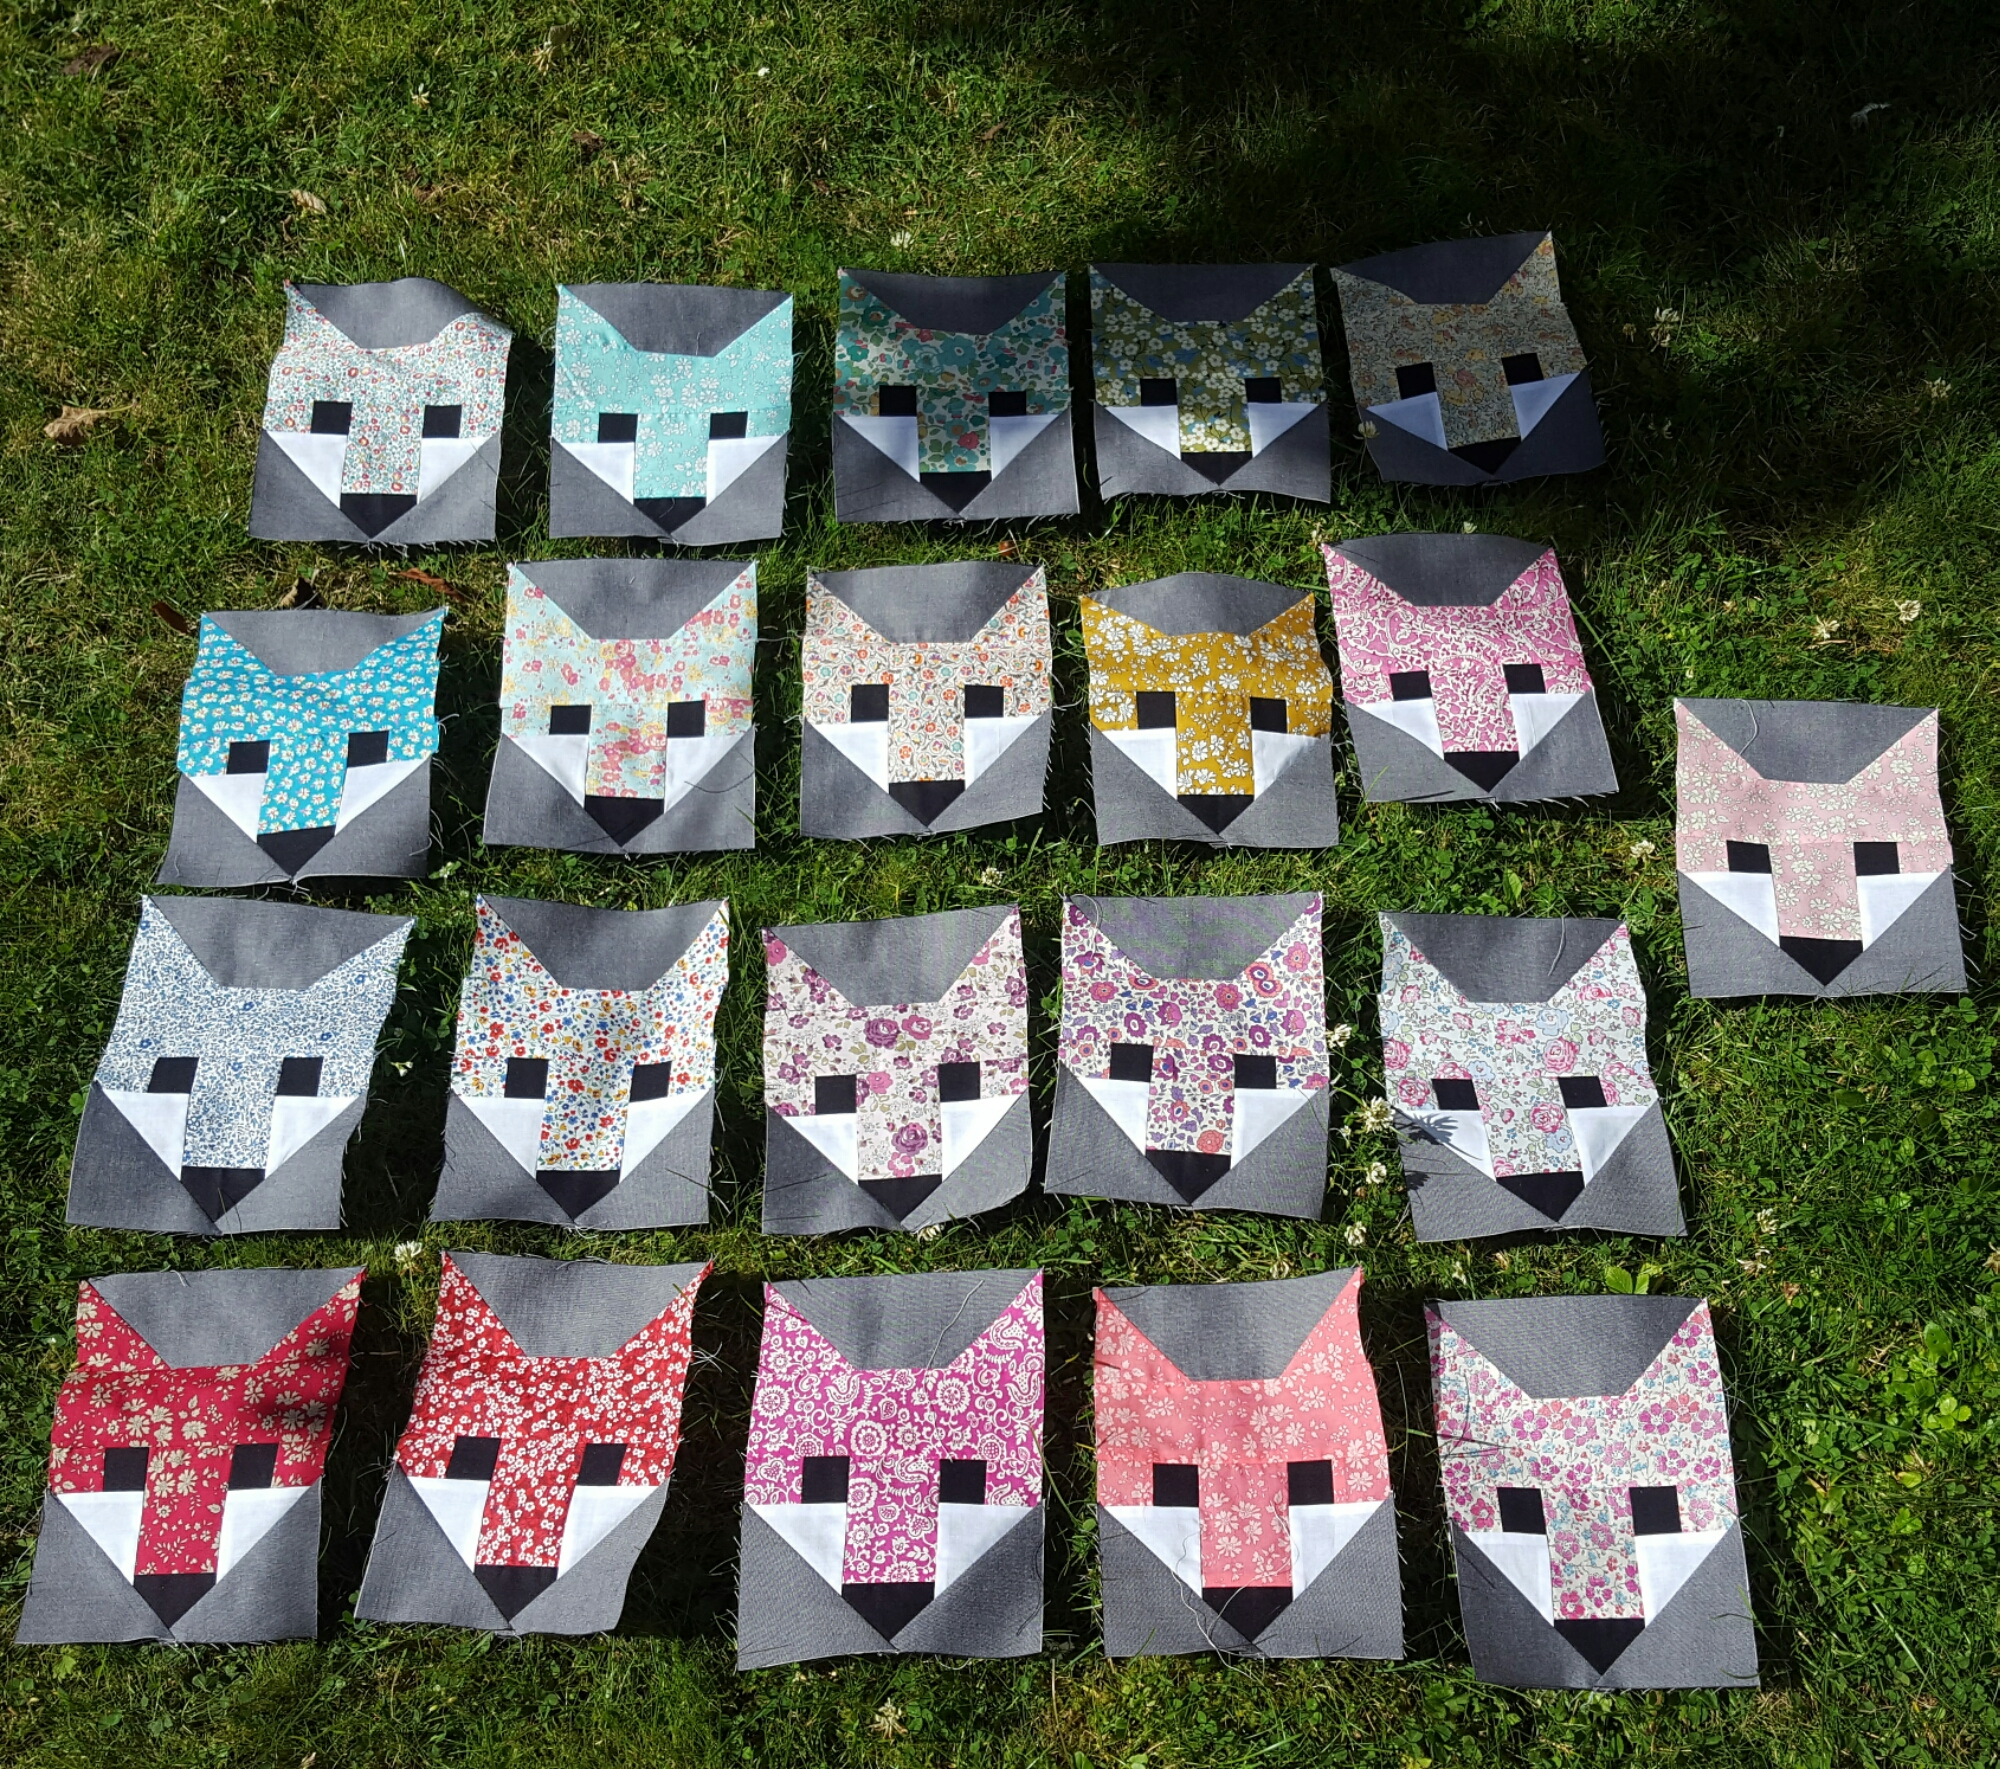
And then the lovely Michelle of http://www.coleandtaffy.com decided she wanted to make a Liberty fancy fox quilt, at a gentle 2 or 3 foxes a week, and we decided to sew along together on Instagram (she is @coleandtaffy and incredibly talented!). Soon we had others joining us, and my little foxes started multiplying, really without much fuss at all.
I have never sewn projects in this way – a kind of gentle, back-burner way. Usually I start, finish and end a project before starting another;somehow that makes me sew on some kind of self imposed deadline, like preparing for battle. I didn’t know I sewed like that until I sewed along with Michelle, who seems to have multiple projects on the go at all times. It felt like a very mindful way to sew. I would have chain pieced them all and had it done within a week had I been left to my own devices, but there was something very conscious and satisfying about sewing each fox individually. I even gave them names.
Meet Heather, Heather, Heather and Veronica:
10 points for getting the 90s film reference!
By midway, I started to think about some sort of colourwash layout. By this time, Michelle and a few other IG friends were not only cheering me on but had donated pieces of Liberty for my quilt and it was all starting to feel rather special.
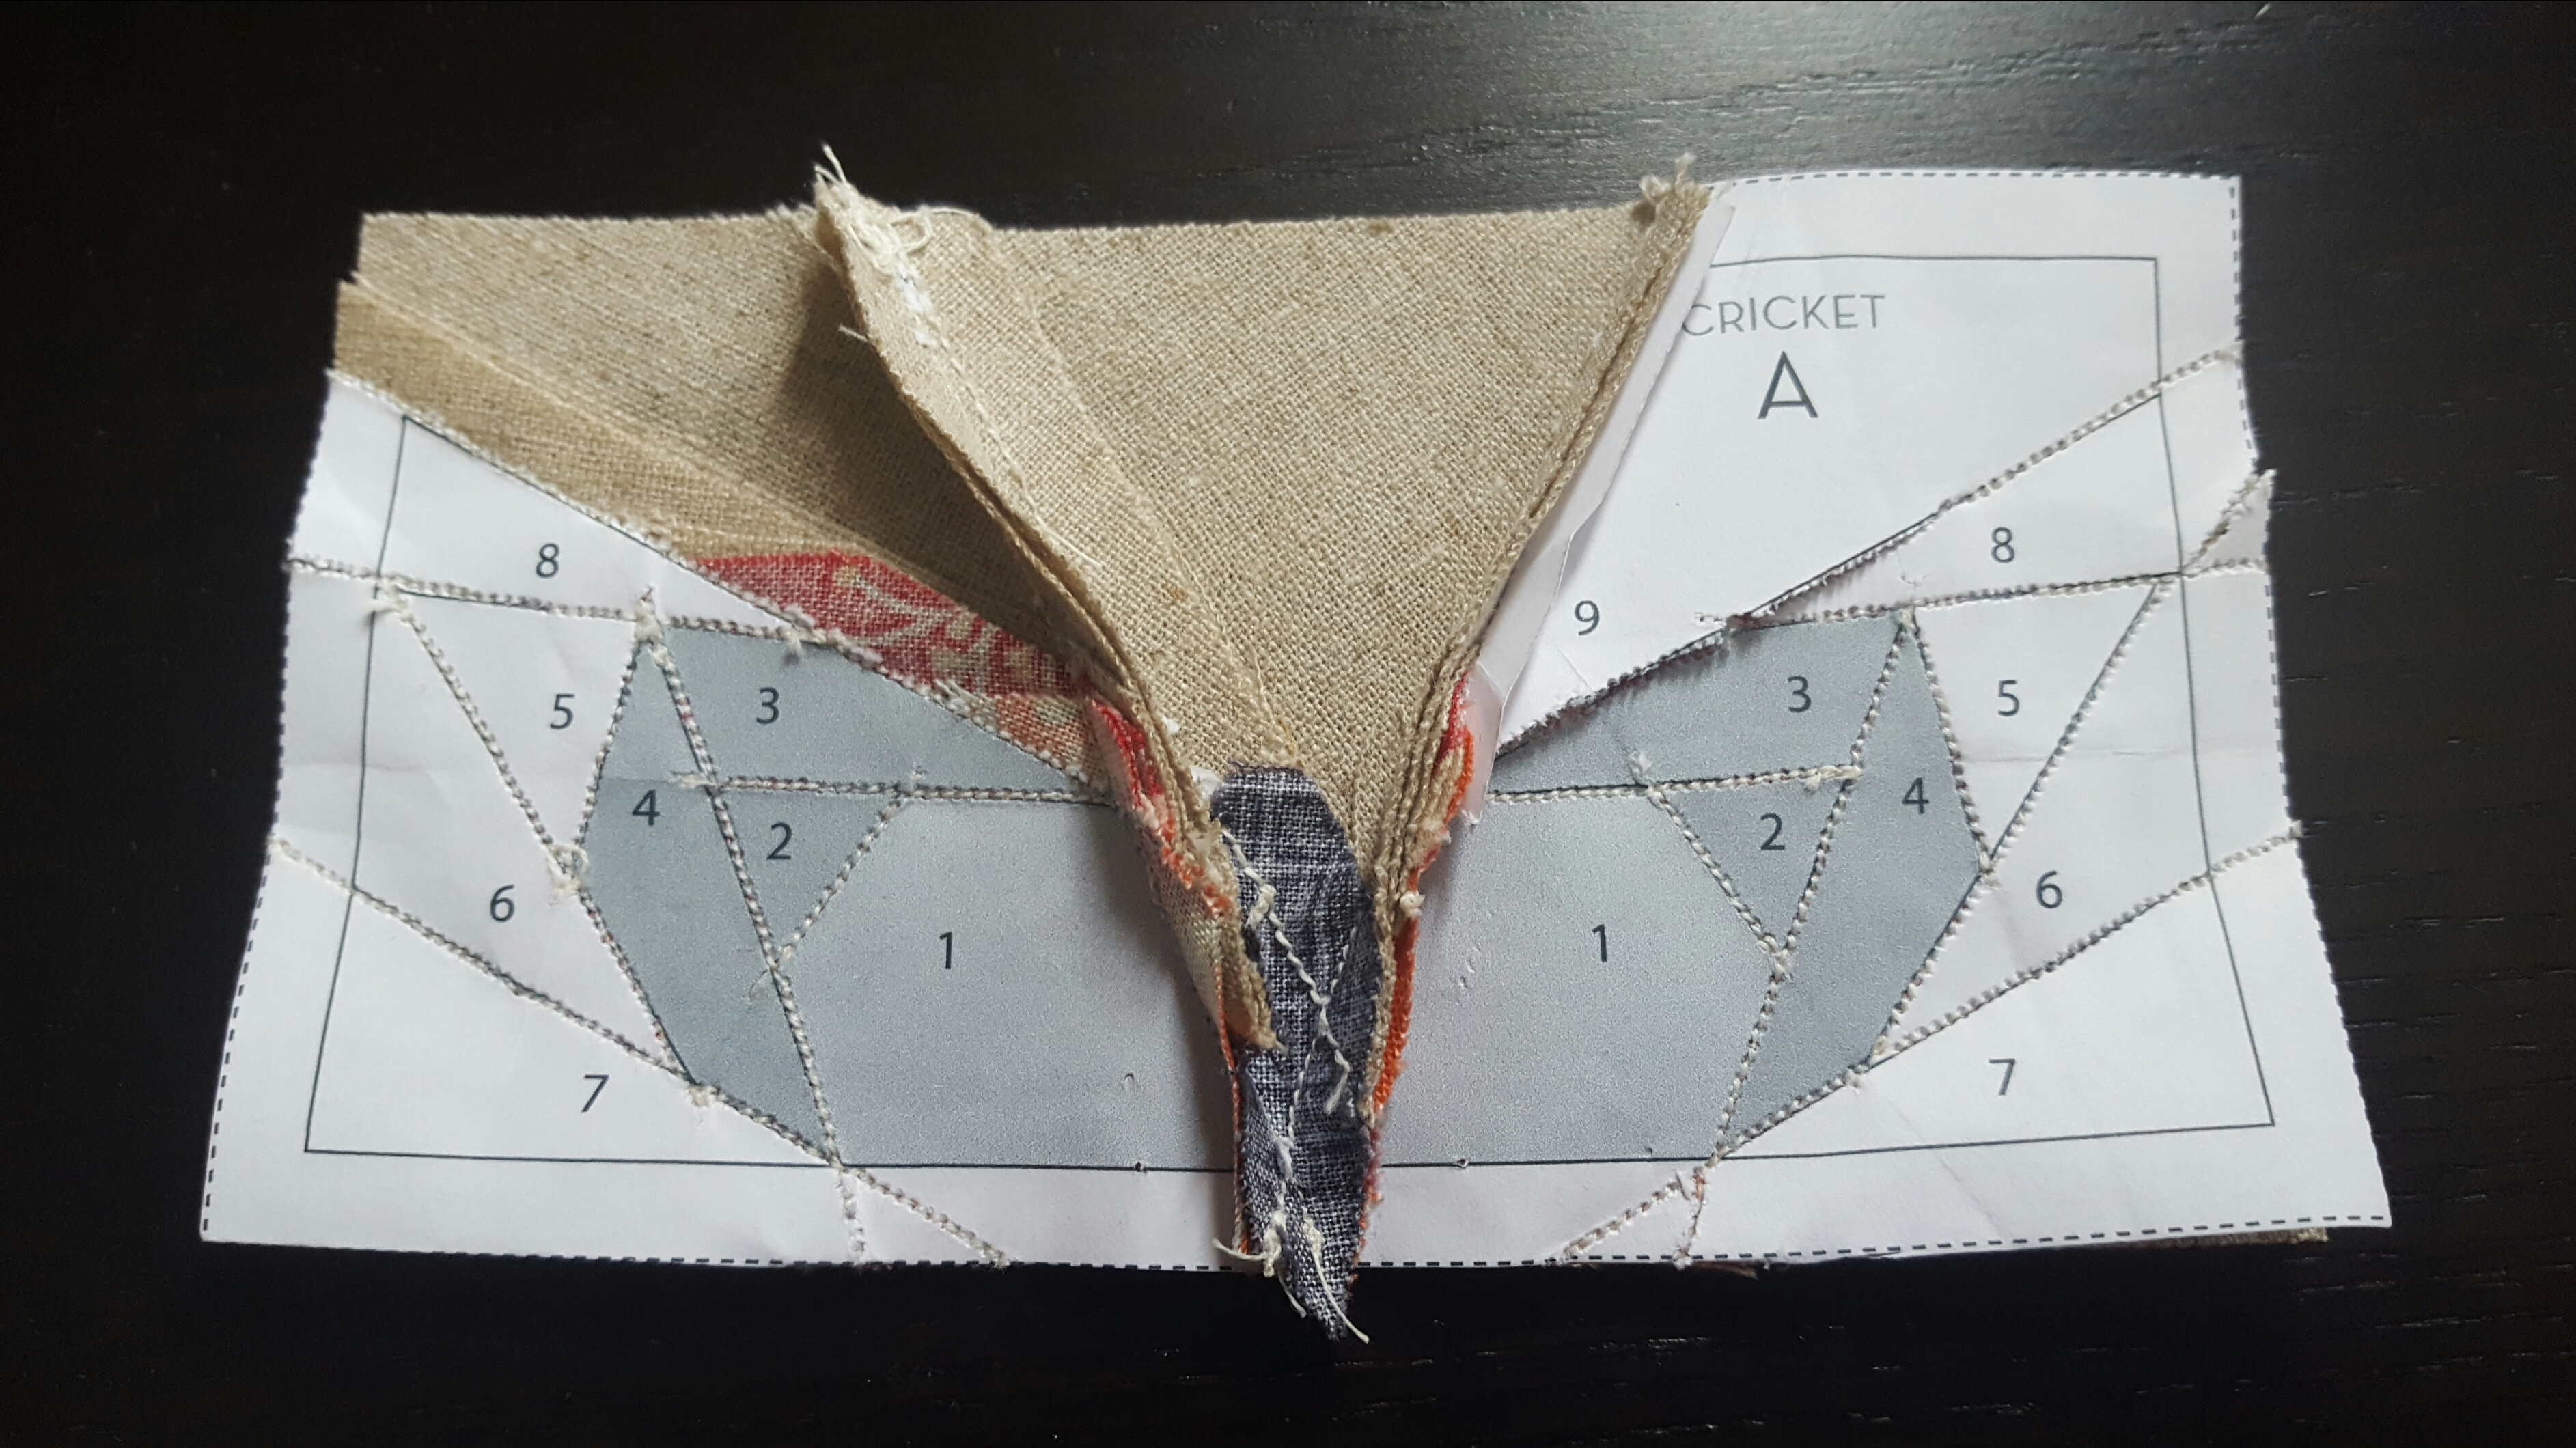
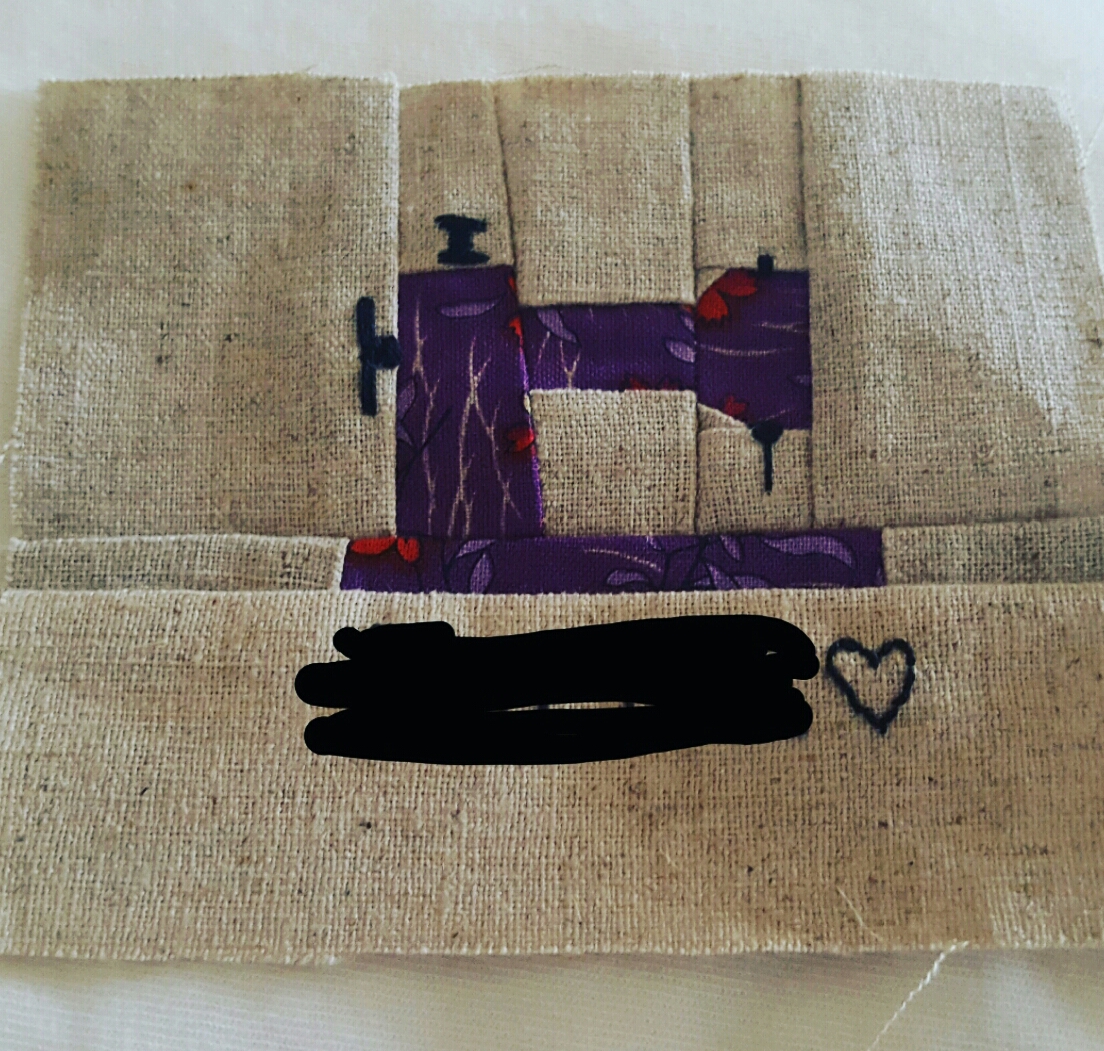
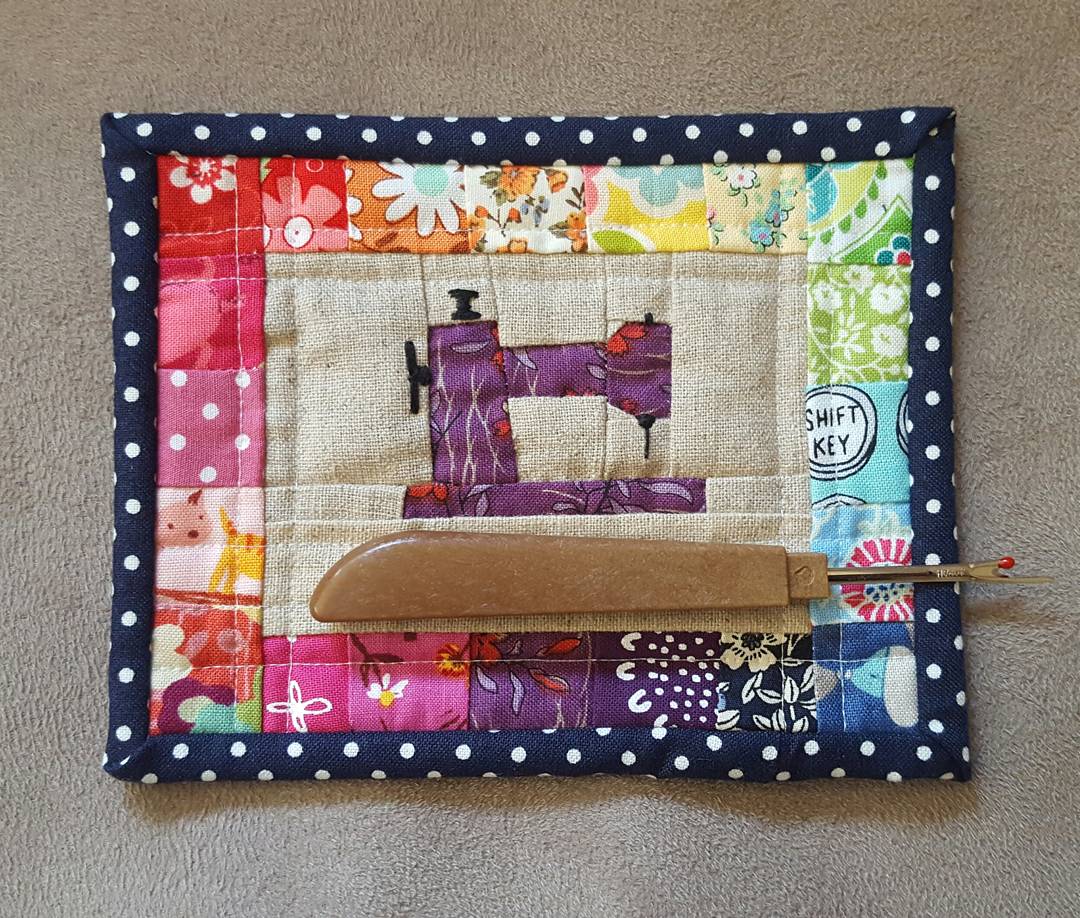
One thing I would say is that at first my 1/4″ seam allowance was a little too scant, and it affected how much overlap there was in the background fabric under the chin (there was too little). This meant some of the noses would get blunted in the seam allowance when I sewed it together – so watch your seam alllowance very carefully! I bought myself a gadget, Liberty fabrics being too expensive to get wrong:
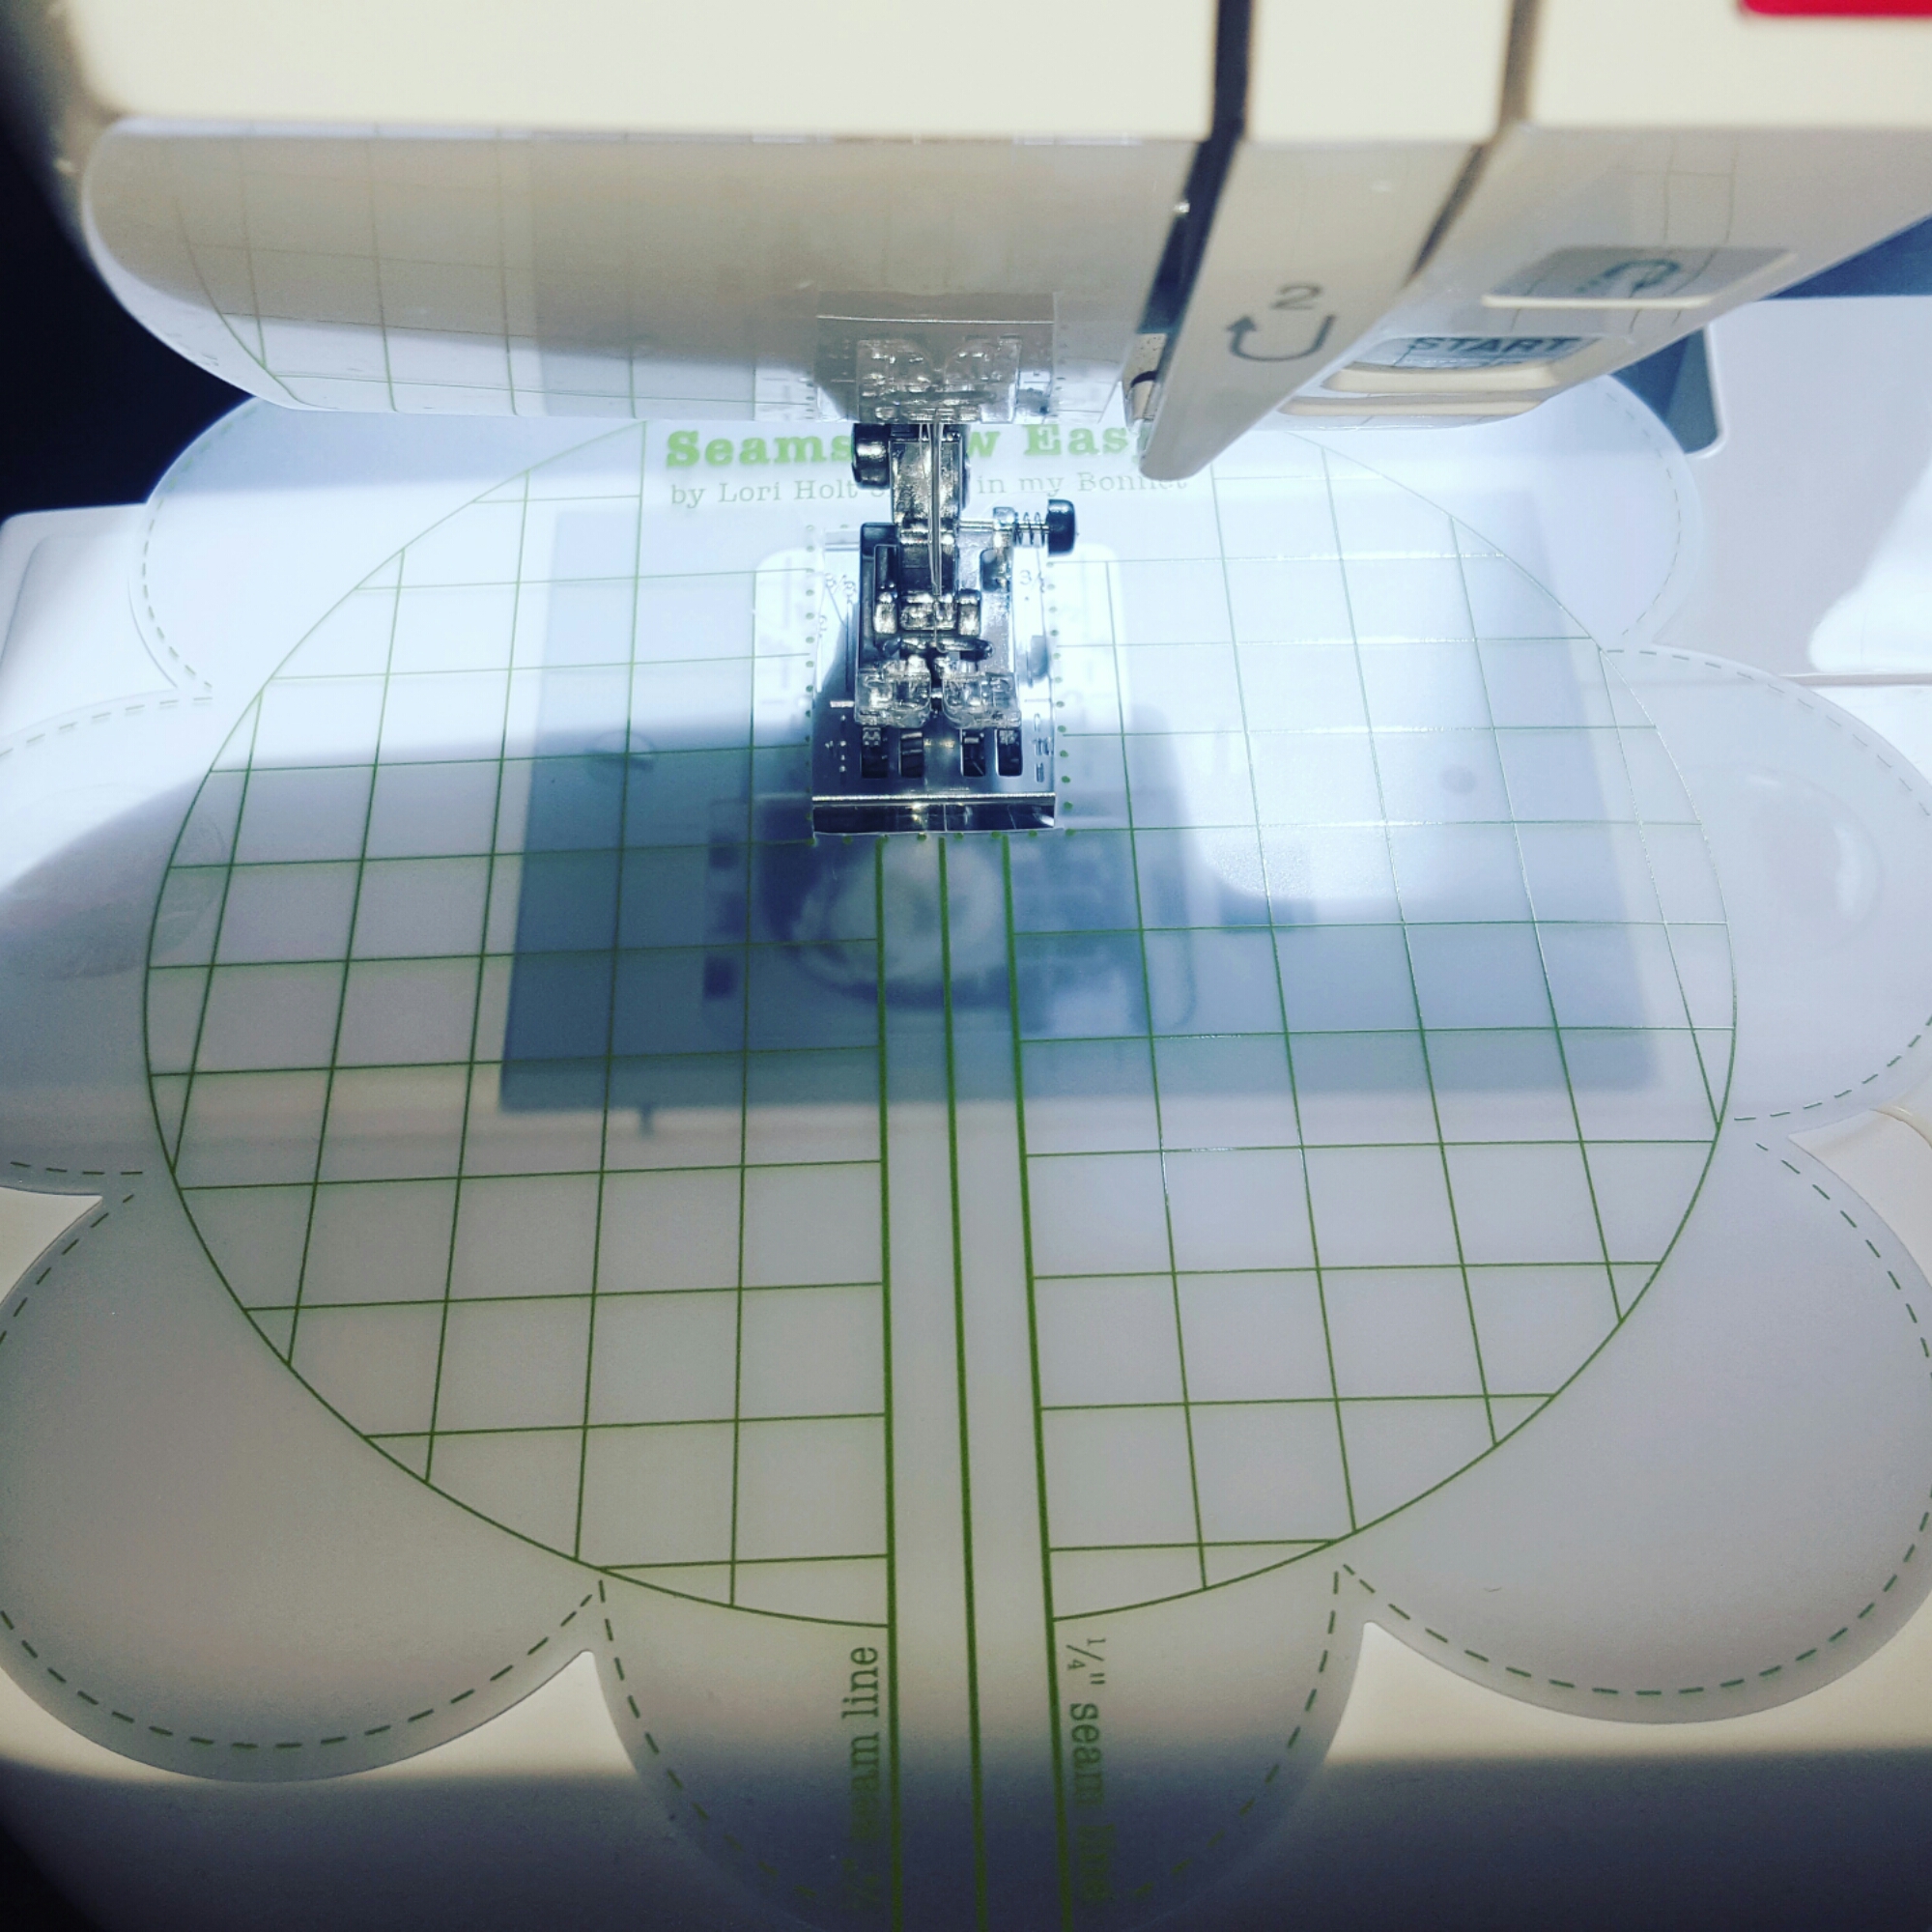
This is a seam guide called “seams sew easy” by Lori Holt and it’s genius. The only issue is you have to reposition it each time you replace the bobbin, but it’s still worth it. Not only did it resolve my seam allowance issue, but it meant I didn’t have to draw a diagonal line on the squares for the flying geese on the fancy fox block …or any other blocks where you sew a diagonal – snowballs, geese etc. HSTs are going to be much quicker now…
Anyway, suddenly I was done! Obviously the kind of suddenly that happens over months. Not really suddenly at all.
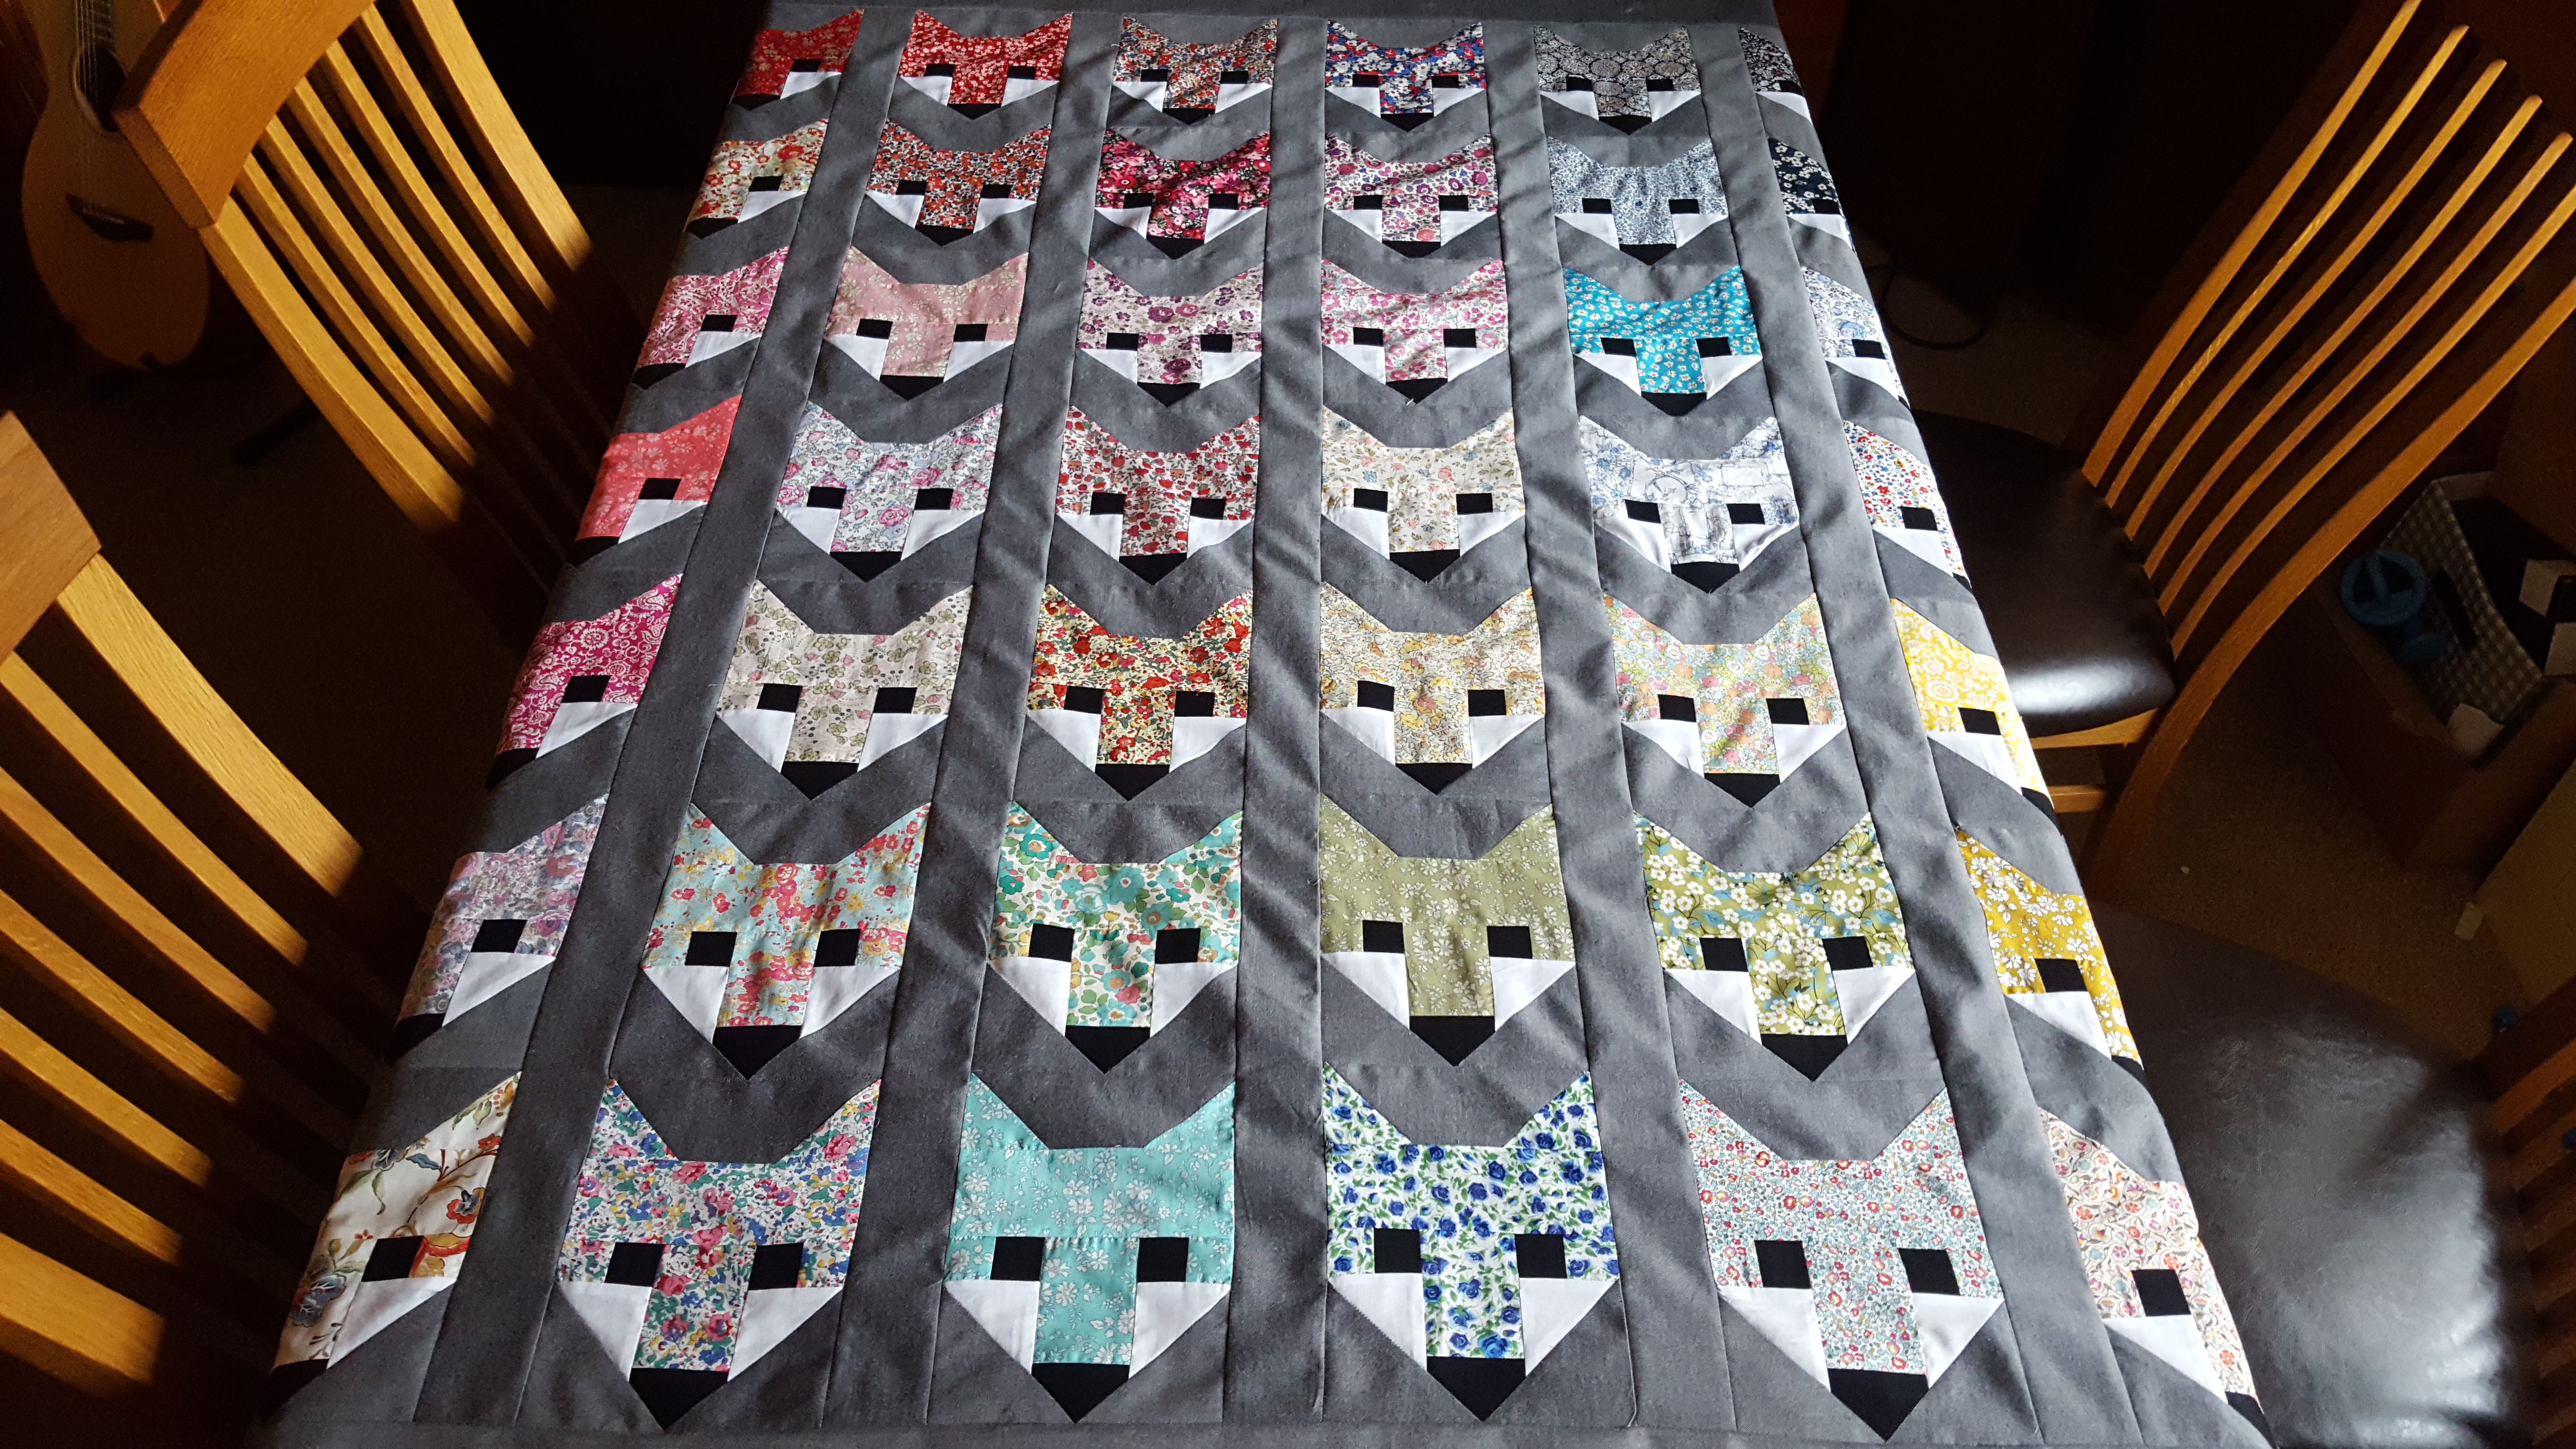
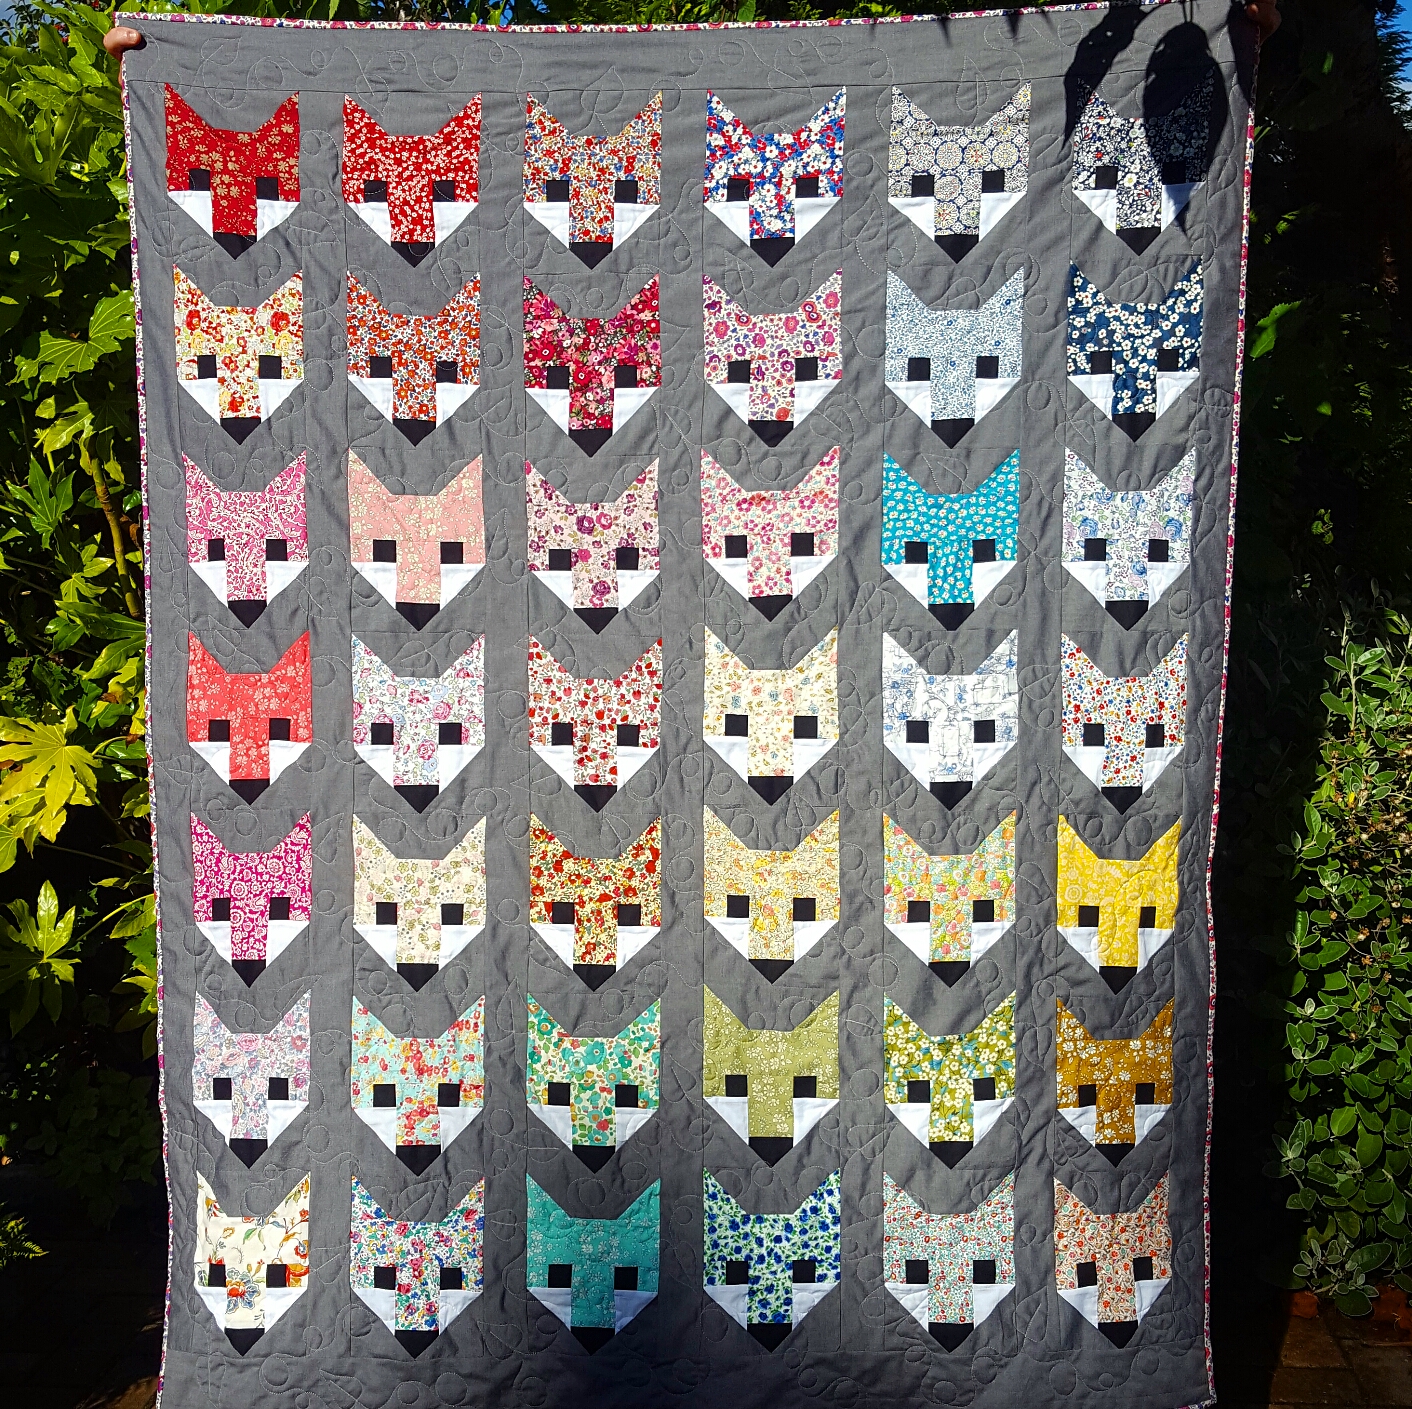
My background fabric was a grey cotton chambray for softness, and the cheek fabric was a white lawn cotton, to try and retain the sofness from the Liberty lawn fabric. I used kona black for the eyes and noses as I figured they’d be too small to really affect the softness… So I chose Quilter Dream Orient batting, with its scrimlessmix of silk, bamboo, tencel and cotton because it’s so soft with a beautiful drape and I splashed out on a Liberty back, an aqua daisy print called Bellis.
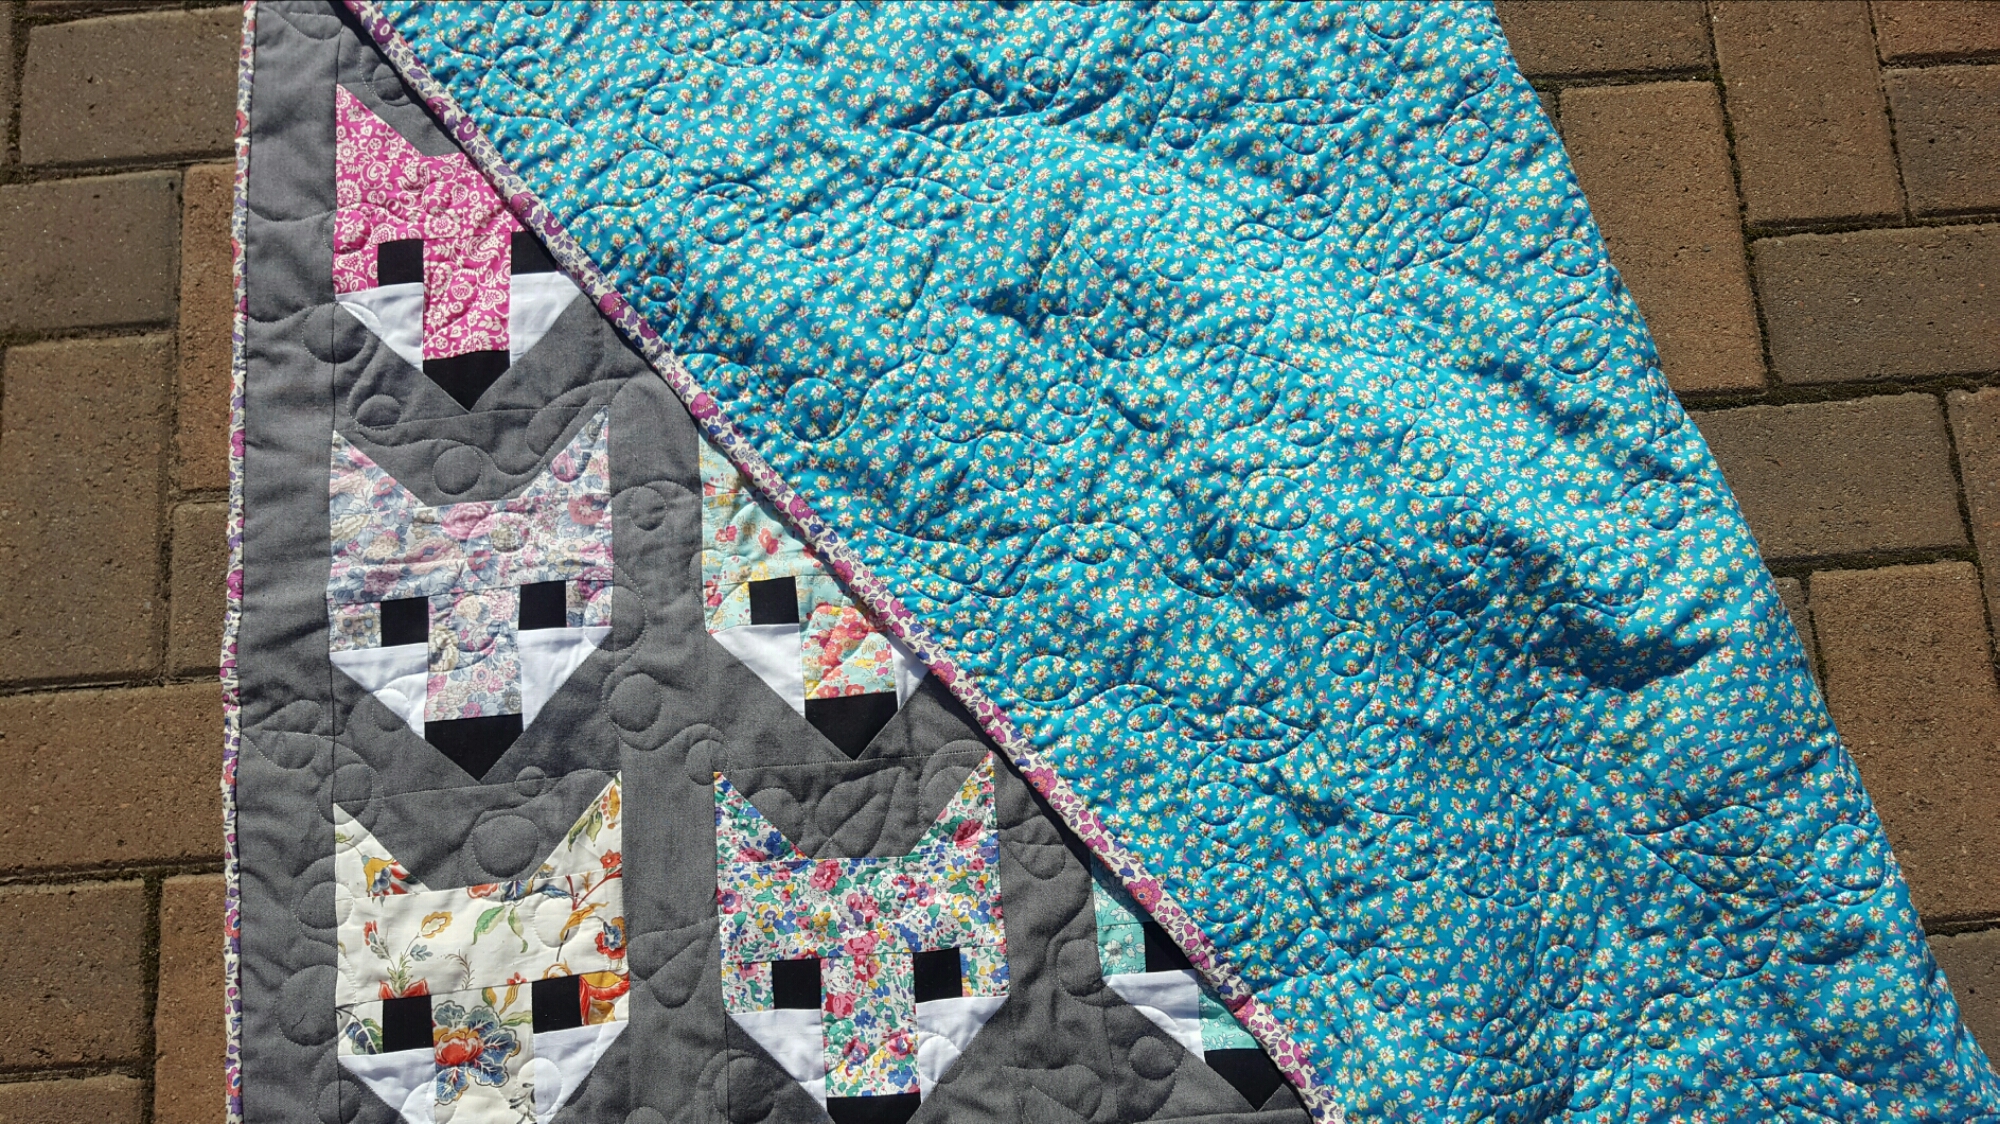
I really pondered the quilting. It seemed to me that lots of people in blogland had sent theirs out to a longarm quilter and gone for a woodgrain pattern. I knew I would never do that design justice, but I liked the idea of woodland. So I quilted a loopy leafy allover design using wonderfil invisifil thread – very fine polyester that I hoped wouldn’t show up too much on the very contrasting background and cheeks. The effect was good; subtle quilting without it being invisible thread but it kept snapping in my machine! Eventually by changing to a bigger needle, I just about got through. I’d really like to try it again for the effect but I’m reluctant to go through that again.. I don’t know why my machine didn’t like it! Annoyingly it doesn’t like Aurifil thread either…
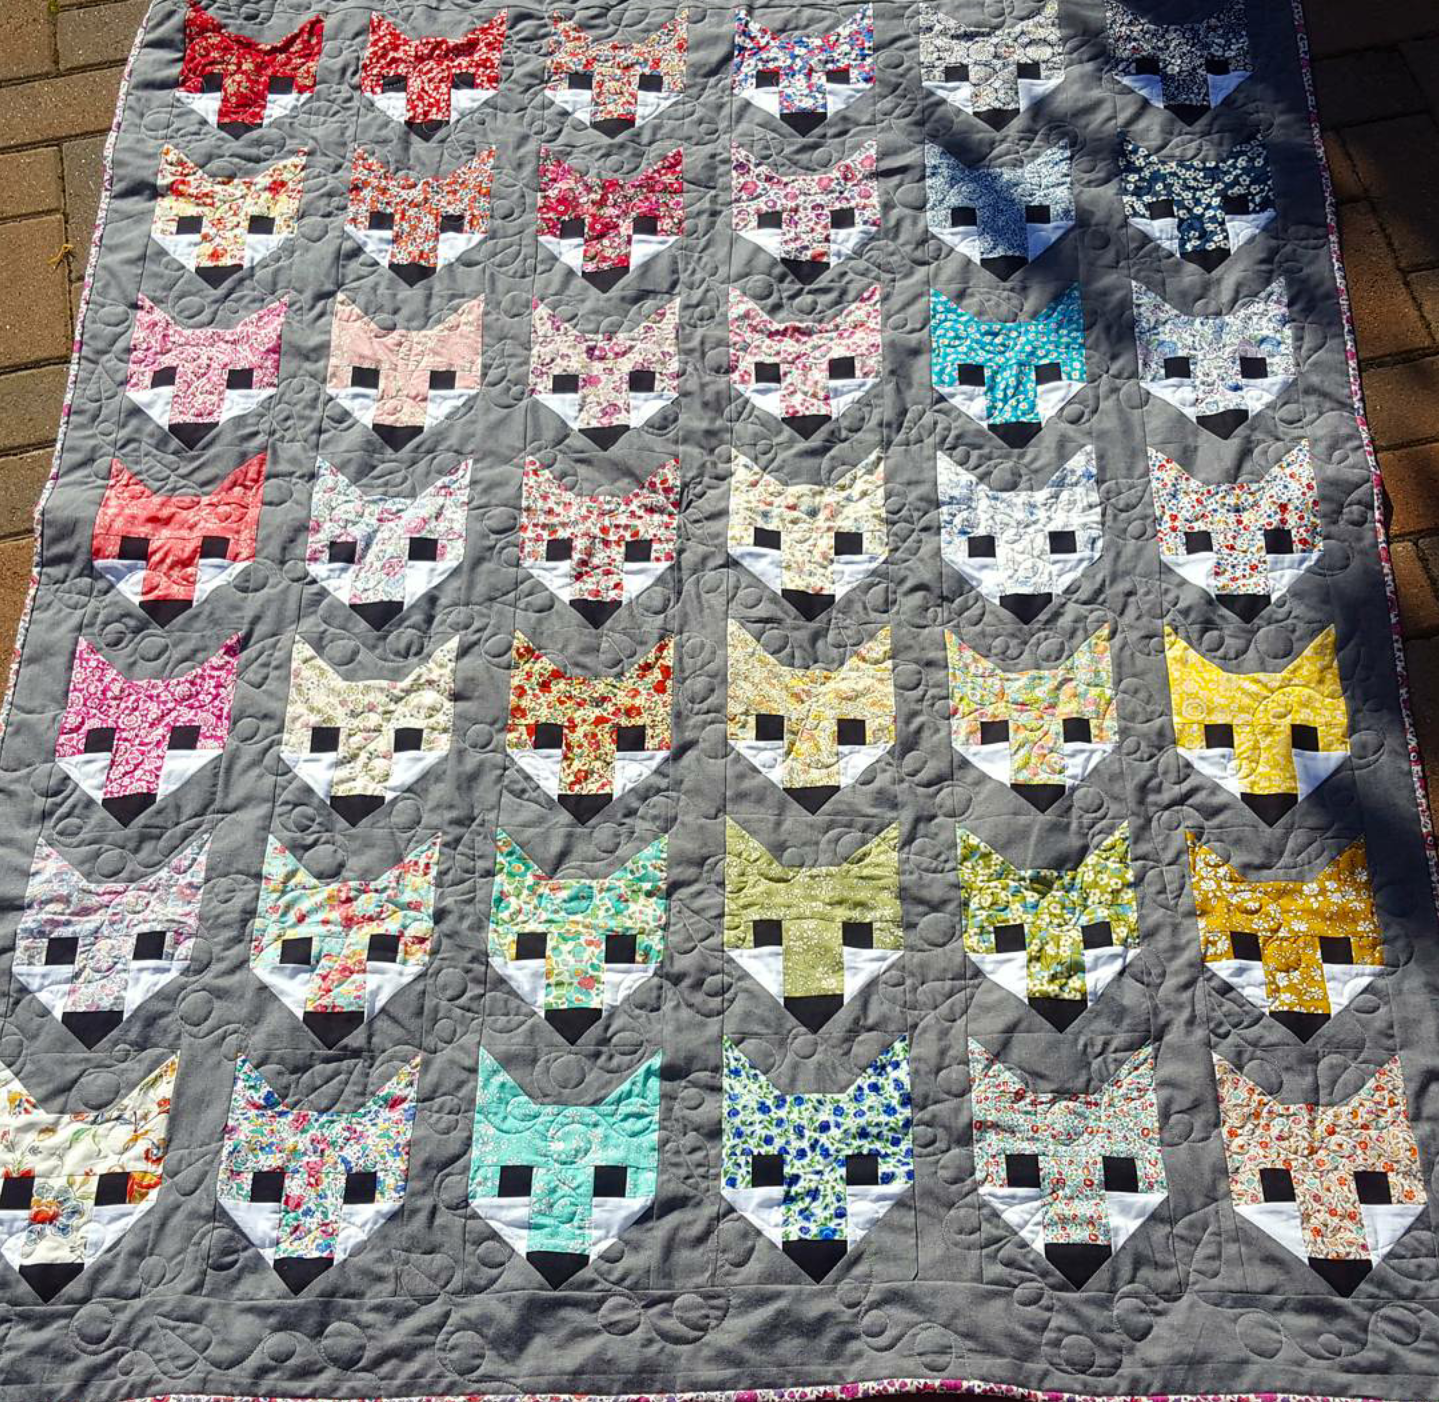
Some pictures… because obviously I haven’t included enough!
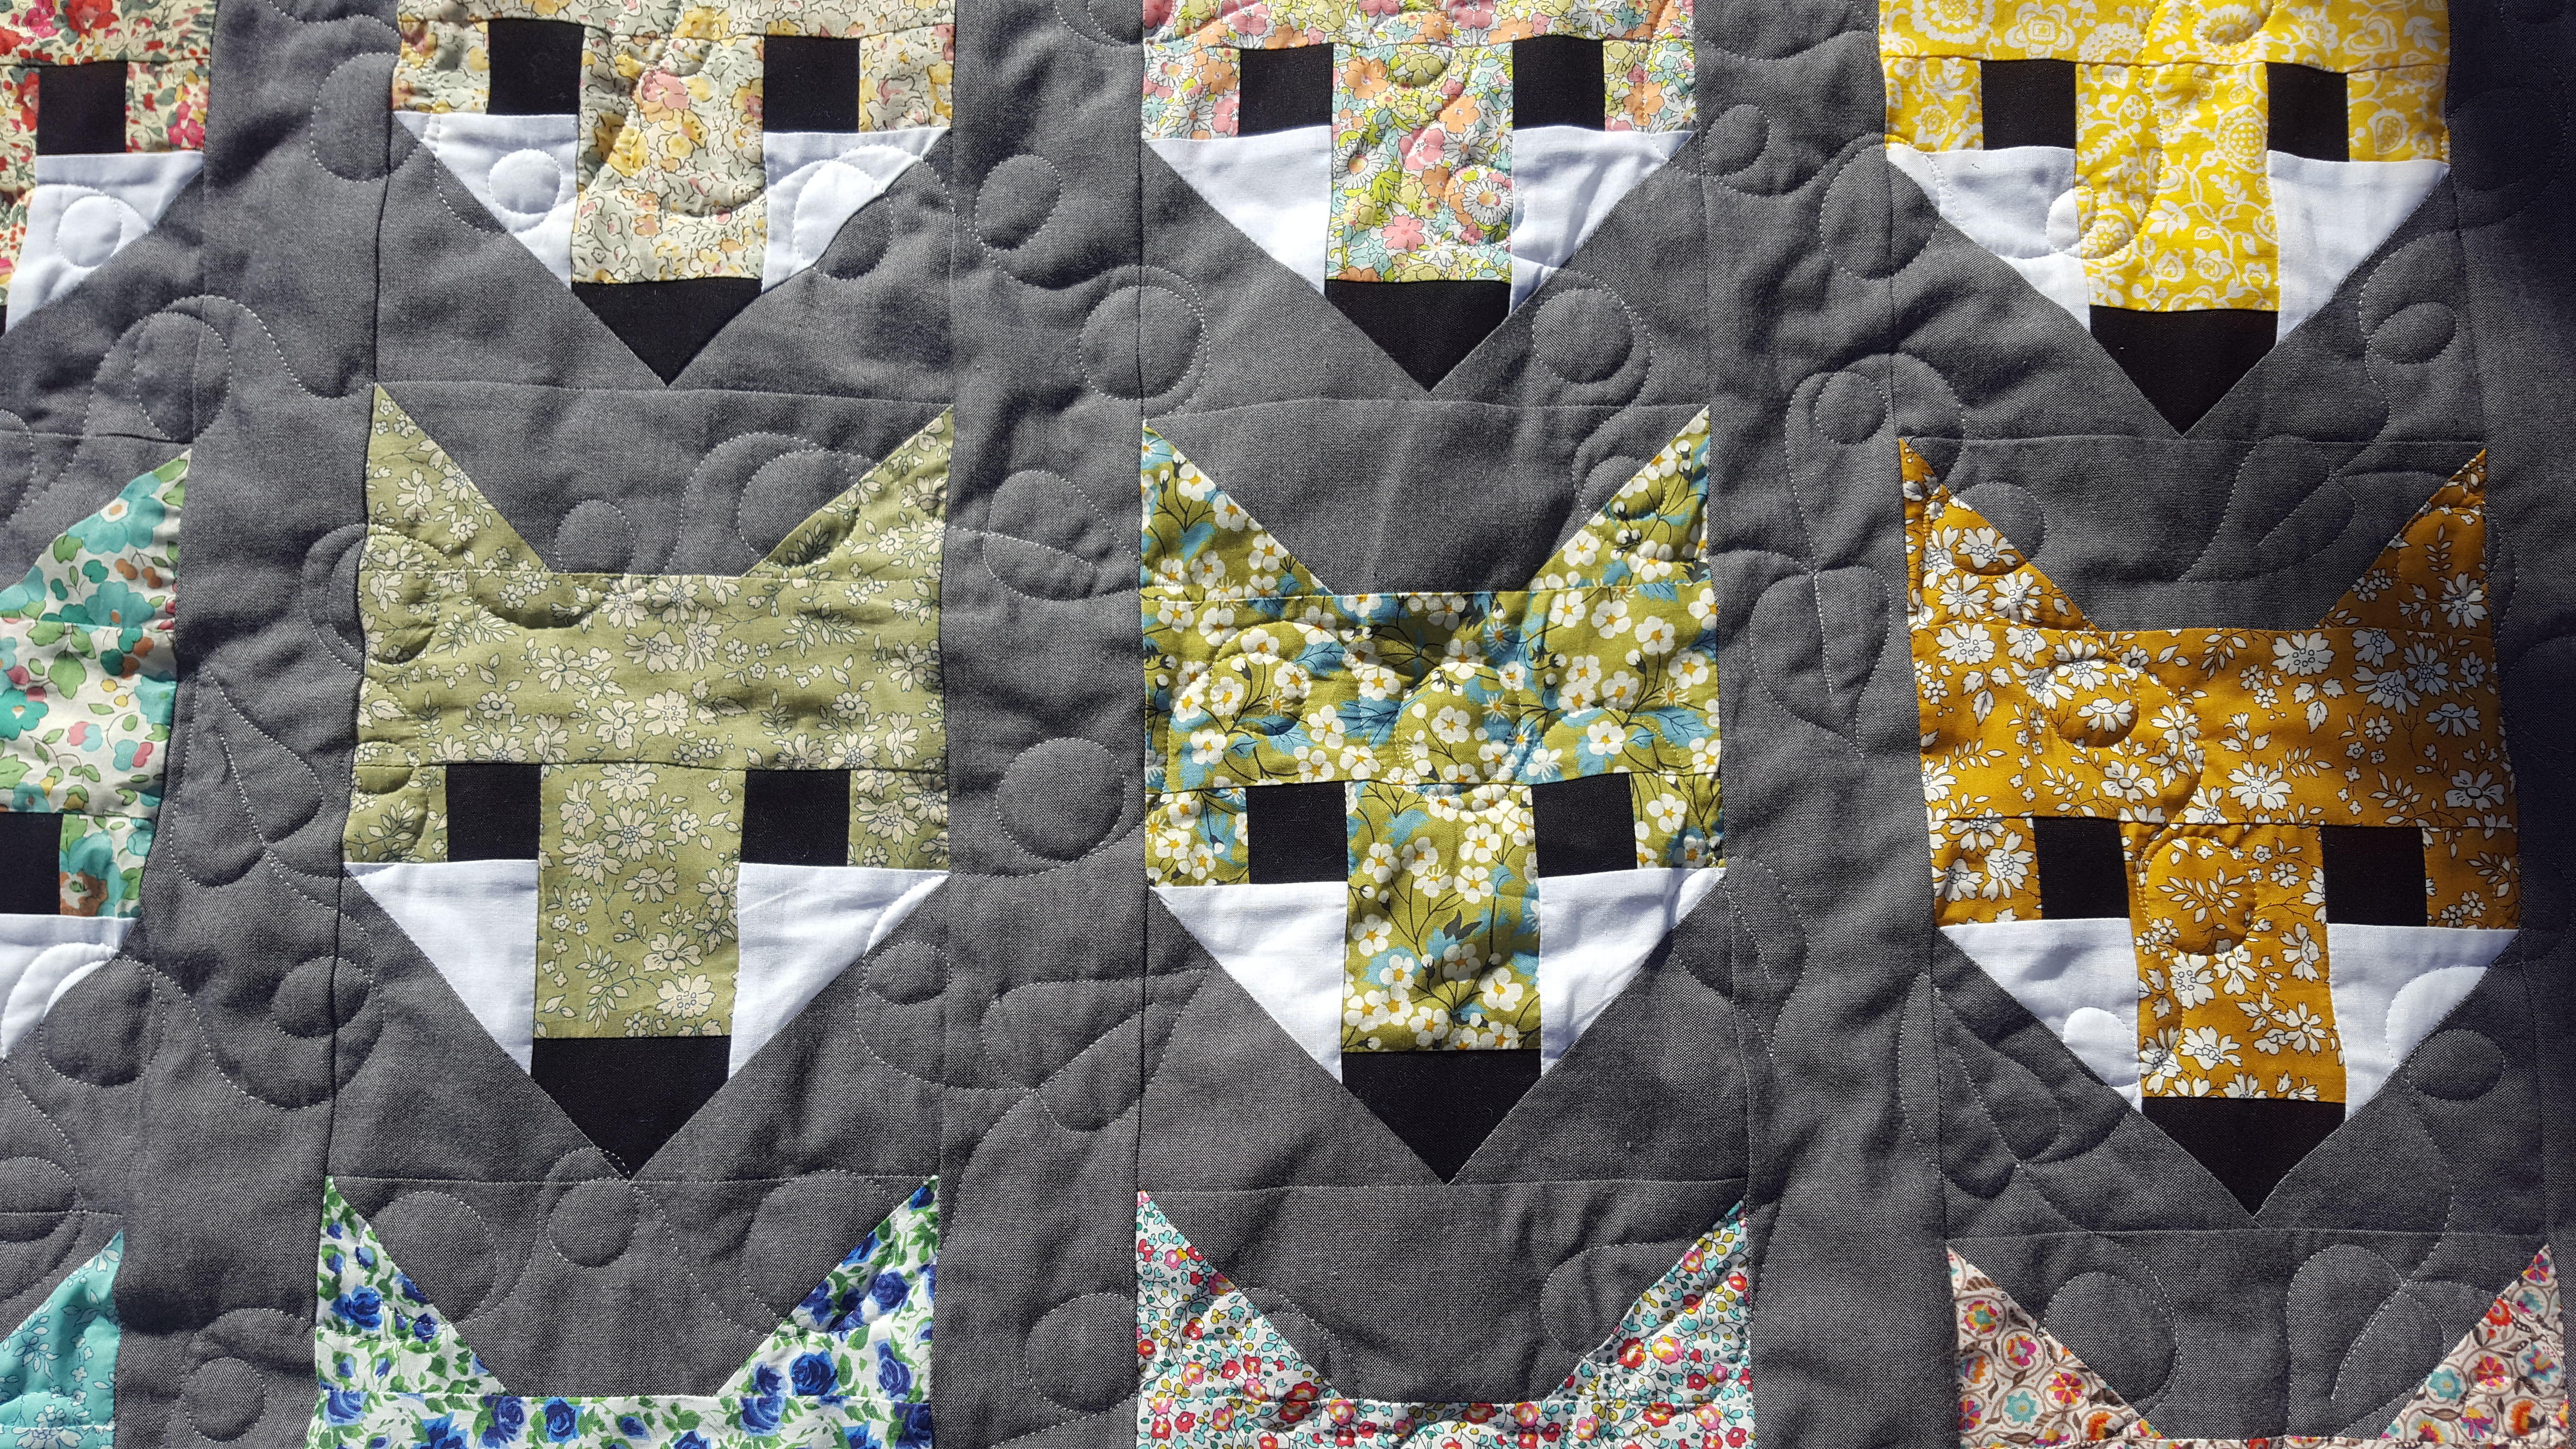
Can you see the leaves? Kiddo says they are all baby foxes peeking out from their nest in a bush. He loves this quilt because it’s very soft and very snuggly, even before the first wash. And because ..foxes.
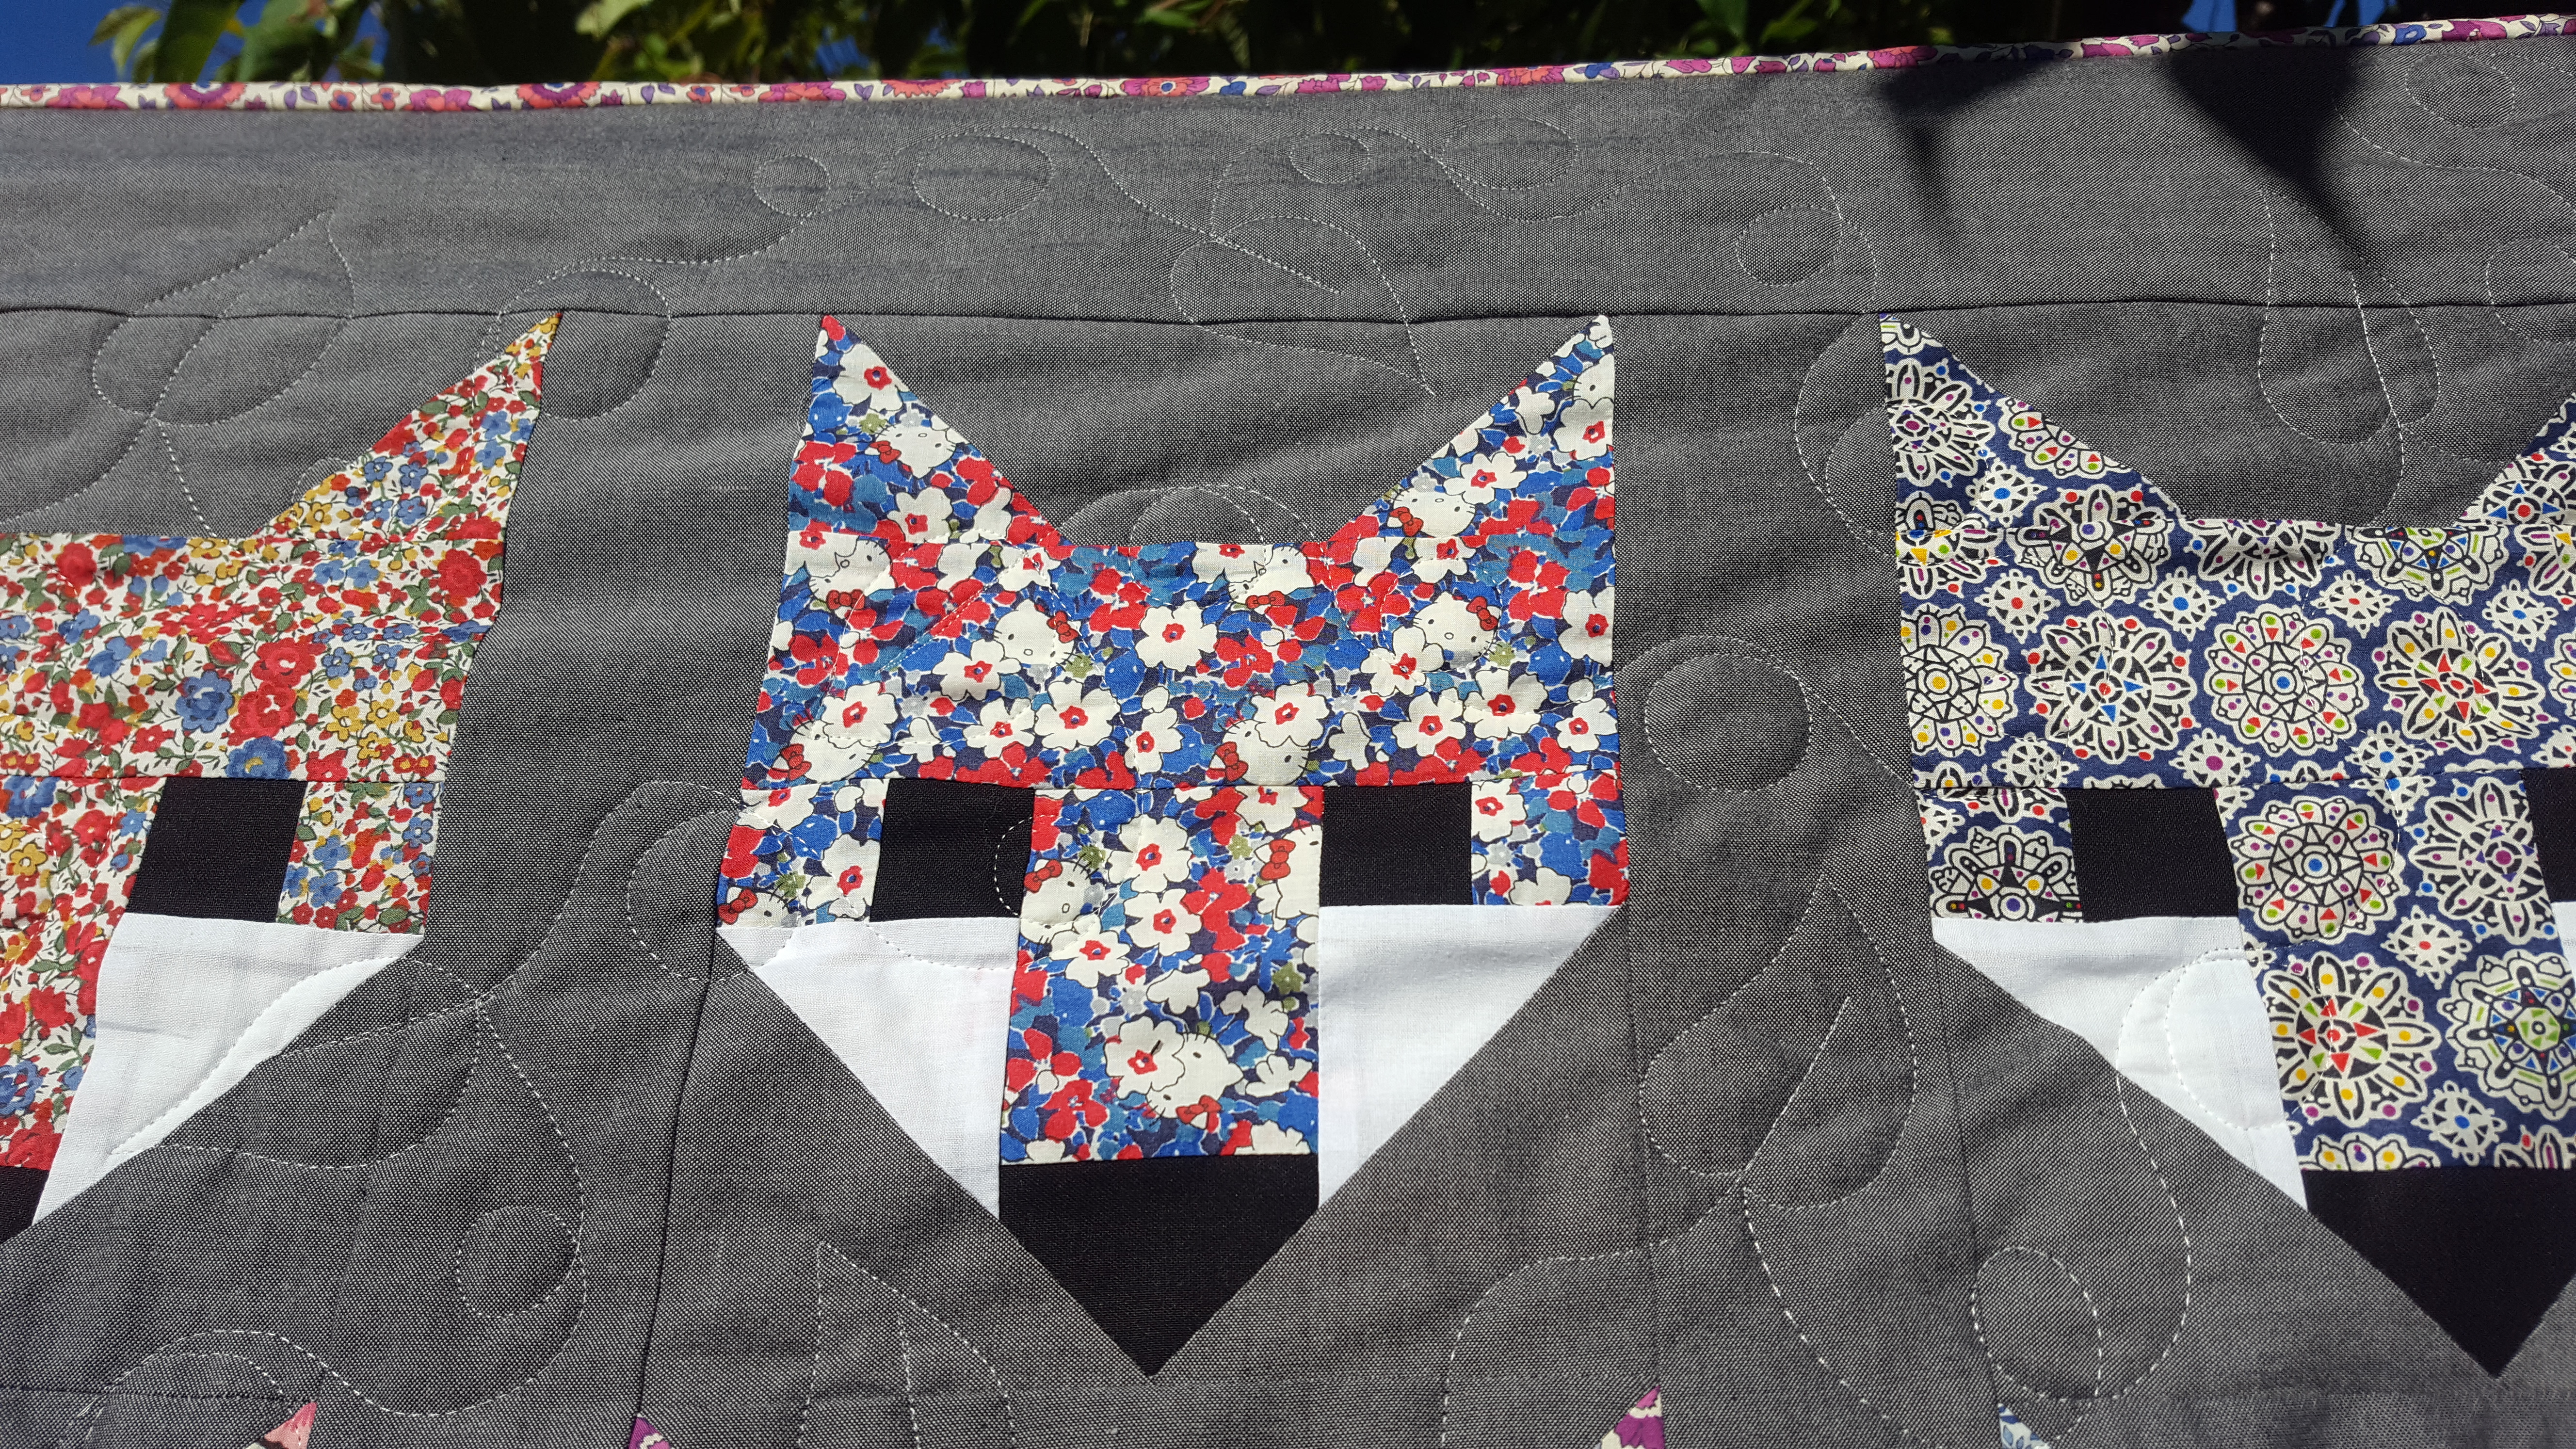
Hello Kitty Liberty! So cute. Why does every piece of Liberty just feel so special?
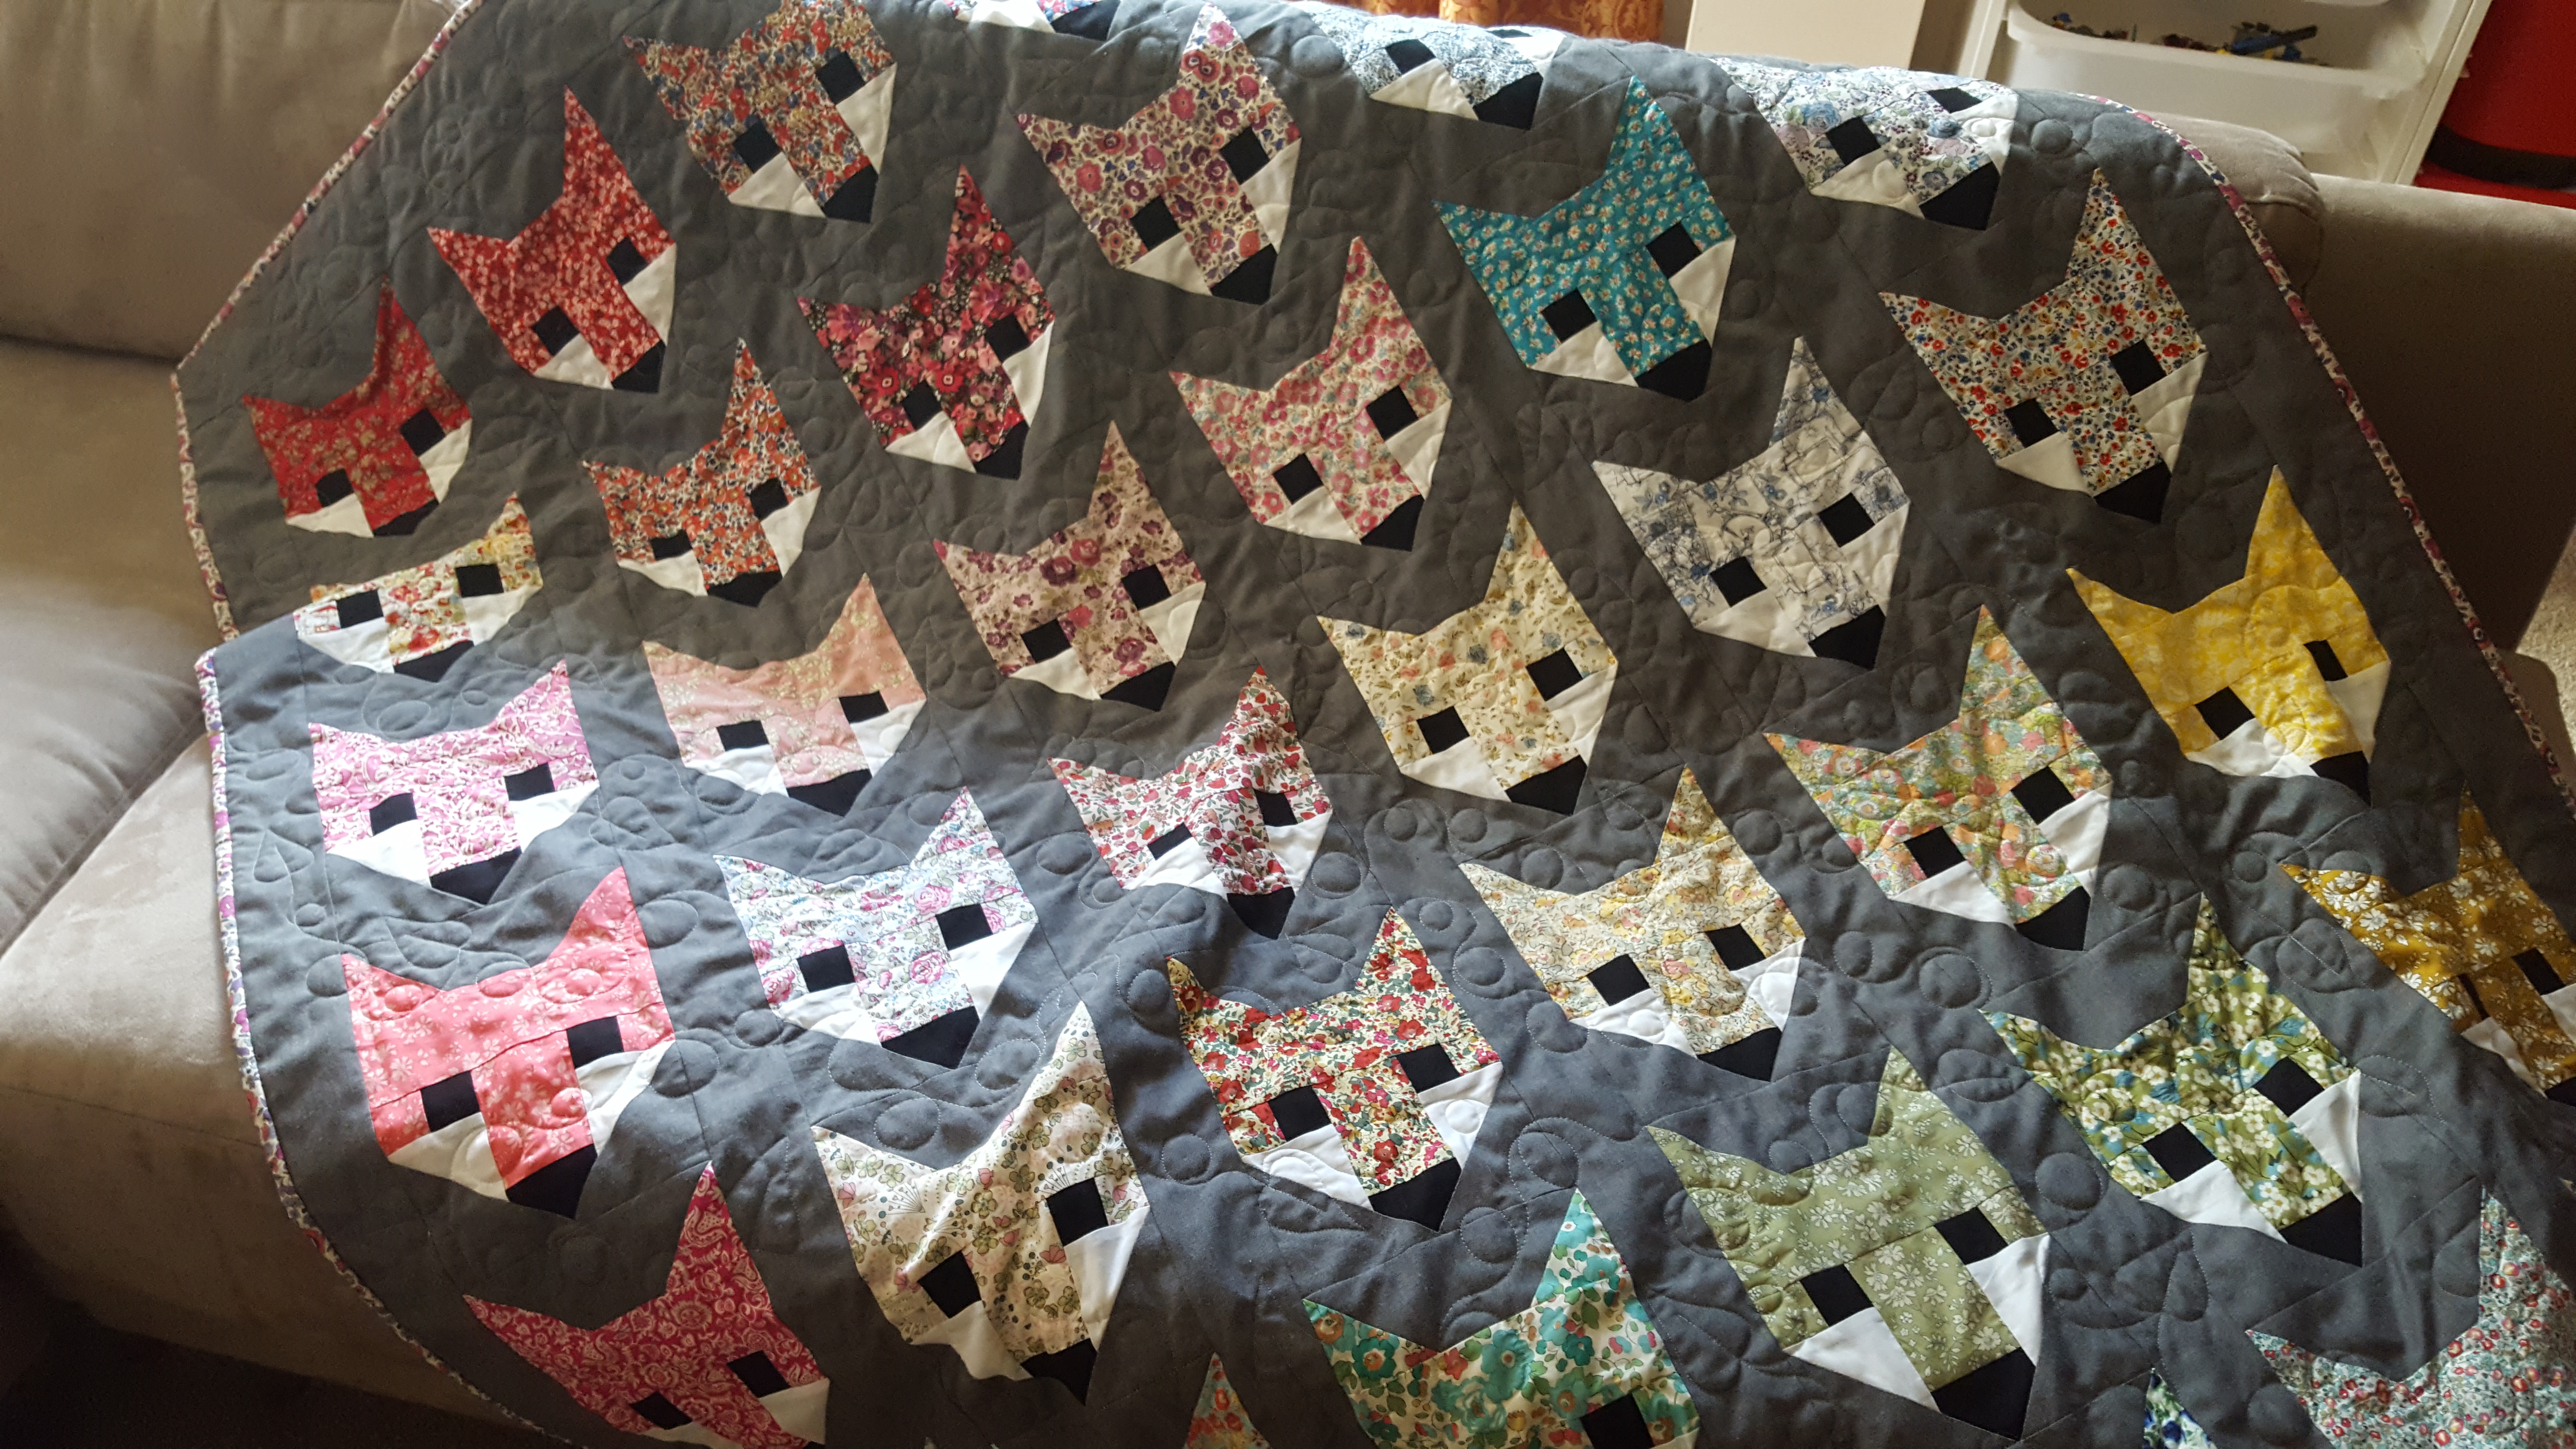
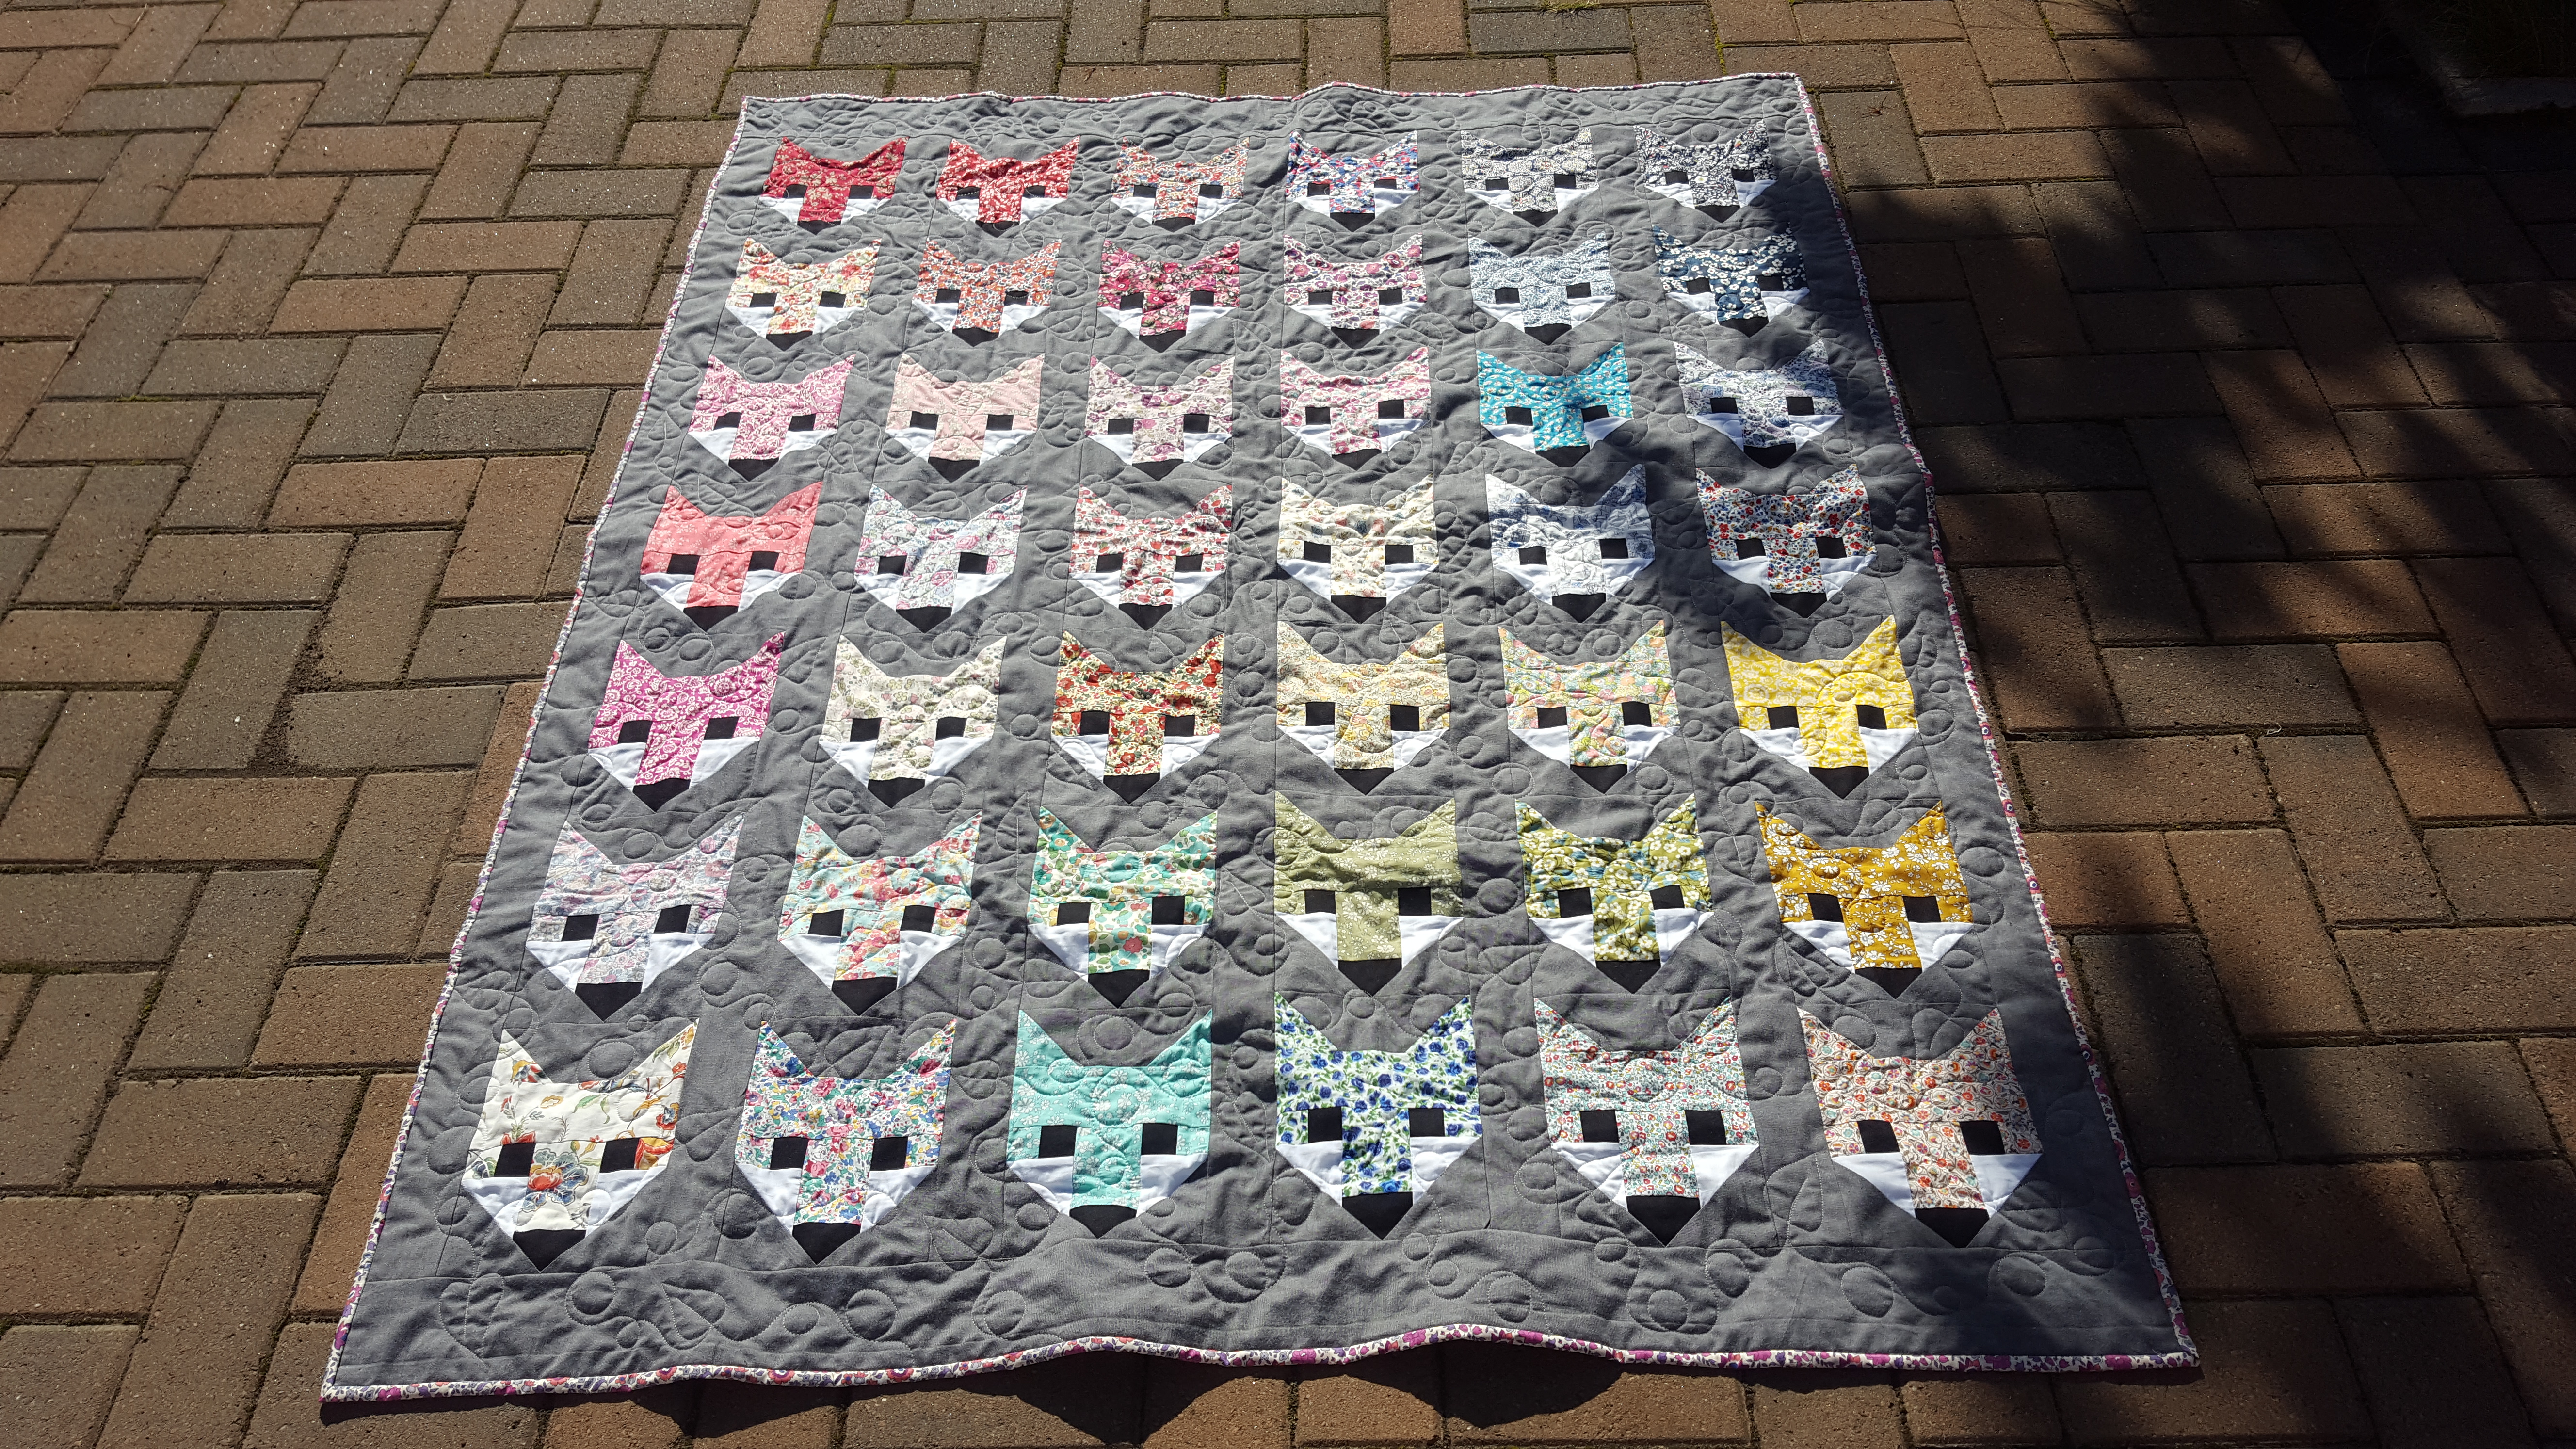
Aw my lovely Liberty foxes! The lap quilt comes out about 60″ x 52″ ish and is a really fun make. It looks good in most fabrics , so long as you ensure a high contrast between the cheek, eye/nose and background fabrics, And it’s actually pretty economical for prints – each fox face uses a 5″ x 9″ or 2.5″ x 18″ piece of printed fabric) I can imagine doing this lap quilt with half a jelly roll or half a layer cake . I’m so tempted to buy the giant size pattern now – I don’t think I’m done with these foxes yet.
Meanwhile, I’m off to snuggle some very fancy foxes! Until the next time,
Poppy xx