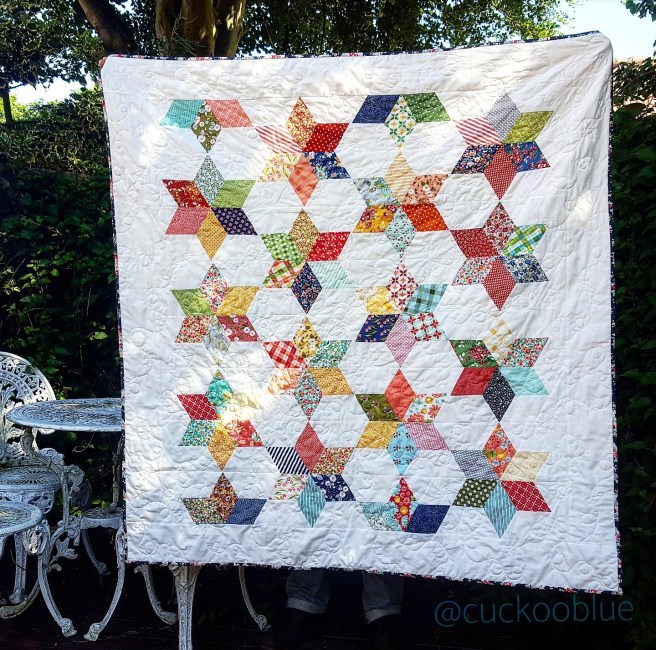
It’s like this little quilt just magically appeared in my hands:
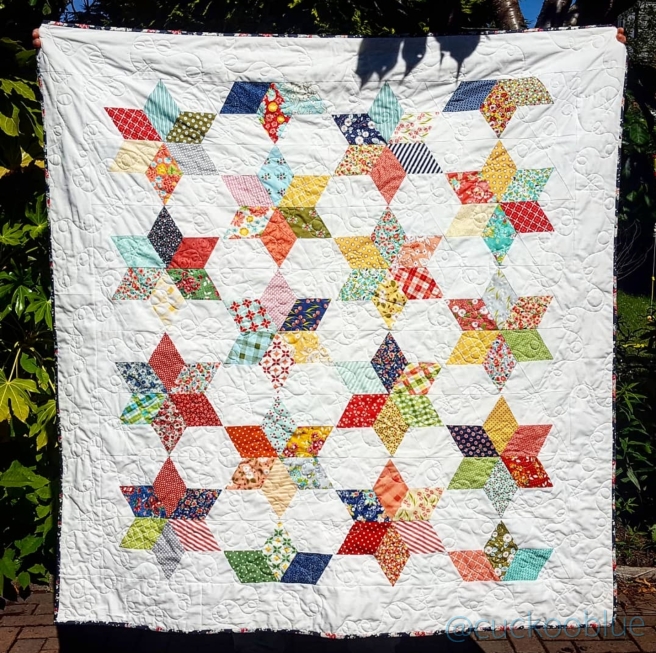
Isn’t it pretty? I say it magically appeared because it wasn’t on the list of things I’m either making (you can see those @cuckooblue on Instagram) or things I’ve been planning to make; it wasn’t on the radar at all. I haven’t even seen a quilt like it that I had in my head. Well I kind of had. Have you seen the Missouri Star Quilt Company Rhombus Star Quilt Tutorial? You can find it here:
https://www.missouriquiltco.com/land/tutorials/rhombus-star-quilt/index.html
They use a 10″ rhombus (diamond) template that they make themselves, and they end up with fewer, much bigger, stars which are all one colour. This is a picture of their lovely quilt.

It’s the same method, but it looks quite different!
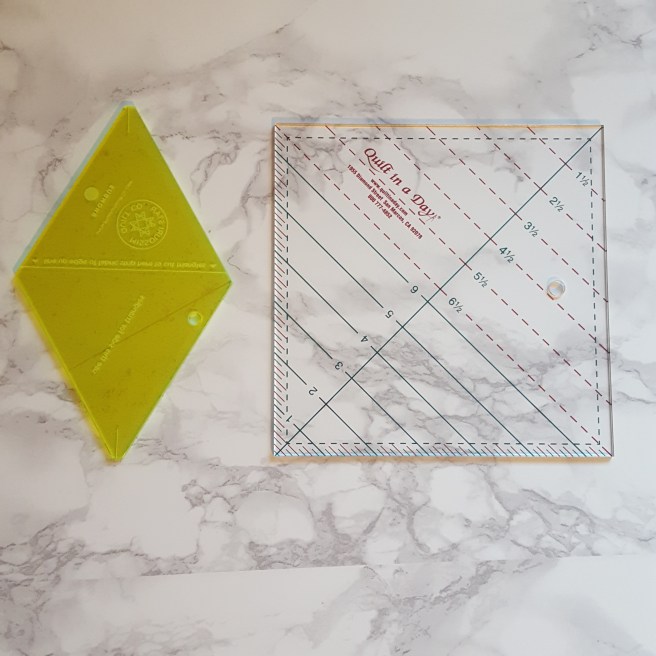
Anyway I watched the tutorial and on a total whim looked online and found both the 10″ template and the 5″ template online at http://www.thequiltshop.co.uk, and, hoping that 5″ meant it would fit charm packs (it does), I bought that one. You guys know my weakness for charm packs don’t you? Well, anything that fits those babies is a winner in my mind.
So the next day it came, and without any real idea of how it would look or how many diamonds I needed to cut or if I was making a quilt or what size it would be or really anything, I picked out charm packs of Tuppence and Acreage by Shannon Gillman Orr (I only just realised they were by the same designer! Talented lady), Little Miss Sunshine by Lella Boutique and Bread & Butter by American Jane all for Moda – and cut a whole heap of diamonds. Followed by a bunch of white triangles. I know, vague. Then I made half-stars as directed by the video until I got bored. So I had a load of diamonds left over and three half star blocks, because yes, I totally cut with joyous abandon and no plan. I’ll tell you what you need to cut later so you don’t make that mistake!

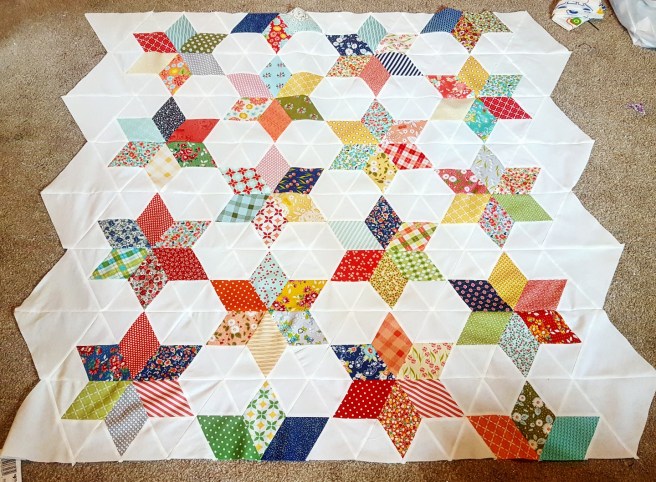
This is it in the process of laying out the half stars. Can you see what I mean by half stars? You sew each diamond to 2 white triangles, then sew three of those units together to make one “half star hexagon” shape. Then you sew them in rows, alternating whether they are up or down.
Seriously, I maybe was distracted and didn’t notice I was sewing hard, but it all seemed to go together really fast. From zero to the above picture in a few hours, from that to the picture below in a few more the next day.

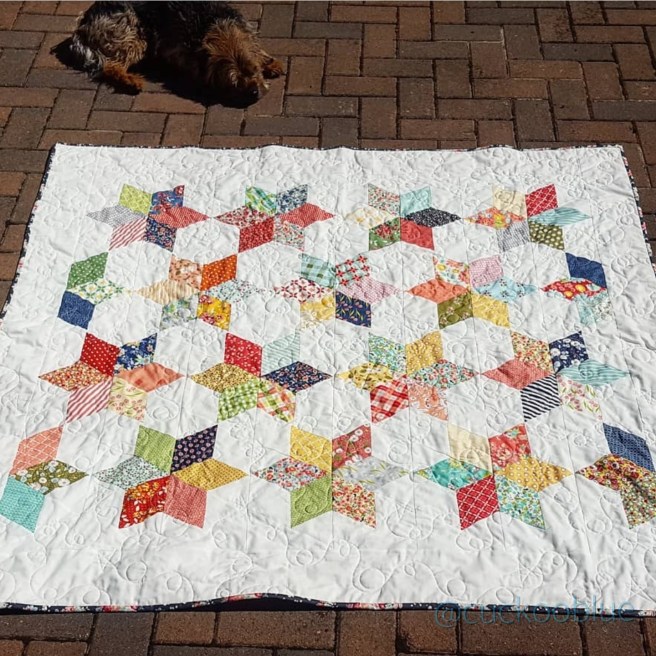
Of course you’re left with funky edges in reality. This is what that really looked like:
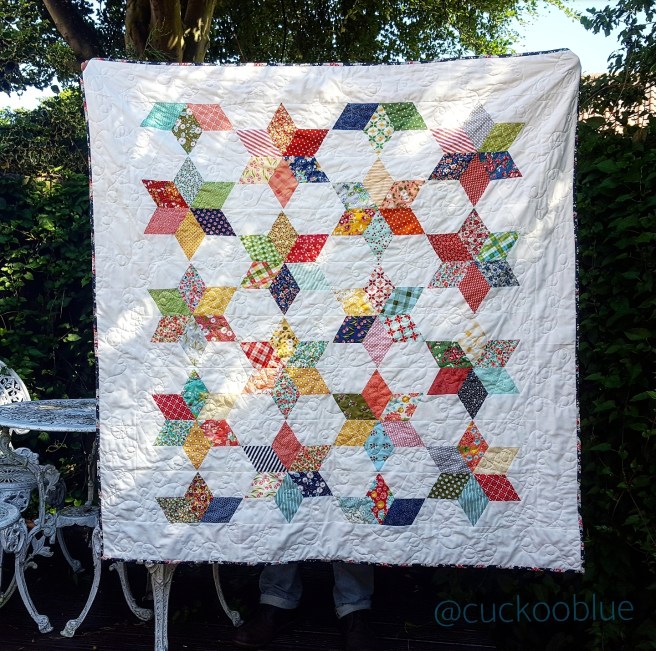
If you look at the edges you’ll see I added 8″ equilateral (60 degree) triangles to the end of each row. I then trimmed the sides down to make them straight and added 5″ white borders. Et voila:

Of course in these pictures it’s been quilted too! I used Bosal Katahdin 100% scrimless batting in Autumn weight which I bought a roll of and I’m playing with. I like it a lot, great quality, can quilt up to 8″ apart. I’m going to say I still prefer Quilters Dream, but it is cheaper, so there’s a very good reason to keep some of this on hand too!
Quilting pics! I quilted a loopy meander punctuated by little stars. I love those stars; they’re sweet, they’re fun, they reflect the quilt and they give you a great place to stop and turn around in your quilting!

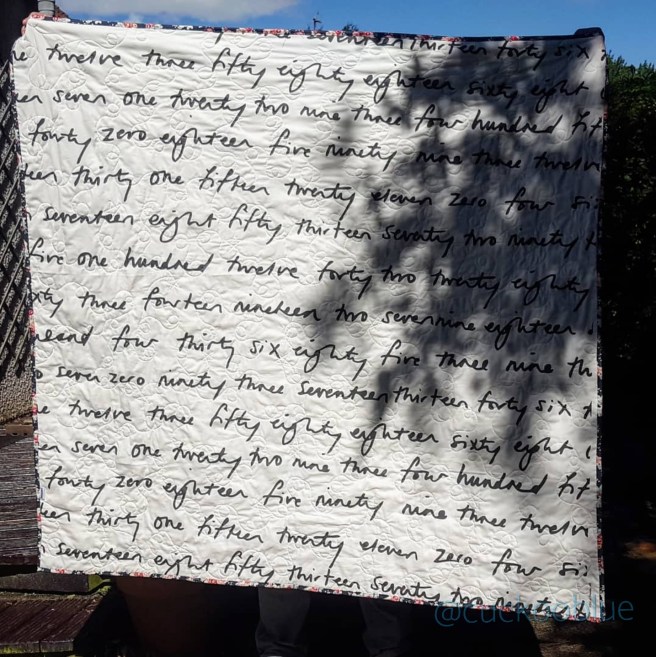
And that’s the back. Almost my last piece of IKEA’s nummer fabric. It’s now discontinued, and that’s a tragedy for modern quilters as it’s a brilliant backing! £3 a metre, 60″ wide, great quality, goes with everything. We should run a campaign to bring it back!
Oh yes, I said I’d tell you how to make the quilt with a 5″ rhombus template. I’m sorry I didn’t think to take process pictures at the time, I was just idly sewing. It’s not a real tutorial; perhaps I’ll do it properly if I make another of these quilts:
Brief instructions on making my scrappy rhombus star quilt (size 55″ x 58″”):
1. Get the Missouri star quilt company 5″ rhombus template.
2. Choose 96 5″ printed charm squares. Lay your rhombus template diagonally across the charm square and rotary cut out the rhombus shape. You can stack 4 or 5 charm squares at a time for faster cutting.
3. Cut 192 white triangles from white cotton yardage.
I think I used 4″ strips for these, but you could make the strips smaller and conserve fabric (the right height of the triangle whatever that is, 3.5″ maybe, I’d measure it if I was close by!)
*Make sure you cut out the bigger triangle shape on the template and not the smaller one like Jenny does in the video tutorial – she makes a mistake!*
4. Cut sixteen 8″ equilateral triangles.
5. Sew each diamond to two white triangles as shown in the Missouri star quilt company tutorial above, to make a triangle unit. Use up all the diamonds and triangles to make 96 triangle units.
6. Sew three triangle units together to make a “half star hexagon” shape. Repeat to use up all the triangle unit until you have 32 “half star hexagon” unit shapes.
7. Lay these units out in 8 rows, 4 in each row. You’ll need to lay them one facing up then one facing down, alternately to make them for together. Place an 8″ equilateral triangle at the beginning and end of each row.
8. Sew these units together in rows. Then sew the rows together.
9. Trim the end equilateral triangles about 3/8ths inch away from the star unit seams to make the left and right edges straight.
10. Cut 5″ strips of white fabric, join until they’re long enough and add as borders. And you’ve finished your top!
Here is a picture of my scrappy notes that I made to remind myself how I did it. Working this out beforehand would have saved a lot of time and fabric!
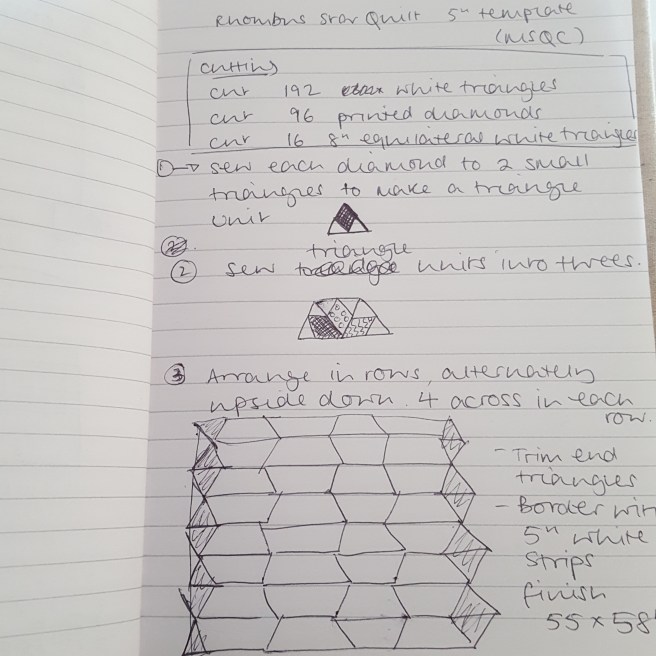
No, it’s not pretty. But it works. And yes I made mistakes. Ugh. Feel privileged that I let you see this. It’s like letting your friends come over without tidying up. Now they’re real friends.
Quick back to another pretty picture of the quilt that just magically appeared in a few hours from nothing! I’m actually considering giving this to my son’s teacher. I only once gave quilts because those teachers literally turned out lives around ( https://www.google.co.uk/amp/s/cuckooblue.co.uk/2014/07/07/quilts-of-gratitude/amp/) . But he’s had the same teacher for 2 years, I like her, she’s been great, and this quilt has appeared just at the right time. Maybe it’s meant to be.
Let me know if you have questions about making this quilt if you want to, I’m aware the tutorial isn’t as comprehensive as normal!
Till the next time,
Poppy

Thanks so much for taking the time to write this post! I think your quilt is great, and any teacher would be thrilled to receive it!
LikeLike
What a truly lovely comment! Thank you for stopping by. I’m now veering even more towards giving it to her! 💕
LikeLike
I think this is one of my absolute favourite quilts of yours! It’s stunning, really. I love the fabric and the pattern and the back is amazing too what great fabric to use!
LikeLiked by 1 person
Hi Anna, so sorry I missed replying to your lovely comment! I must say I also really love this one. The colours are so bright and perfect. I decided to give it to my friends who are getting married- it’s been hanging around my bedroom until now, I’ll be slightly sorry to see it go! But – wedding. Trumps all! Thank you so much 💕
LikeLike
Hello, do you know why do I get a pleat in he middle of my half star?
LikeLike