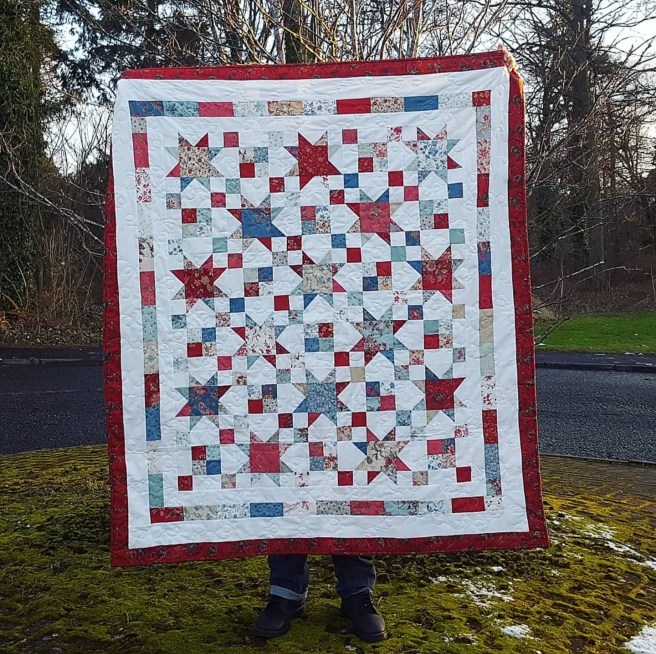
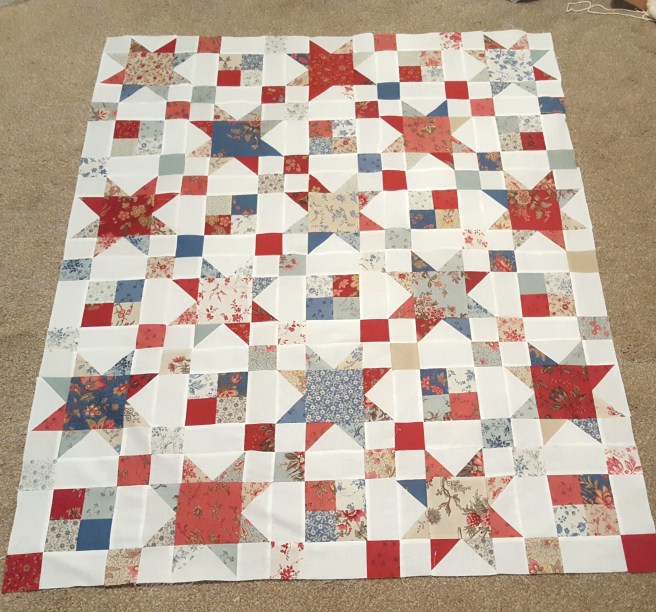
So my dad informed me I hadn’t written a blog post in 6 months. My dad! Who knew. So to appease his apparent need for some sewing chat and to kickstart my blogging this year, here’s Toutes Les Étoiles, the only quilt I ever named:
My friend got married in a beautiful château in France 2 years ago and invited us, starting us off on the most wonderful holiday near Bordeaux. When we got to the château, this was my room:

Isn’t it gorgeous? Authentic antique furniture – and check out that quilt! I examined it carefully and it’s certainly seemed to be a handmade quilt, just the right amount of wobbles and mistakes to feel authentic. Ahhhh. The wedding party had the château to ourselves for 4 days and it was truly heavenly; we all got on well in idyllic romantic surroundings with beautiful weather and the happy couple were truly happy. Great memories.
Anyway, a few months ago they bought a house in the country together (fairly near us) and since this year is their 2 year and aptly-named “cotton” anniversary, I thought a quilt reminiscent of their French wedding might be a good housewarming present.
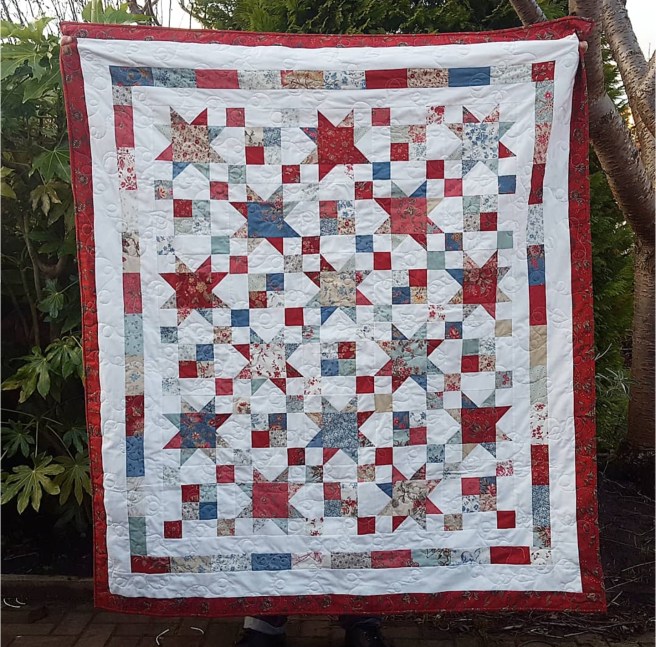
I used a Moda layer cake of French General’s Rural Jardin which I’ve been hoarding for far too many years and is now out of print, but they bring out beautiful, authentic-looking French inspired fabric collections regularly if you like the look of this one. Check out the back:

Do you like it? I do. It’s some Toile de Jouy quilting weight fabric I bought years ago from a French importing shop, which sadly didn’t survive the recession. I pieced it together with some leftover charm squares cut in half.
It’s not difficult to see how you make this quilt top, but here are instructions if you need; at least the maths is all done!
Tutorial
*Stitch everything right sides together with a 1/4″ seam allowance, the more accurate the better! *
Quilt top measures 56″ x 64″
Fabric Requirements:
- 3 – 4 charm packs* (or 1 layer cake cut into 5″ squares)
- 1 yard of printed fabric for outer border and binding
- 2.5 yards of white background fabric 44″ wide
*Note: you can make this quilt with 3 charm packs but 4 gives more options for removing fabrics with low contrast with the background fabric. You can cut 42 5″ squares from stash instead of a charm pack if you prefer. Leftovers can be used in the pieced backing.
Cutting:
Cutting the Printed Charm Squares:
1. You will need 100 printed fabric charm squares, for the patchwork and the inner border.
Remove any charm squares which have poor contrast with the white background, although one or two could be used for the star centres.
2.Choose 15 printed charms for the star centres. Cut these down to 4.5″ squares.
3. Take 60 printed charm squares and cut into quarters, yielding 240 2.5″ squares. Keep them in sets of 60.
4. The remaining 25 charm squares are for the inner border. Cut these in half yielding 50 5″x2.5″ rectangles. set these aside for the inner border.
Cutting the White Fabric:
1. Cut four 2.5″ x Width of fabric (WOF) strips. Subcut these into 60 2.5″ squares.
2. Cut 14 more 2.5″ x WOF white strips and subcut these into 120 2.5″ x 4.5″ rectangles.
3. For the two borders, cut 11 more 2.5″ x WOF strips. Join these together end to end to make one long strip and then leave aside until you are ready for the borders.
Making the Star blocks:
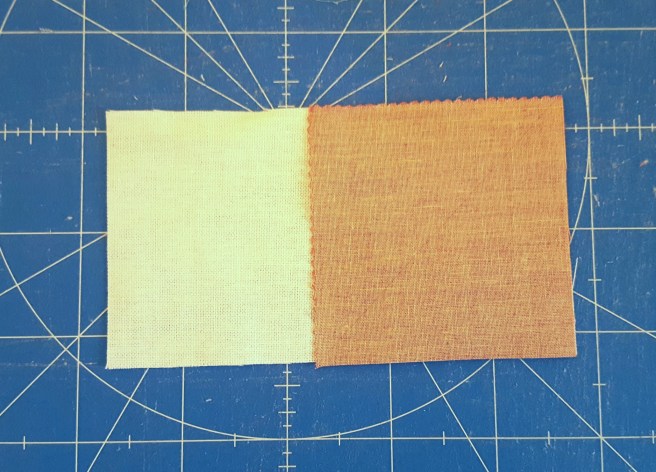
1. Take 120 2.5″ printed squares and on the back of each one draw a diagonal line in pencil from one point to the opposite point.
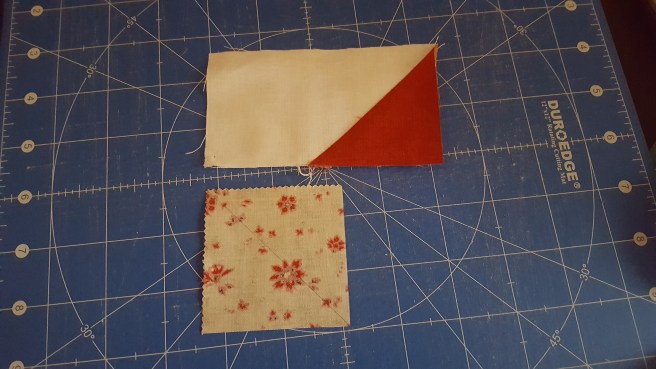
2. Now make your first flying geese unit. Lay one of your squares, right sides together (RST) onto on of the white 4.5″ x 2.5″ rectangle so that the pencil diagonal line goes from the top right corner of the rectangle into the bottom middle.
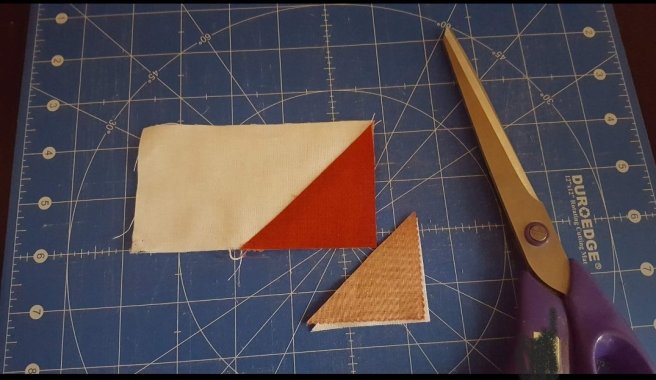
3. Sew along that pencil line

4. Cut off the triangle (both the printed and white bits) below the pencil line, cutting about 1/4″ away from the sewn diagonal line. Discard the cut off triangle.

5. Fold back the printed fabric to reveal your flying, um, goose.
6. Take another 2.5″ square, lay it onto the white rectangle with the pencil line going from top left to the bottom middle then sew along that pencil line.

7. Again cut off and discard the excess triangle fabric.

8. Fold back the printed triangle and press – you now have one flying geese unit, which will be one side of your star.

9. Make some more of these flying geese units. You will need 60 all together.

10. To assemble one star block, you need one 4.5″ square centre, 4 flying geese units and 4 white 2.5″ squares. Lay these out as below.
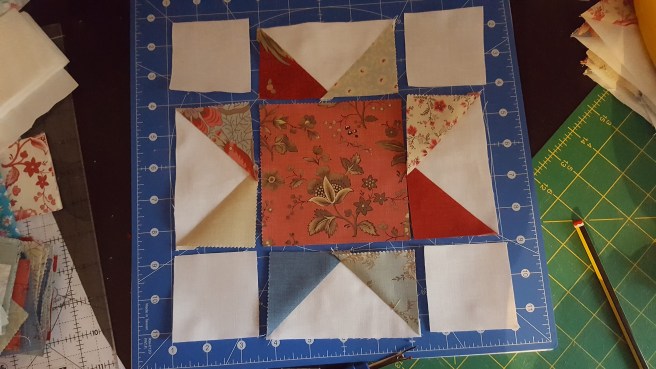
11. Sew a flying geese unit to each side of the centre square.

12. Next sew the 2.5″ white squares to the ends of the top and bottom flying geese units as shown below,

13. Sew all the rows together to make a sawtooth star block. It should measure 8.5″ (if your 1/4″ seam allowance is accurate).

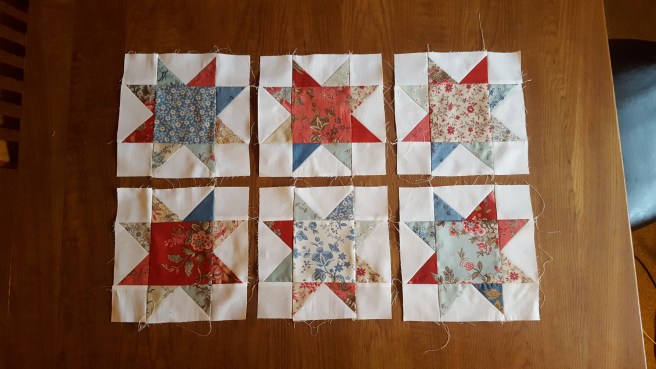
14. Make 15 of these star blocks and press.
Making the Chain blocks:
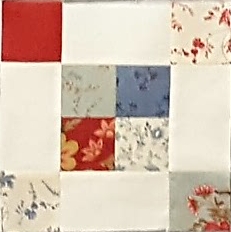
Okay, this is where I confess that I lost some photos and can’t show you quite as step by step, but they are really easy. I’ve done a mock-up with some other fabrics below.

1. Take 60 of your remaining printed 2.5″ squares, sew them into pairs and then sew the pairs into little 4 patches, like the middle of the above picture. You will need 15 4-patches.
2. Next sew a white 2.5″x4.5″rectangle to either side of each 4 patch.
3. Now take the remaining 60 4.5×2.5″ white rectangles and sew a printed 2.5″ square to each side of each white rectangle.
4. Finally sew the rows all together. you should end up with a block that looks like this below! (excuse the blurriness, it’s cut from a bigger picture!) It should also measure 8.5″ square, if your 1/4″ seam allowance is accurate). You need 15 of these blocks. Press.
Assembling the Quilt:
Lay out your star blocks and chain blocks in an alternating pattern, starting with a chain block. Make a 5 by 6 grid as shown below….

2. …and sew it all together.
Adding the Borders
1. Measure the sides of your quilt. If seam allowances were entirely accurate the sides should measure 48.5″, but they never are totally accurate. Measure the sides and then cut white border strips to that length – this helps prevent warping of your borders that can happen if you over stretch the borders as you sew. Pin on the border at both ends and in the middle and then sew on the side borders.
2. Next measure the top and bottom borders (theoretically 44.5″), cut a length of white 2.5″ strip to that measurement. Pin and sew on your top and bottom white inner borders.
3. To make the scrappy inner border, sew together twelve 2.5″x5″ printed rectangles that you made at the beginning by halving the charm squares. Sew this to one of the sides of the quilt and trim off the excess. I figure it’s scrappy so it really doesn”t matter if it’s perfectly symmetrical.

4. With the remaining white strips, make a second white border in the same way as described above.
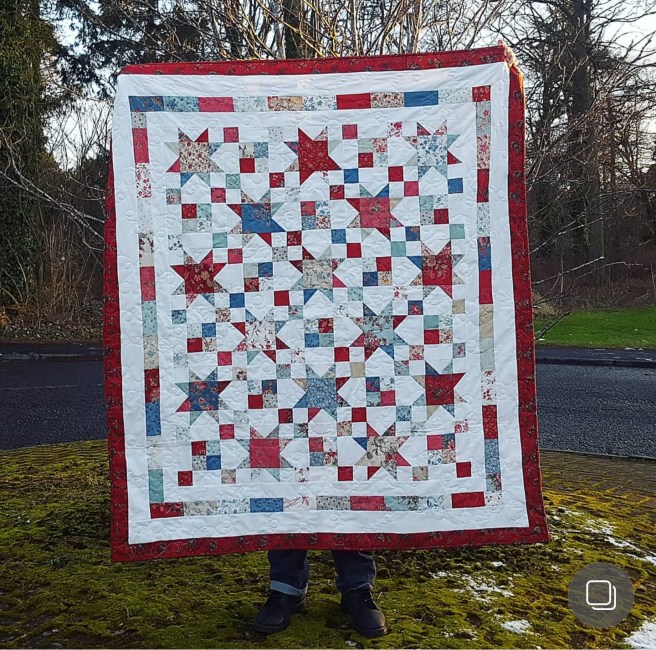
5. Finally, cut and join 2.5″ strips from your printed yardage fabric and add as the final outer border. I used the same fabric as my binding too.
…and you’re done!

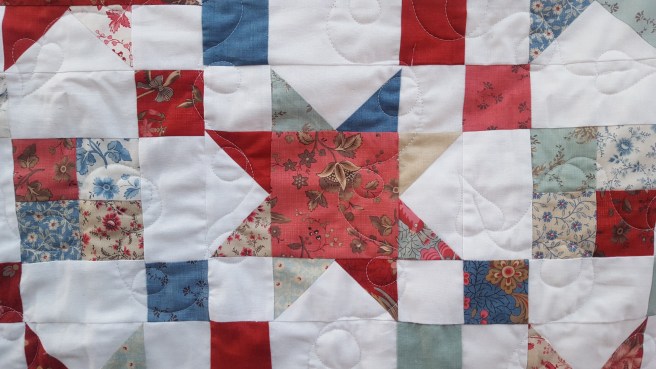
I used Quilters Dream Orient, my all-time-favourite batting and free motion quilted it with a loop and leaf design. It’s my favourite quilting, it looks classy but somehow fairly modern and leaves enough areas unquilted to keep the quilt snuggly. Quilters Dream Orient can be quilted up to 8″ apart despite having no scrim, which is a real bonus for snuggly quilts!

Oh and I forgot to say, you can use halved leftover charm squares sewn together and bordered with 2.5″ white strips to piece the backing if you like!

Well, I’m pooped after writing all that. seriously, no wonder it takes me 6 months to get to a computer! I’ll resolve to do this a bit more often, hear that Dad? After all I’m on Instagram (as Cuckooblue) most weeks, even every few days… hmmm I think I might see a connection!
Off to admire my, I mean, my friend’s, new quilt.
If you make it, I hope you like yours too!
Until the next time,
Poppy xx

I’m with your Dad!! Lovely to read all about this and the background. I can’t imagine a lovelier home warming present.
LikeLike
Thank you so much lovely! Haha, I’d have never expected my dad to be in such creative company! I really appreciate you stopping by.
LikeLike
What a lovely and thoughtful present. Thank you for the tutorial as well – I’ll save that for later 😉
LikeLike
Thanks so much Rachel; and I’m so incredibly flattered that you might come back to the tutorial!
LikeLike
I love everything about this! The name is perfect, and what a lovely idea for an anniversary present! You always use such lovely colours, these work especially well for the French theme. The quilt is absolutely stunning! I also love love love the back – such a lovely idea to add that row of patchwork, it’s a great detail.
LikeLike
This is the most lovely comment, thank you so much for all those compliments! And, between you and me, the best thing about a pieced back is you don’t have to pattern-match the backing… Major bonus that you think it looks good! Thank you again 💜
LikeLike
hello! Nice to meet you through this lovely quilt. The combination of white fabrics with the colourfull ones is so well done and pleasing to the eyes 🙂
LikeLike
Yikes, I’m so sorry I missed your comment until now! My blog is a bit neglected since I joined Instagram 🙈 What a lovely comment, thank you so much! I really do appreciate it. ❤
LikeLiked by 1 person
No problem, what is your Instagram, we can become friends and I can put my comments there 😛 (I talk a lot)
LikeLike
Hee hee, yes please! I’m @cuckooblue on Instagram. What’s your handle? See you there!
LikeLike