3 months. That’s how long it has been since I strung more than a few sentences at a time about sewing. Forgive me if I stumble, I feel like a baby giraffe starting to walk. Here’s a picture though to distract us all:

I blame and thank Instagram in equal measure for my absence; on the one hand it has inspired and renewed my creative life, on the other I can see how easily it could be the death of the blog. In a few short months of being addicted I have become part of a genuinely interactive and inspiring sewing and quilting Instagram community, one within which you make real friends. It’s so quick and so immediate in its reach and feedback. And yet, on reflection … blogs still feel important. The story behind a project, the details, the tutorials, time taken to tjink about a topic – I learn and I’m inspired so much from the blogosphere; even my small blog gets many hundreds of visits a month, even when I’ve had a hiatus. I think we sometimes need more than a quick eye candy sewing fix, addictive though that is in itself. So Cuckooblue is still here, even rising, baby-giraffe-like like a Phoenix. It is possible I may be over using metaphors in my zeal.
So this one is about Foundation paper piecing (FPP). It’s a pretty old technique, in which you sew onto marked lines on paper, rip off the paper and are left with some amazingly intricately pieced blocks, or blocks which would be difficult to piece by traditional methods. I don’t know if it is having a modern day resurgence, but it seems to be everywhere just now. This was my first attempt at FPP.
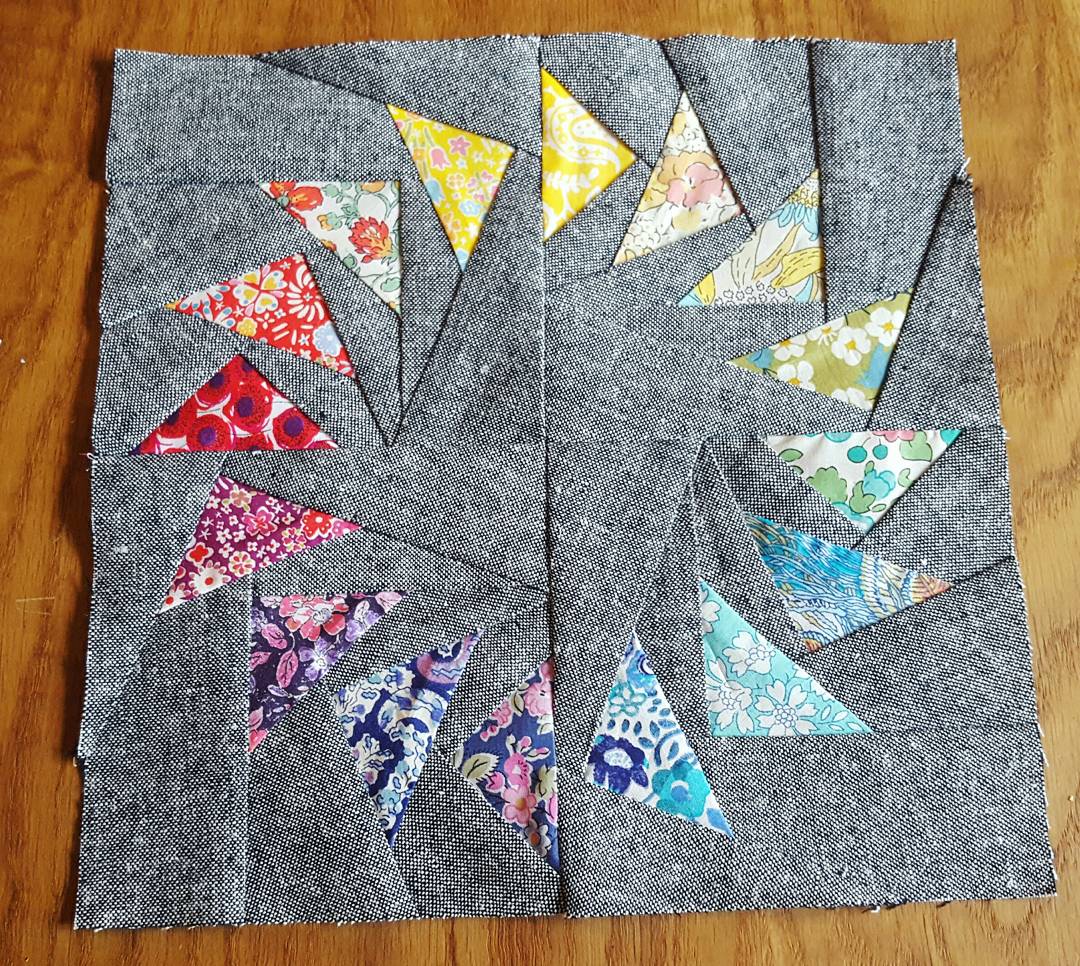
It’s a pattern called “Goosing around” which is created by the incredibly talented Jeliquilts; her immediate download PDF patterns are available for a few pounds at the link below, and I thought this was a great first pattern for me. I just printed it off onto ordinary printer paper, but you can use foundation paper too which is supposed to be easier to rip off afterwards.
http://jeliquilts.blogspot.co.uk/p/my-pattern-shop.html?m=1
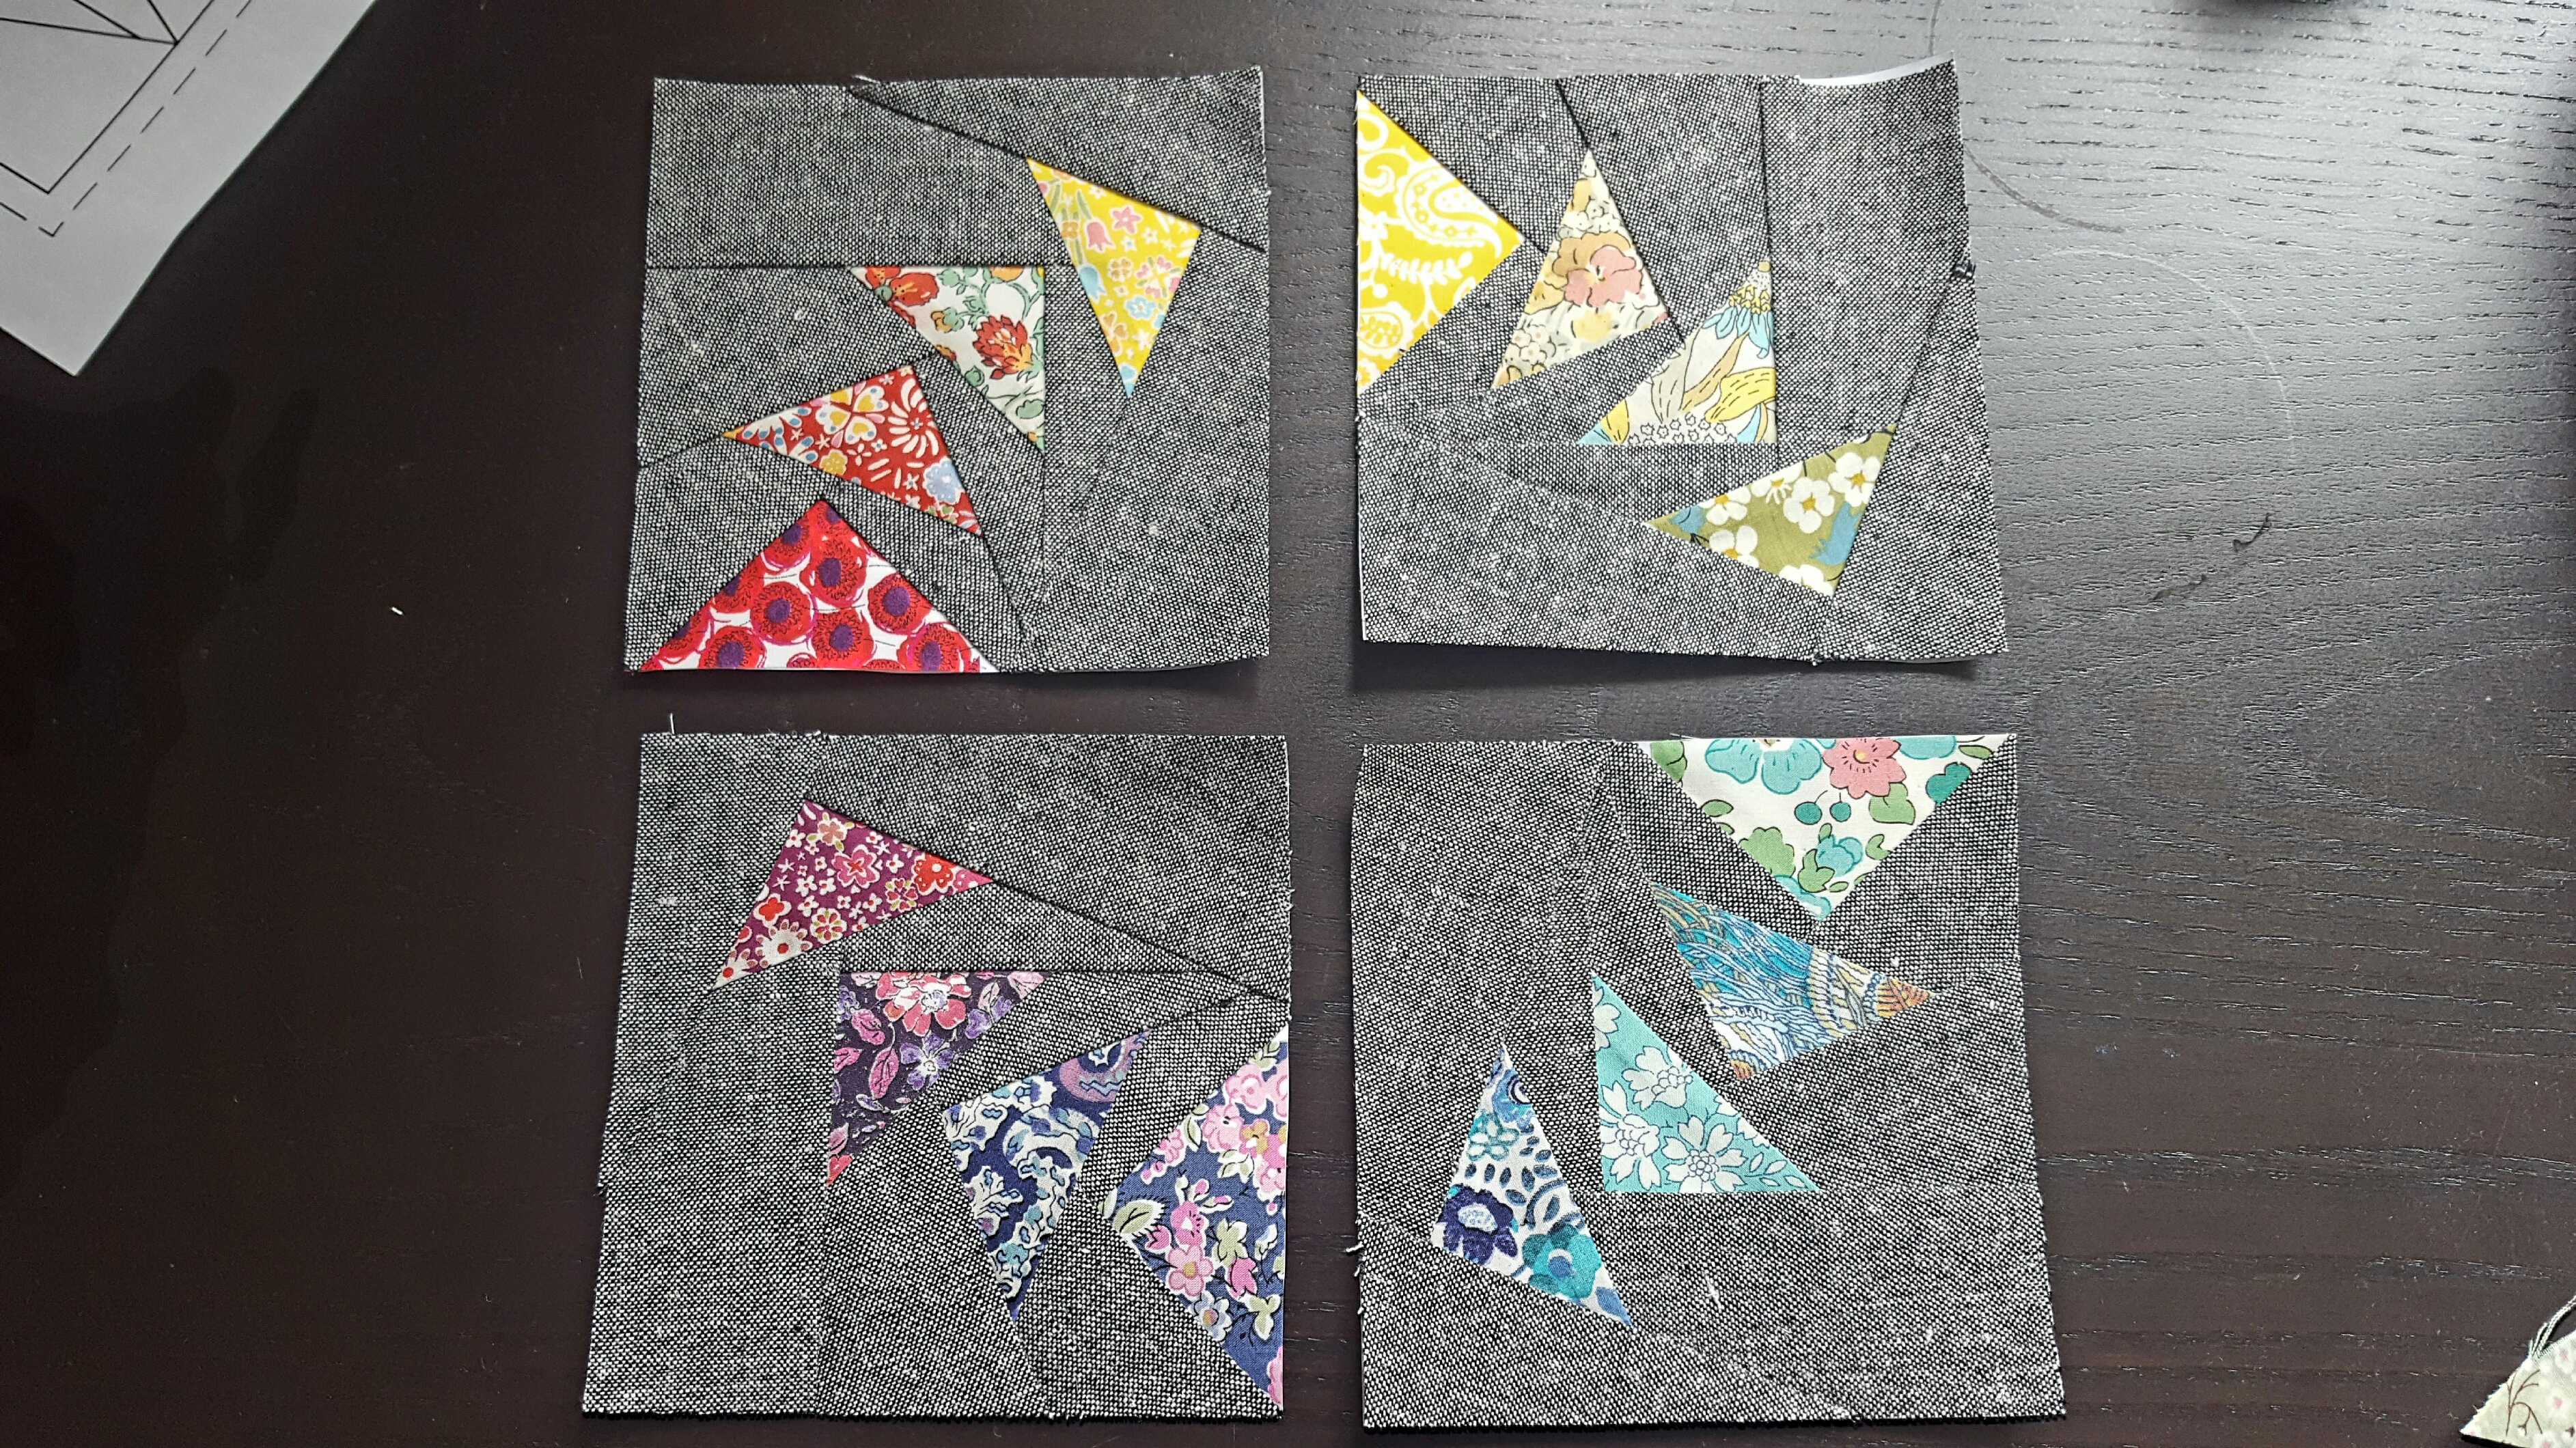
This pattern is made up of 4 blocks which you sew together to make an 8.5″ block, as directed in the pattern. The technique does take some practice and you need bigger fabric pieces than you’d think, especially at the beginning – it is such a different way of thinking about making a block. The best way is to learn from a video tutorial, I think. I used this video by Karen Johnson of Connecting Threads; the “add a quarter ruler” and postcard method which she uses I think makes it much easier.
This was my next go:
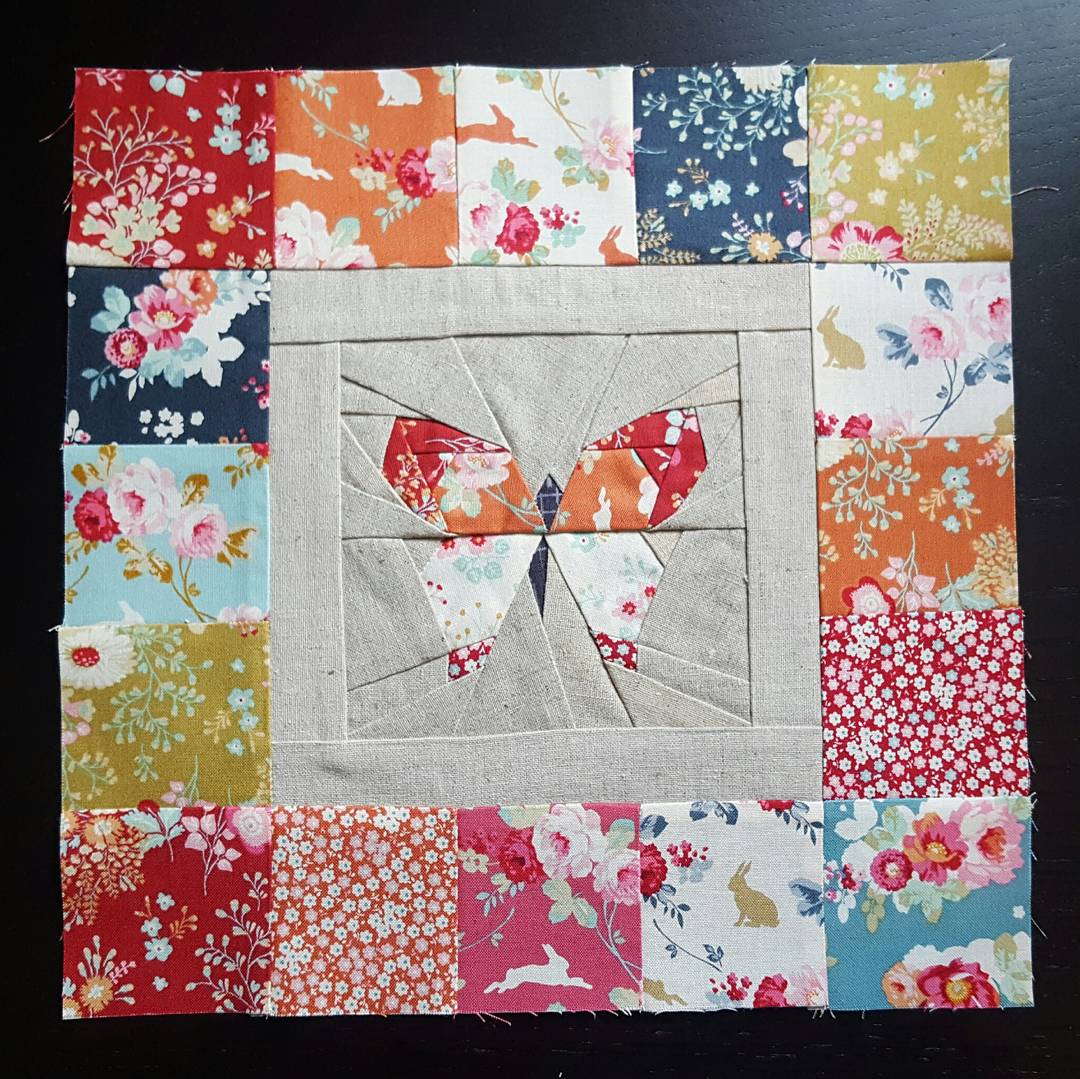
It’s for a swap; in a month’s time I will be going to the Stitch Gathering 2016 in Edinburgh – a day of stitching classes (I will be doing my first ever sewing class – a little scary but also quite exciting!). There are secret swaps organised – we each make a potholder (trivet) to swap with our allocated person (they don’t know who is sewing for them) and a nametag for a different person – perfect opportunity to practice some FPP I thought! I was going to quilt the “goosing around” block for my potholder swap, but I shamelessly stalked my partner’s pictures on Instagram and decided she would prefer the butterfly.
The butterfly is an FPP pattern by Nicole aka Lillyella of Lillyella.com, 3 different butterfly patterns are available as a free PDF download here:
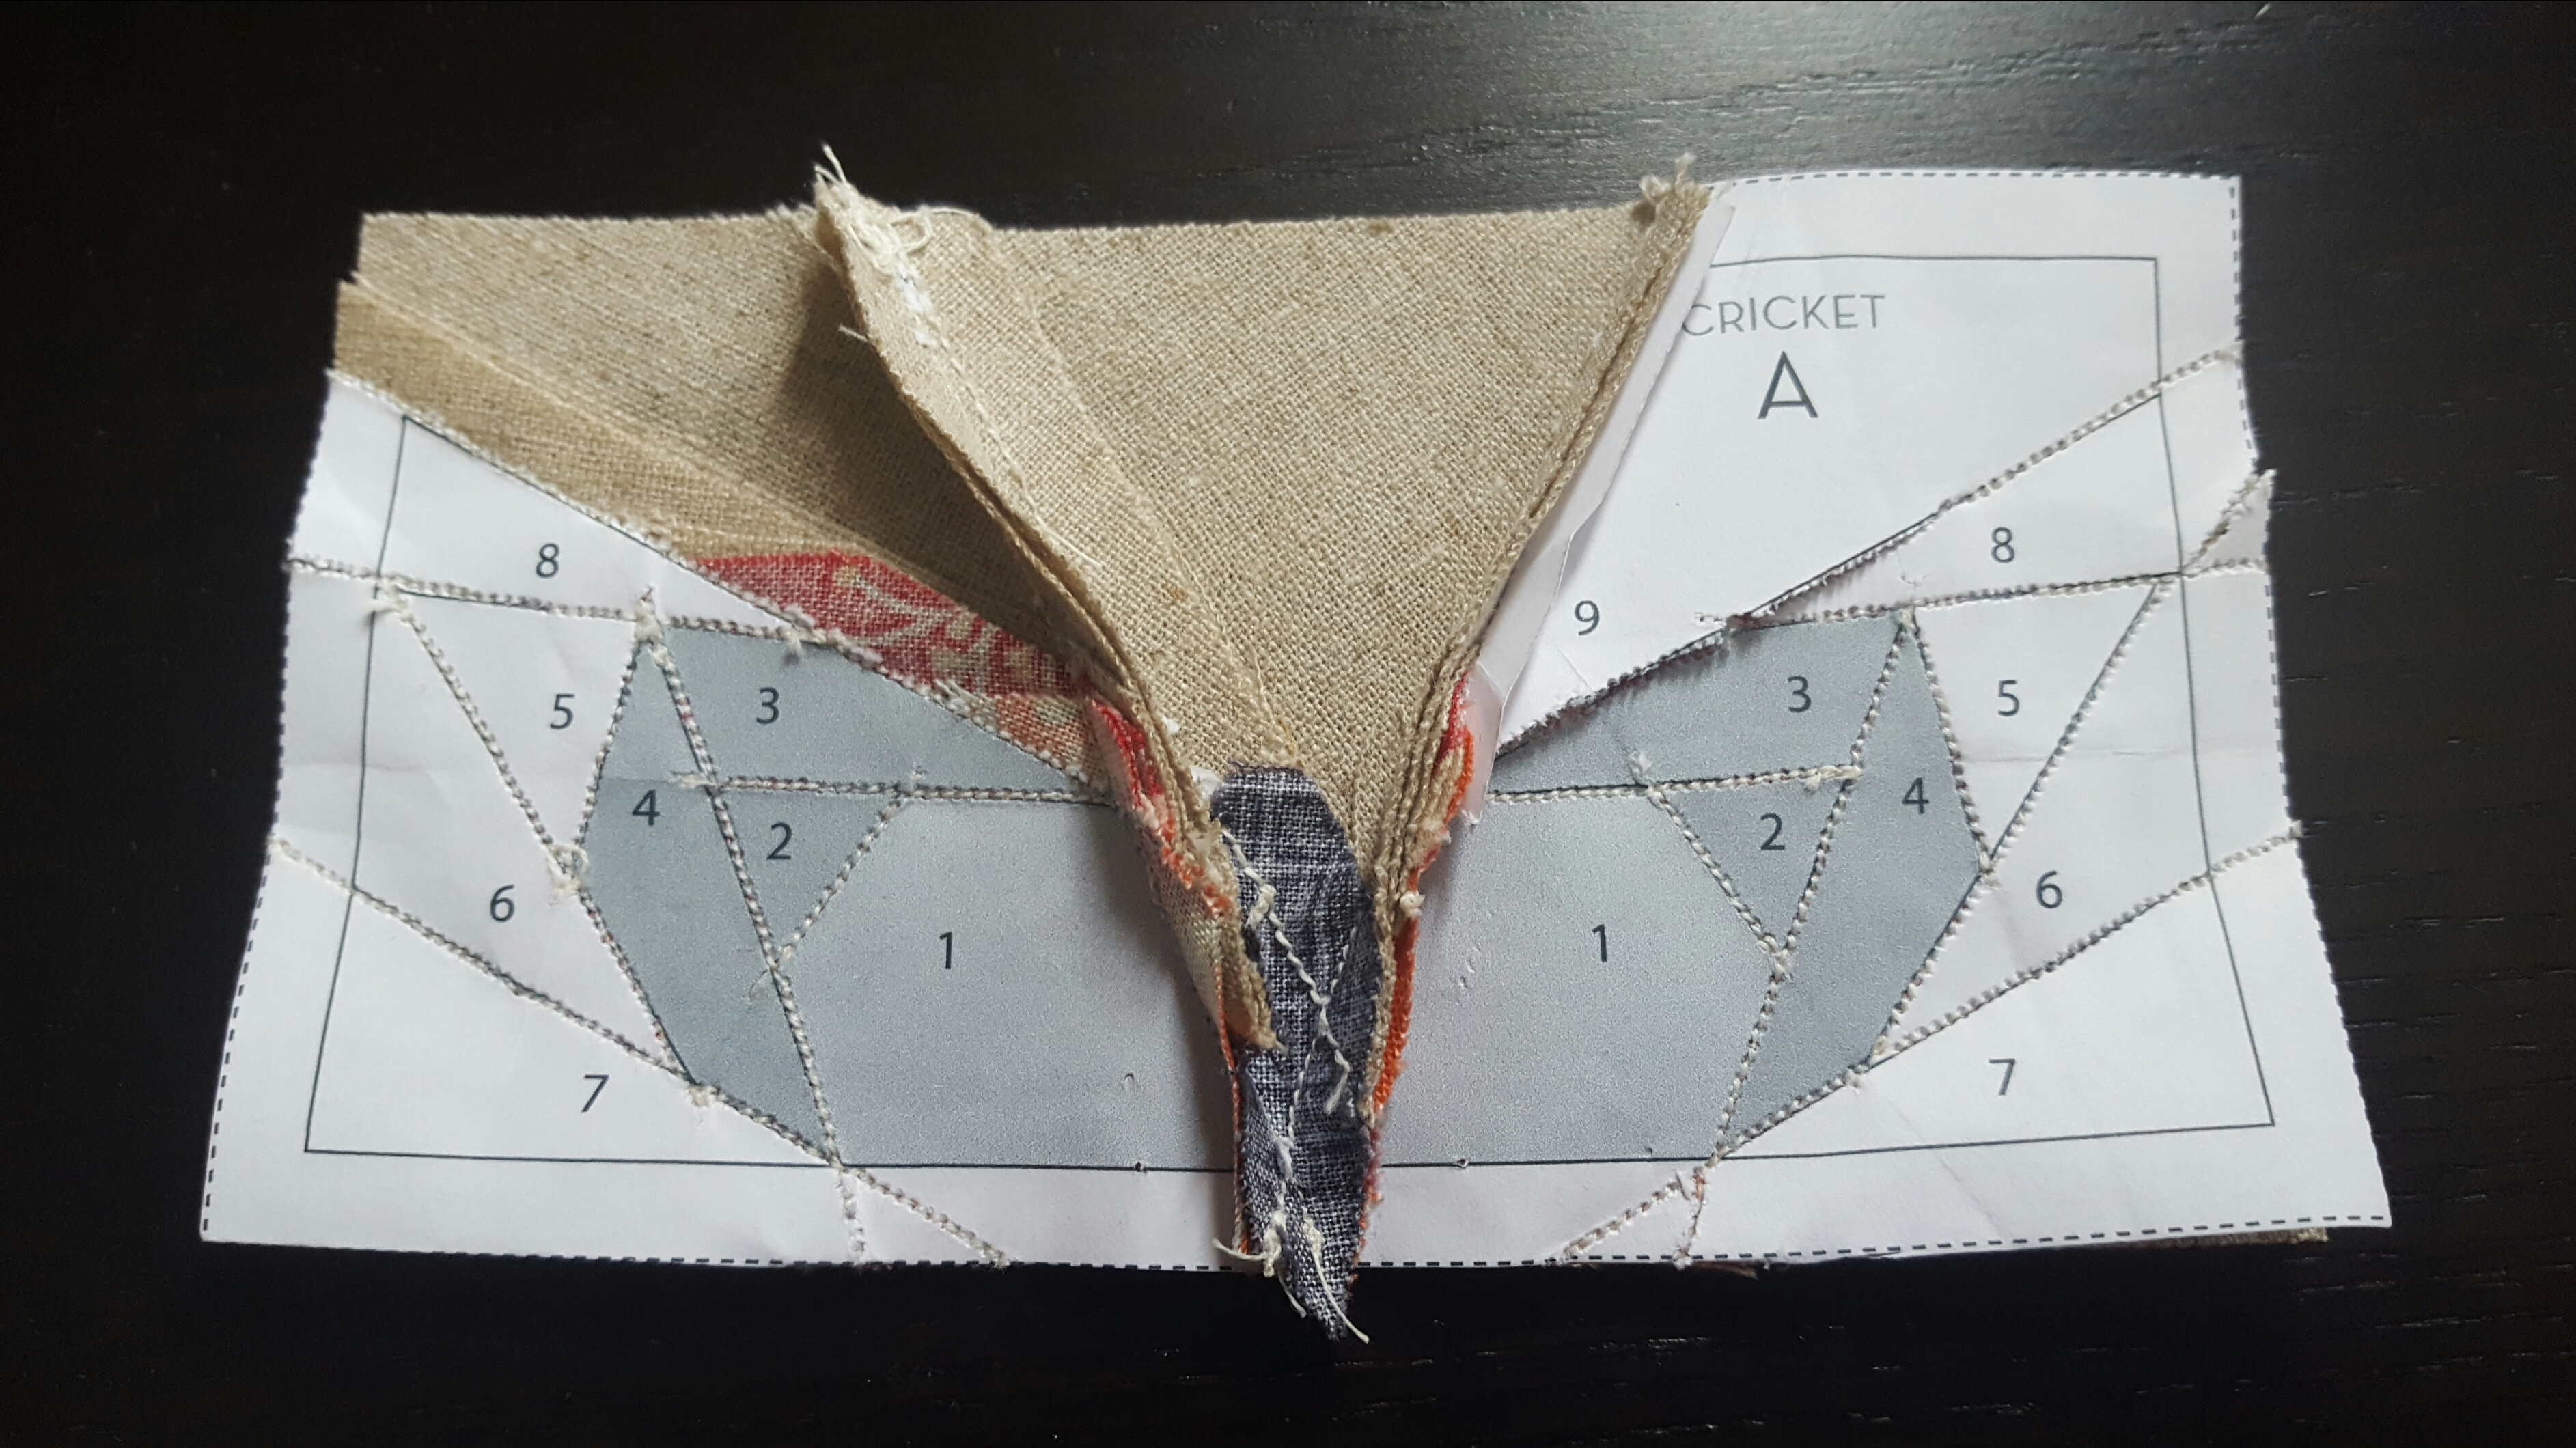
This is mine in progress. See how you sew along the pattern lines and then remove the papers? I am still a real novice at this; But going carefully and slowly really does do the trick. I *might* have had to re-do some messed up sections in this one though…I would say have plenty of fabric and time and be prepared to re-do some when you are first starting out with FPP!
I used the new collections out by Tilda Fabrics, Memory Lane and Cabbage Rose. I cannot tell you how much I ADORE these collections! Prettiest Tilda fabrics ever, which is saying something. Prettiest fabrics ever, possibly. I’m really taken with them. I used insulated batting and a mixture of machine straight lines and hand quilting with perle cotton #8.

And the final bit of FPP I’m going to show you is the nametag I said I had to make for the stitching day. This pattern is by Megsmonkeybeans, here: http://megsmonkeybeans.blogspot.co.uk/2012/09/a-pattern-for-you.html?m=1 who designed it for a nametag. It is so tiny – and you have to add outer seam allowances to the pattern yourself, so not a beginner’s pattern. Very cute though! This is the sewing machine I made for my partner, with the name scribbled, I mean expertly blanked, out:
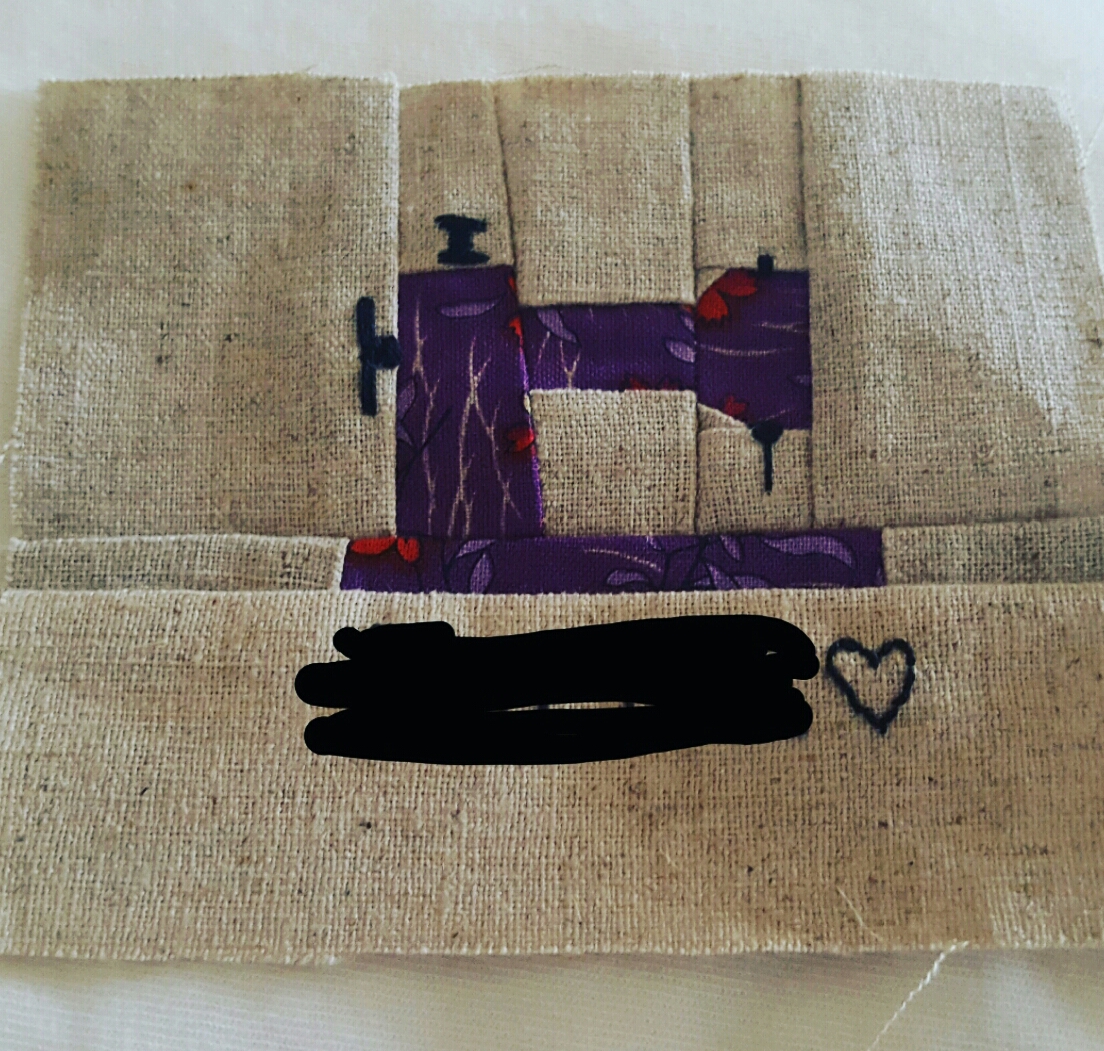
I embroidered the details of the machine and the name using black perle #12 cotton – I couldn’t really believe it came out so cute! I was dubious when I saw the pattern. Oh me of little faith. This is it finished:
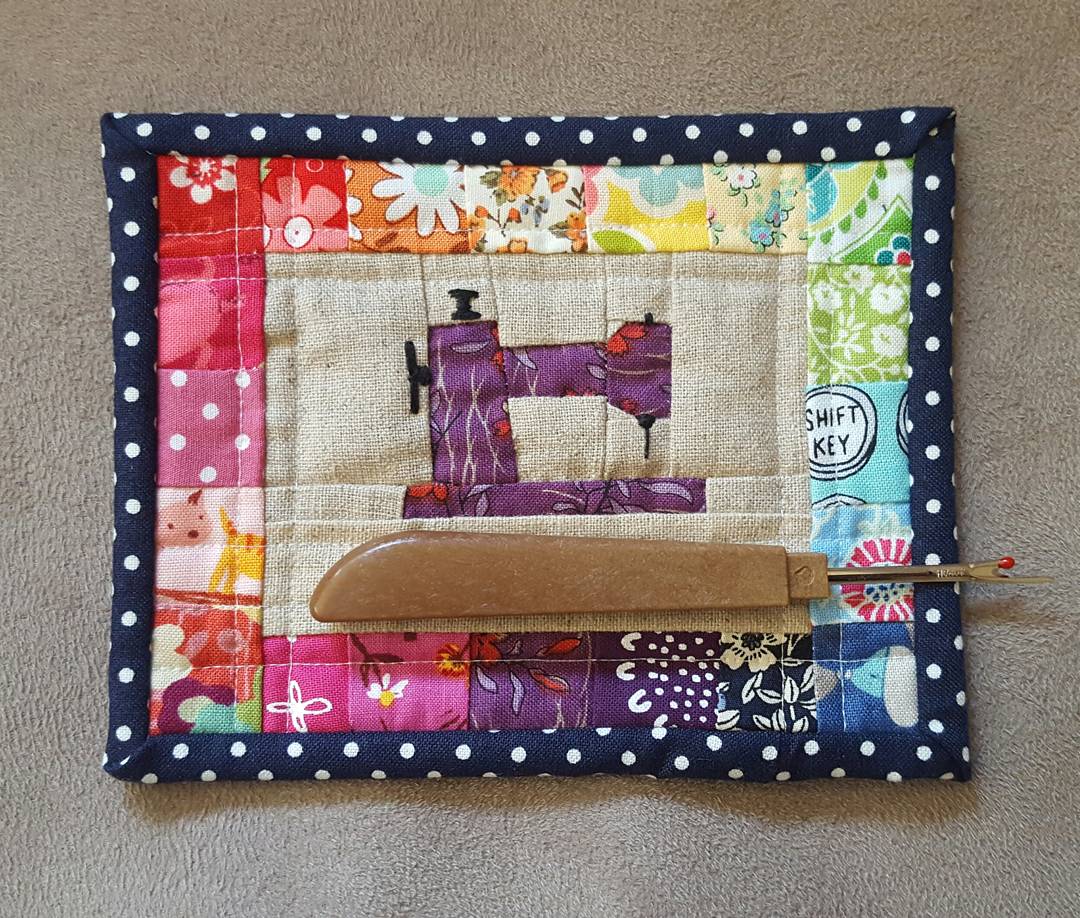
I LOVED using my tiny scraps to make a rainbow border. The scraps really are tiny, cut to 1.25″ square; only just big enough to include a kitten head, puppy kiss, turtle, typewriter key, flowers… I quilted with Superior thread’s The Bottom Line, a fine but strong polyester using white in top and pale blue in bottom bobbin (as the back is those blue kissing dogs). Impressed with the unobtrusive quilting line it makes – I would recommend the thread if you’re happy to use polyester!
I hope you get inspired to maybe try a little FPP yourself if you haven’t already, whilst I can’t currently see myself doing a whole quilt with this technique (some people do!), it is really fun. Those butterfly blocks are charm square size too – I can see all kinds of possibilities with this technique!
Until the next time,
Poppy xx

Love both of these! Can’t wait until next year where I get to go on my next sewing retreat.
LikeLike
Thank you so much! It’s good to know how much you like retreats. I’m excited although I guess slightly nervous. Enjoy yours next year, it will be here before you know it!
LikeLike
Thanks for sharing the tiny sewing machine pattern! I have been looking for a cute quilt-related label pattern, I can’t wait to give it a try.
LikeLike
You’re welcome! It’s a very cute pattern – hope it worked out well for you! 🙂
LikeLike